RENEE FORD METALS
  • home
  • shop
  • about
  • custom design
  • contact
  • set-it! instructions
  • hold-it! instructions
  • teaching
  • The Hammer and Anvil
  • the journal

the journal
occasional musings of my obsession with metal

​

NEW! Gravée collection

Sometimes I paint...

10/13/2013

7 Comments

 
Picture


Yes it's true.  I like to paint too.  During one of my "Mommy needs quiet time" moments, I decided on a pet portrait of one of the most adorable dogs, Taco. (Instagram: frenchtac0 follow him.  You won't be sorry.) He's a French Bulldog and so friggin' cute.  It was nice to let my mind wander from jewelry...

Week 6

But back to the jewelry...We pretty much worked on stone setting all week.  It was a bit of a "meh" kinda feeling for me after the "Big Project" ring last week.  I wanted another.  Instead we set.  And set.  And set.  Much of it was fancy shapes: princess cuts, marquise cuts. The exercise of setting the stones was very informative and I learned a ton about effectively avoiding breaking the fine tips of pointed stones.  The "pocket" or "parking garage" are key in making a space for the tips.  I've set a few princess cuts and pear shapes over the years but really got a clear picture of how it is actual done. 
Picture
Making a parking garage for the point of a princess cut.

Picture
Crabby McCrabby.


Marquise cuts were on the menu, much to my dismay. Marquise cut (aka: Football or eyeball) aren't really my favorite cut.  Actually I kinda think they are fugly.  Yup. Fugly.  The v-tip prongs with the four standard prong setting pretty much looked like a crab.  It made me a little crabby to be setting the marquise all day long. *Snort* Even with the lack of enthusiasm on my part, I finished them up and learned some very practical details.


The middle of the week a little milgraining practice was thrown in.  I love milgrain.  I want to milgrain everything.   It's kinda like "bedazzling" but on a micro scale.  It makes it all sparkly!! 

More setting: a semi bezel, teeny bezels, marquise bezel and oval basket head settings (to prep us for setting our "Big Project" ring.)  
Picture
Milgraining. It is in the details.

Picture
Bug eyed from setting.


With all of this stone setting going on, I began to get a little bug eyed from all of the micro vision.  Lots of breaks and giggles from my bench neighbor, Nick, were helpful in keeping me entertained.  


Picture
Nick, the funniest awesome-ist bench neighbor a girl could ever want.

Picture
Week 6 projects.


The week rounded out with another bench test.  We half shanked a ring, set and polished a ring and made a chain repair.  We had about 1 1/2 hrs to complete.  I think it went well for everyone and the tension was much less than our last test, er, timed exercise.

Picture
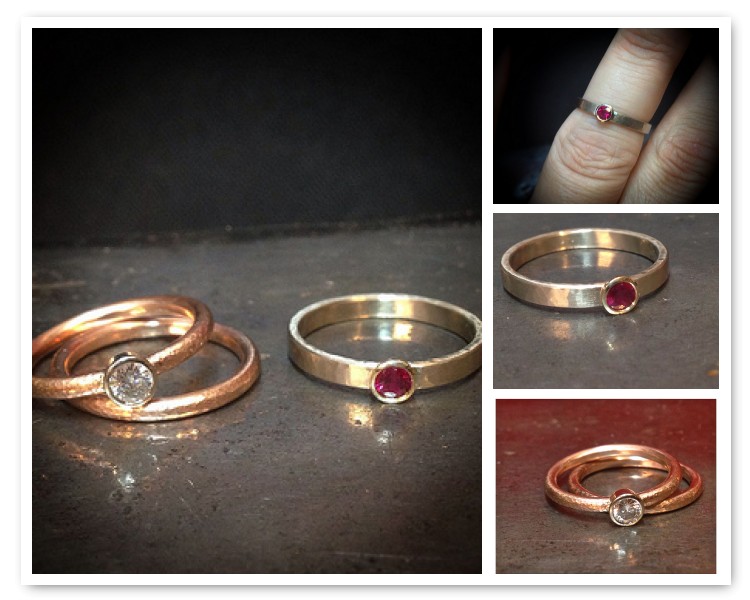
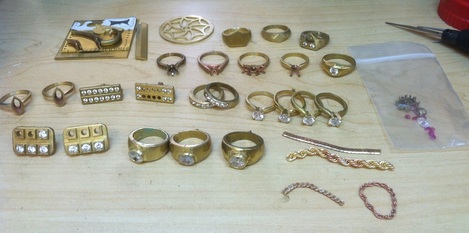
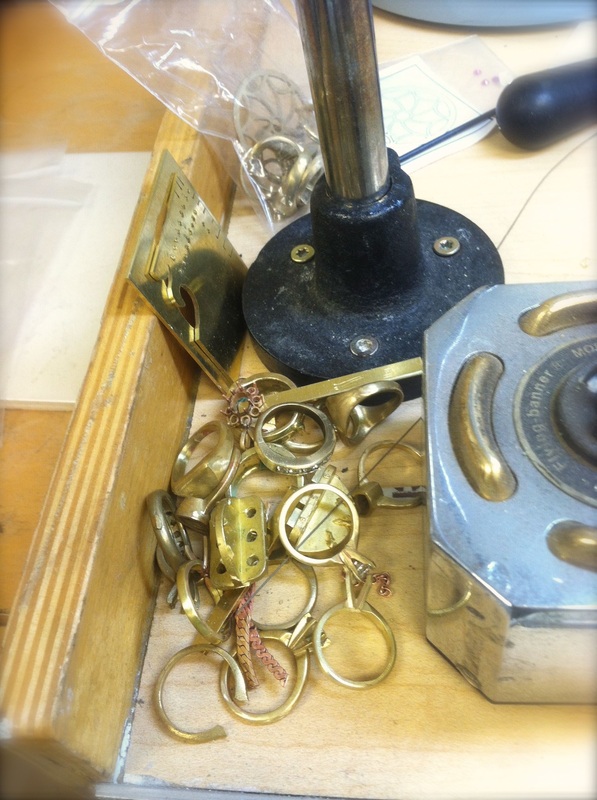
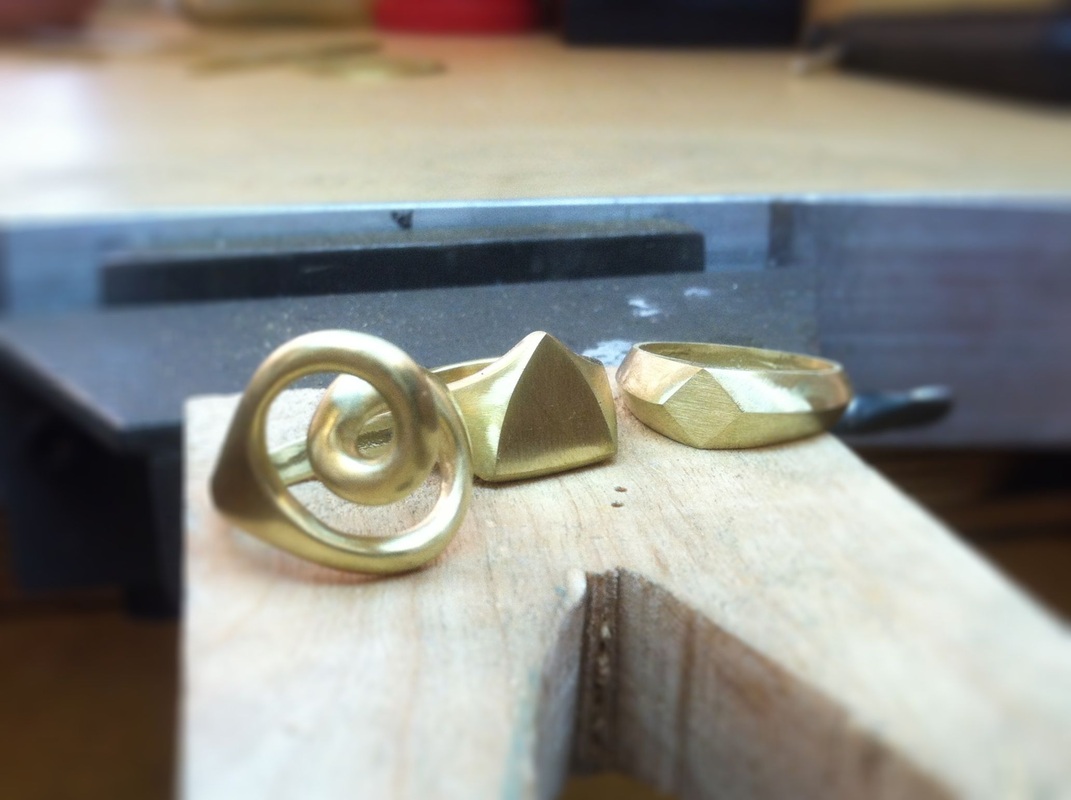
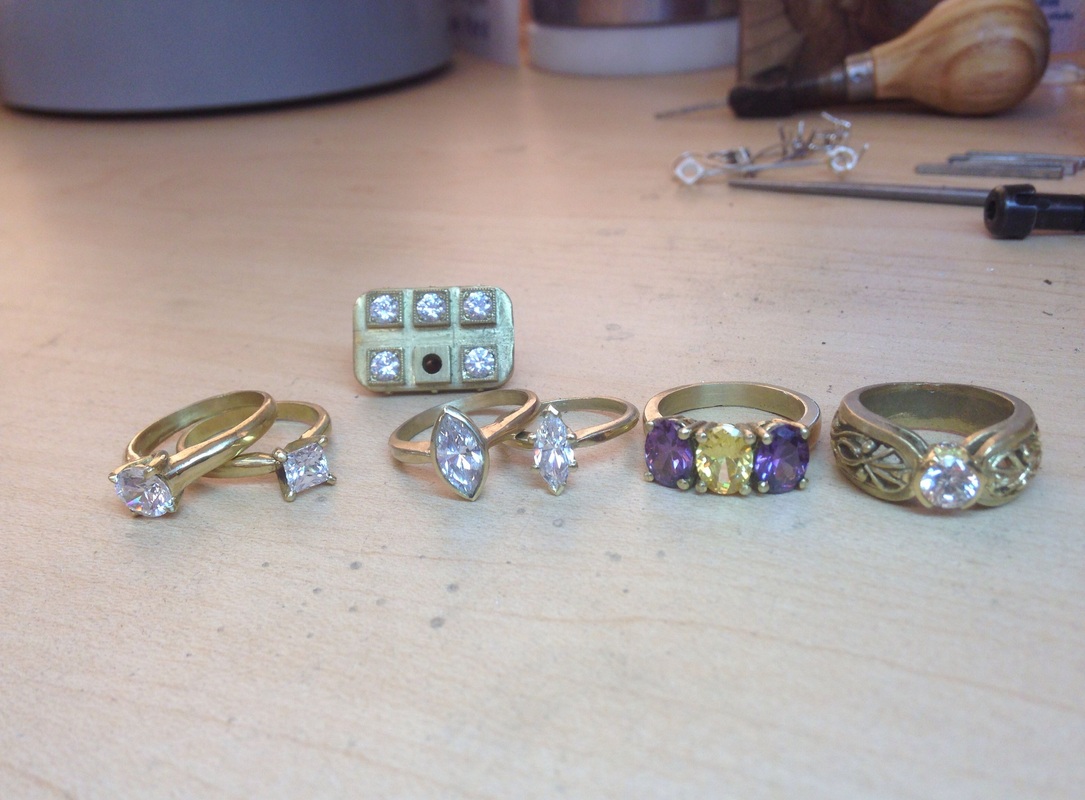
Week 6 projects (minus our bench test pieces.)


After spending all day, every day at the bench during the week, I find it difficult to sit at the bench much on the weekends.  With the holidays around the corner, I have got to get some new product in my Etsy shop.  A moissanite rose gold wedding set and a two tone gold ruby ring were finished and are soon to be listed for sale!  All that stone setting came in handy!  These were a breeze and much cleaner than BB (Before Blaine.)
Picture
New work!! Soon to be listed at http://panicmama.etsy.com
7 Comments

The "Big Project" Ring

10/7/2013

32 Comments

 
Picture
Upper gallery beginnings.
Week 5

5.5 days.  49.5 hours.  2970 minutes.  178,200 seconds.  All spent on this ring.  Well, ok, maybe I went pee once or twice and maybe I ate a Chick-fil-a sandwich and had cupcakes (yes, plural, don't judge me) to celebrate Christina's B-day.  But realize, this is pretty much all we did this week. 

We began last Friday with the shaping of the plates for the three stone oval ring and the layout of the top gallery. Monday morning began the rest of the story...


The upper or top gallery was established first.  We cut out our layout pattern to stone size and left guides or arms to help us hold the piece.  The stone size is 8x6mm oval faceted stones.  I was using CZ's to establish sizes, while deciding which type of real stones I wanted to set into the finished piece.
Picture
Pretty oval upper gallery.

Picture
Brick for spacing galleries.


Little "bricks" were added to establish the spacing between the upper and lower galleries.  The bricks helped keep spacing between the galleries while we attached the wire prongs.


The top gallery was then soldered on.  Carefully we cut out the lower gallery to taper in from the upper gallery.  The lower gallery outer shapes we established and then clean up of the outer ovals to perfection.  It really was beginning to take shape. 
Picture
Soldering bondage. 50 Shades of Jewelry.


Each step was explained with care and diligence to make sure we understood the exactness and care that is needed to make this come together.  The huge 3 screens are a huge help but can also drive you nuts!  I want to be able to see everything at 150 times magnification.  Obviously, my eyes can't do that.  Even with a loupe or microscope.  Using a loupe has changed my jewelry making world, but a microscope is in my near future.  I just can't see myself wanting to create without one. 
Picture
Upper and lower galleries cut out and shaped.

Picture
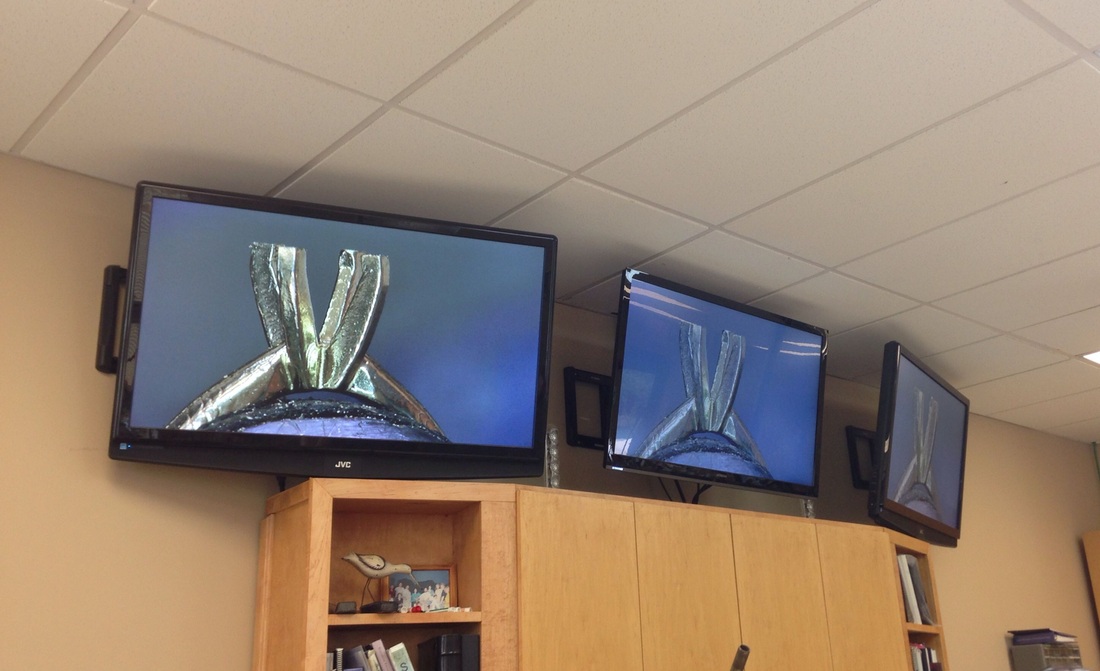
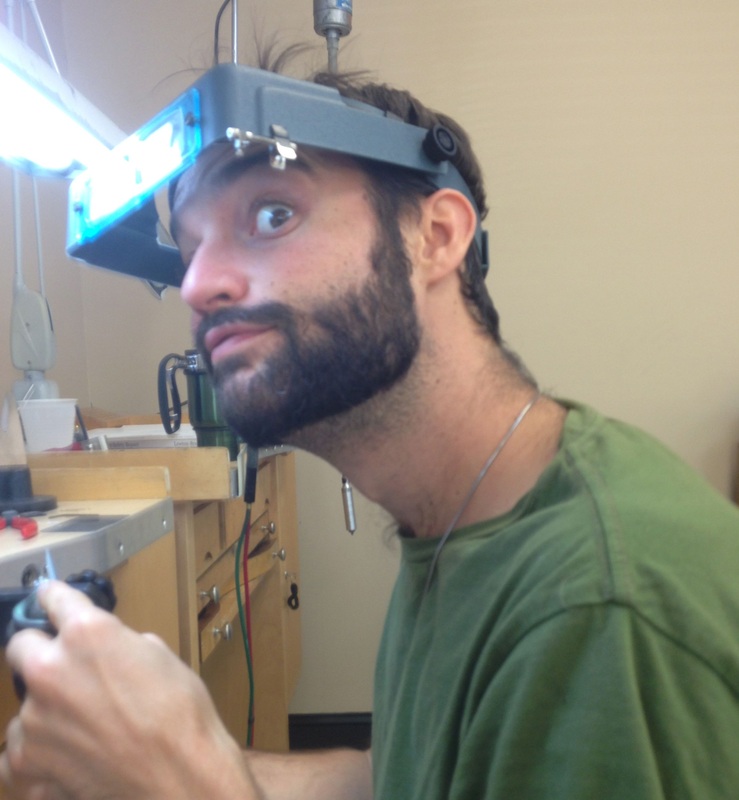
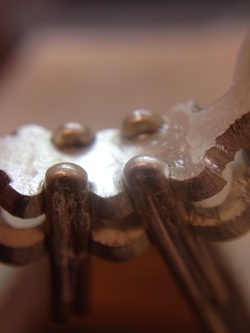
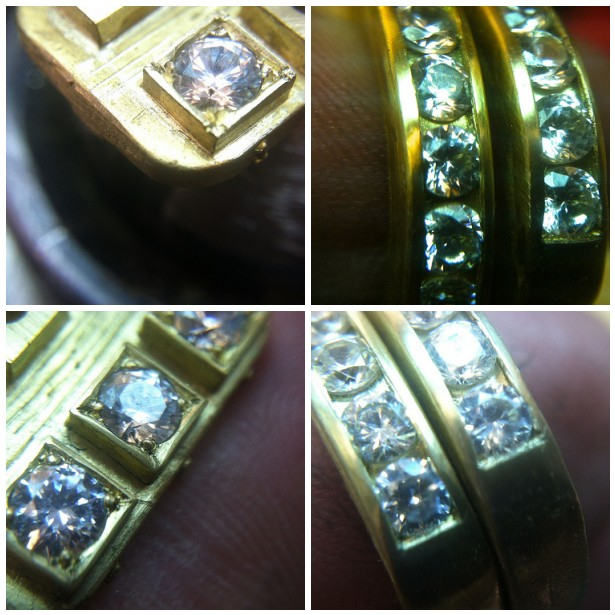
Large three screens 150 times magnification is awesome. But drives you crazy too.

Picture
Under side of prongs being attached to lower galleries.


Next came careful filing of grooves for prongs to be applied.  This part kinda bummed me out.  My perfect little ovals now were all indented with slots for prongs.   Once the prongs were attached, I was less annoyed with them, but I was a little pissed they invaded my ovals.  Little buggers.


Prongs in place, a little magic clean up and we were ready to start the shank.  Well, ok.  Maybe the prongs didn't go that smoothly.  This point really was a critical step.  One wrong move and your ring goes to shit.  Prong angles and alignment are crucial to have the ring look proper and balanced.  Gaps, off angles, wonky attachment... all can pose problems with the end product.  I resoldered one prong three times and another twice.  Frustration could be felt in the air in the classroom.  It was thick as pea soup.  And honestly, who really likes pea soup?  Bleh.
Picture
Prongs attached and in their proper place.

Picture
Tapered shank.


Day 4 on the ring we created the shank for the ring.  The shank began as an ingot that was then was pulled into square wire.  The square piece of wire was grade rolled down into a taper.  Once the shank took shape and finger size was established, it was time to cut throats in the sides and attach the pieces together!! YAY!  The "Big Project" was finally coming together.


Careful alignment and angle adjustments are required for a well executed fit of heads and shank.  We learned way back in week two how to attach a shank and three stone head together.  I had lofty ideas of adding side bezels and all kinds of other foofy additions. But in the end, I just wanted to keep it simple.  I could get fancy pants with my next one. 
Picture
Shank and head assembly.

Picture
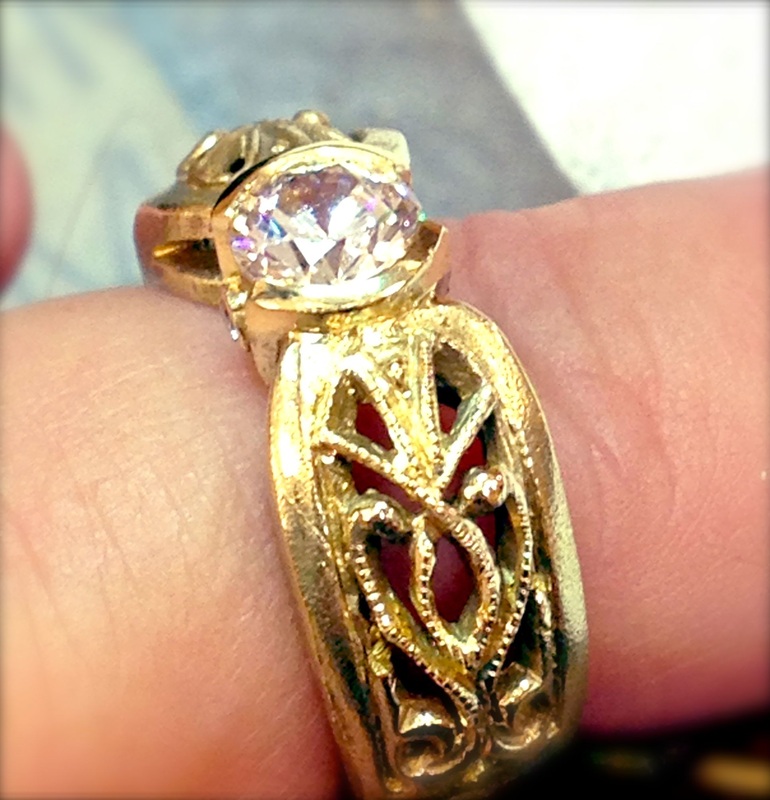
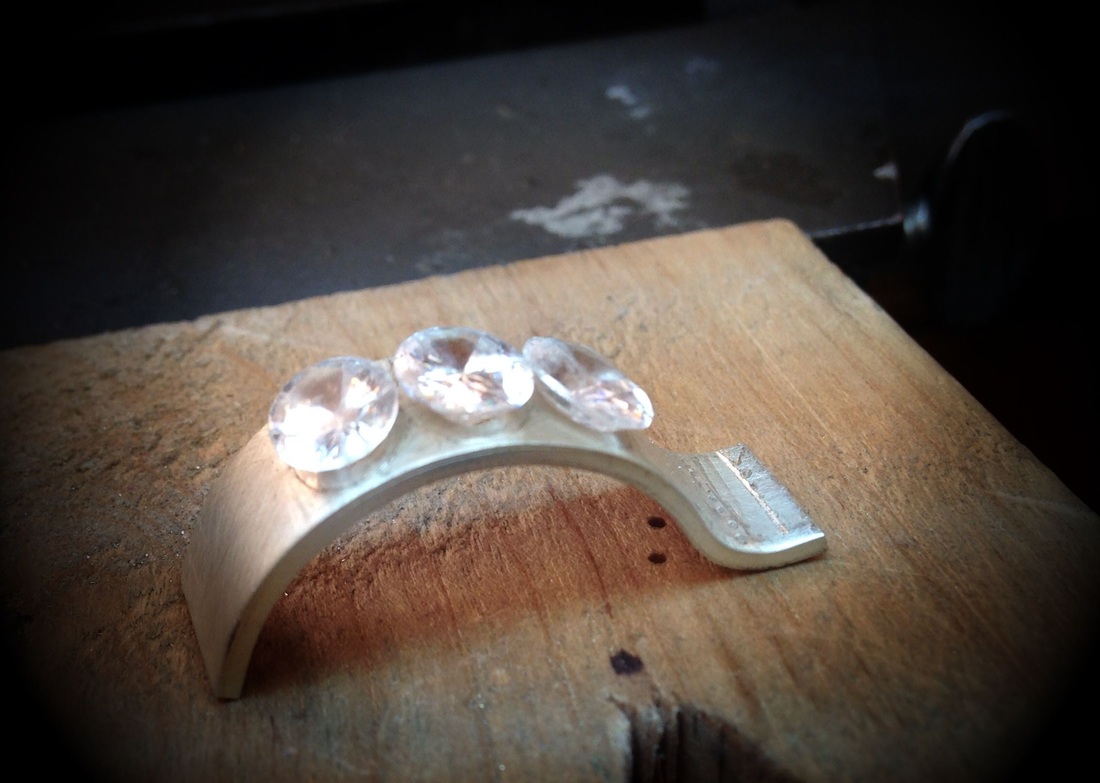
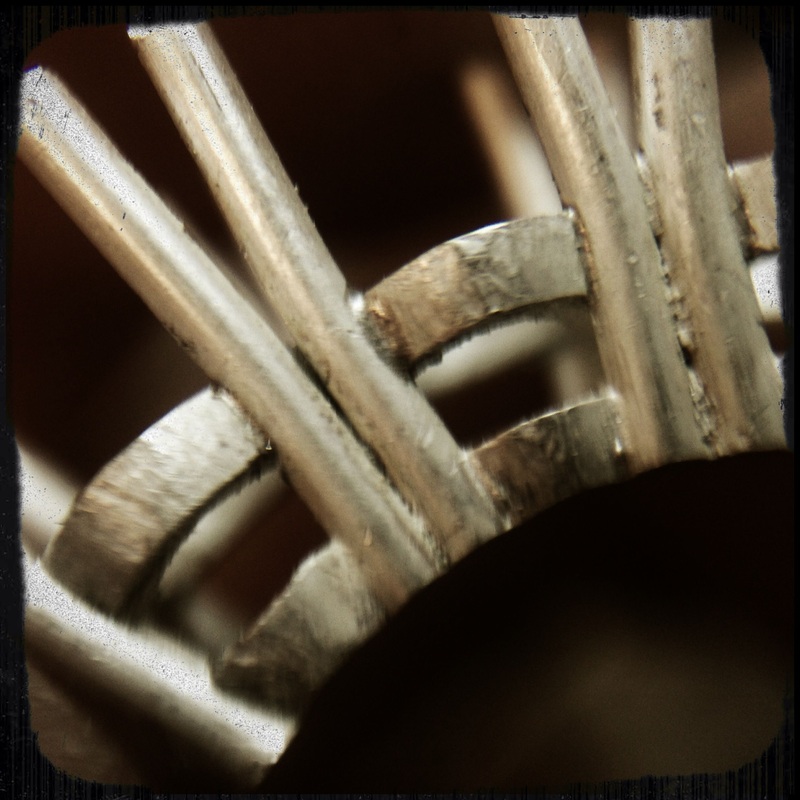
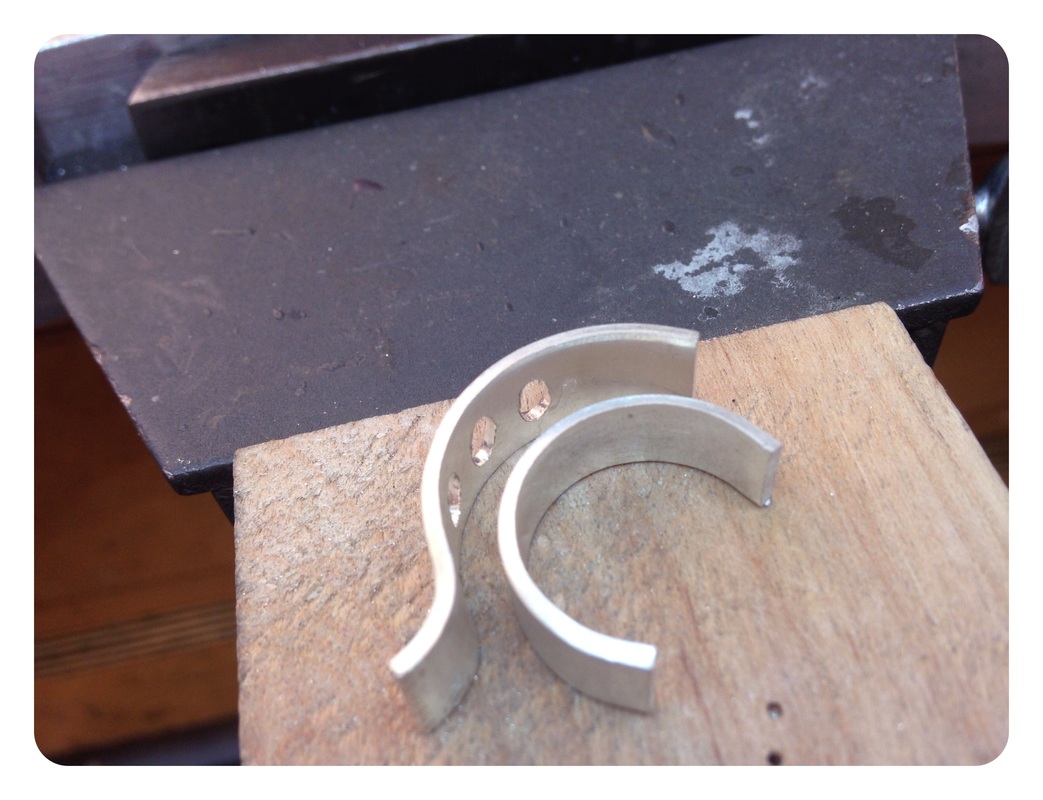
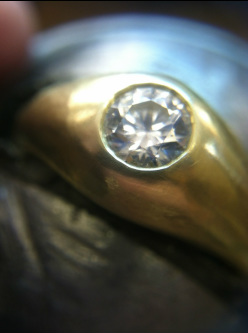
The "Big Project" Ring complete. Sorta.

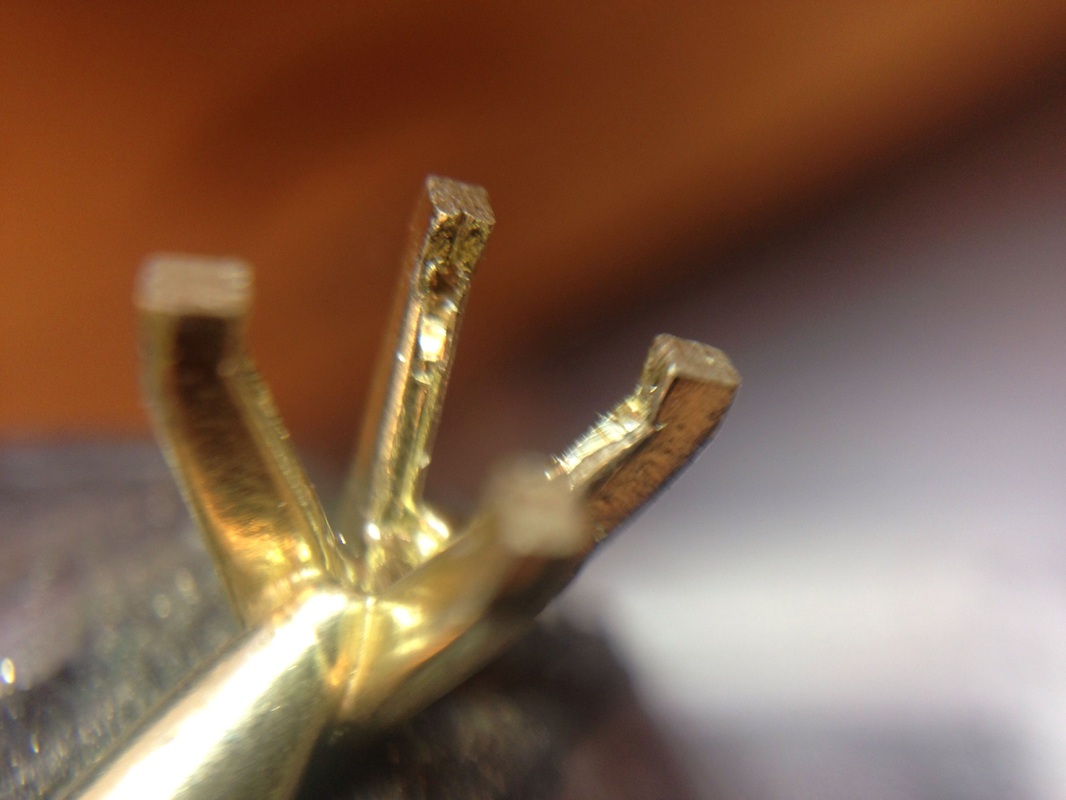
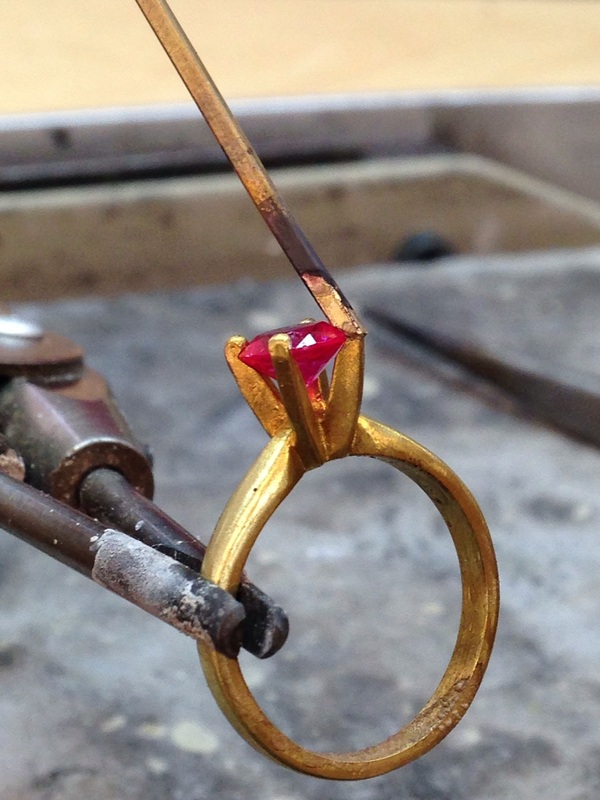
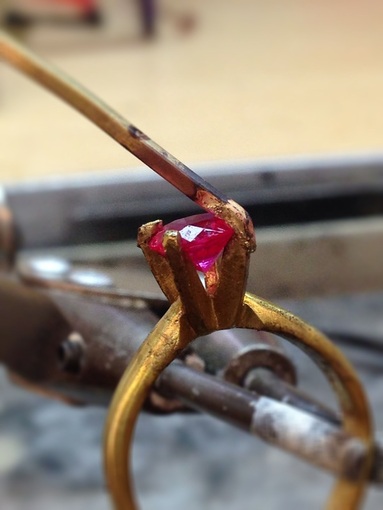
String polishing (thrumming) and final polishing to get the ring all gleaming!  Anxiously awaiting the stone setting part, we were informed that we would not be setting at this point in time.  Huh?  That is like saying you can have cake but not the frosting!!  Not. Fair. Groan.

I never really have been a fan of prong settings. I now have a new appreciation for them.  Especially hand fabricated ones.  I find myself looking for new ways to incorporate prongs into my own designs.  I think this could be an interesting adventure, Mr. Prong.  You and I could become friends.  Let's see where this journey takes us...

Picture
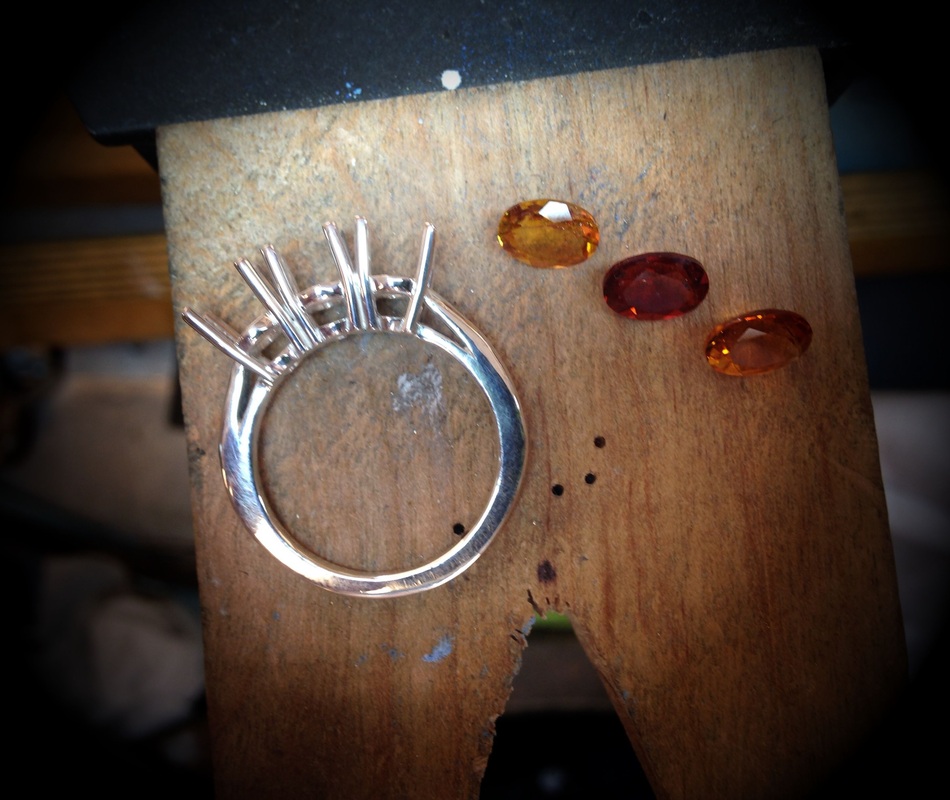
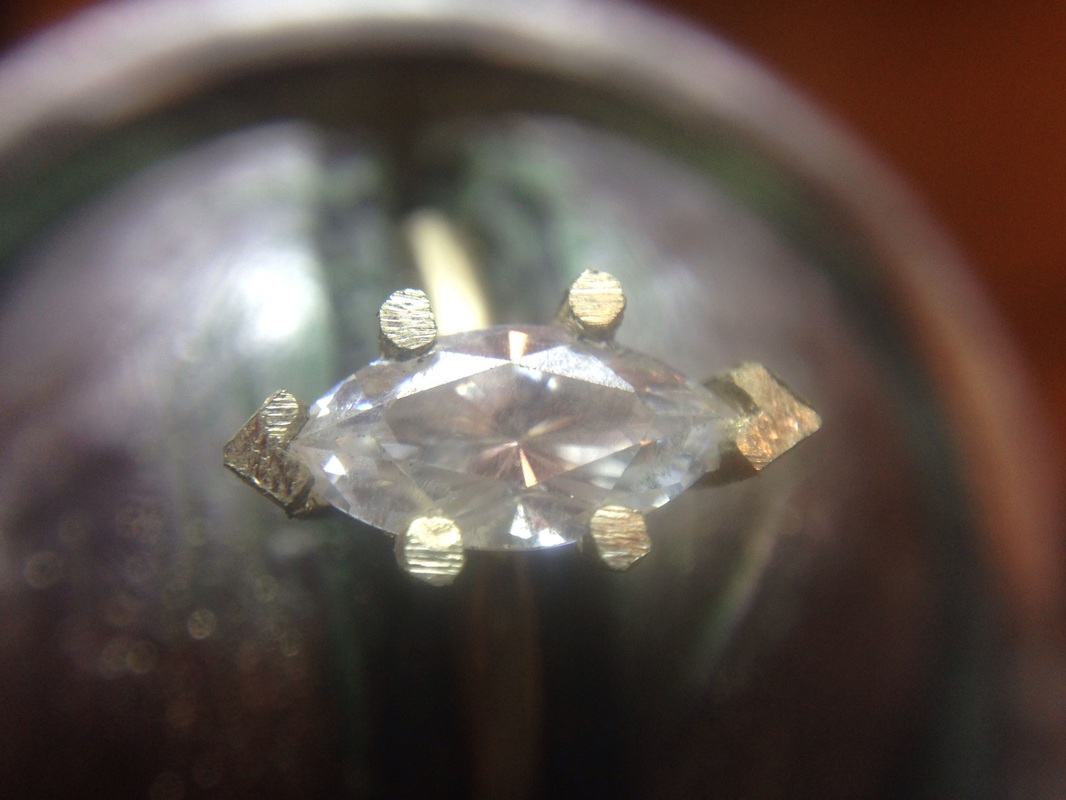
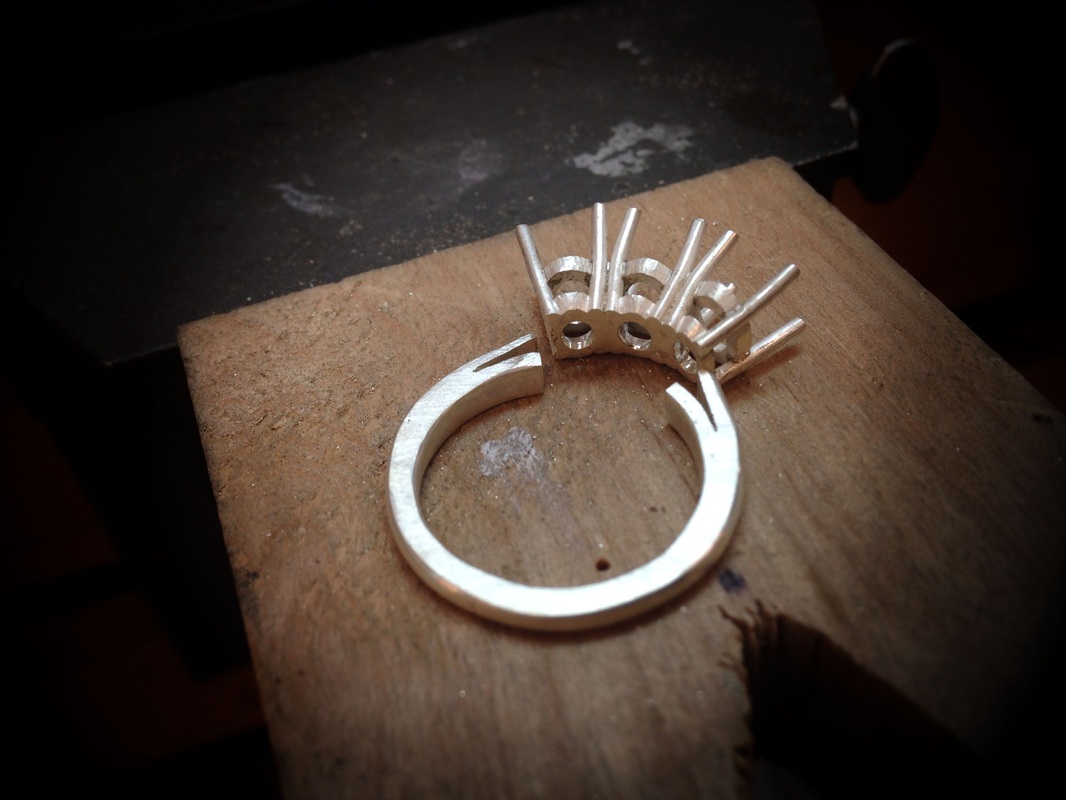
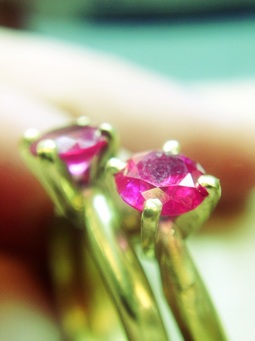
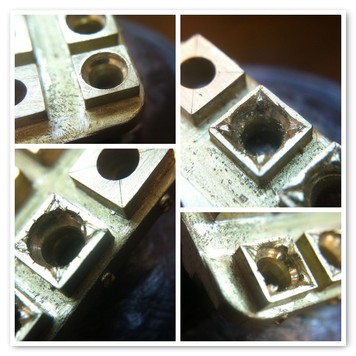
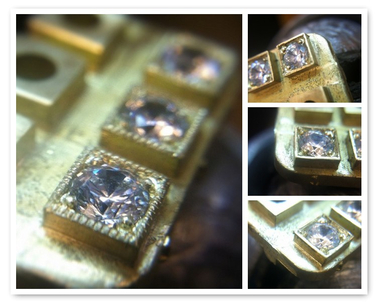
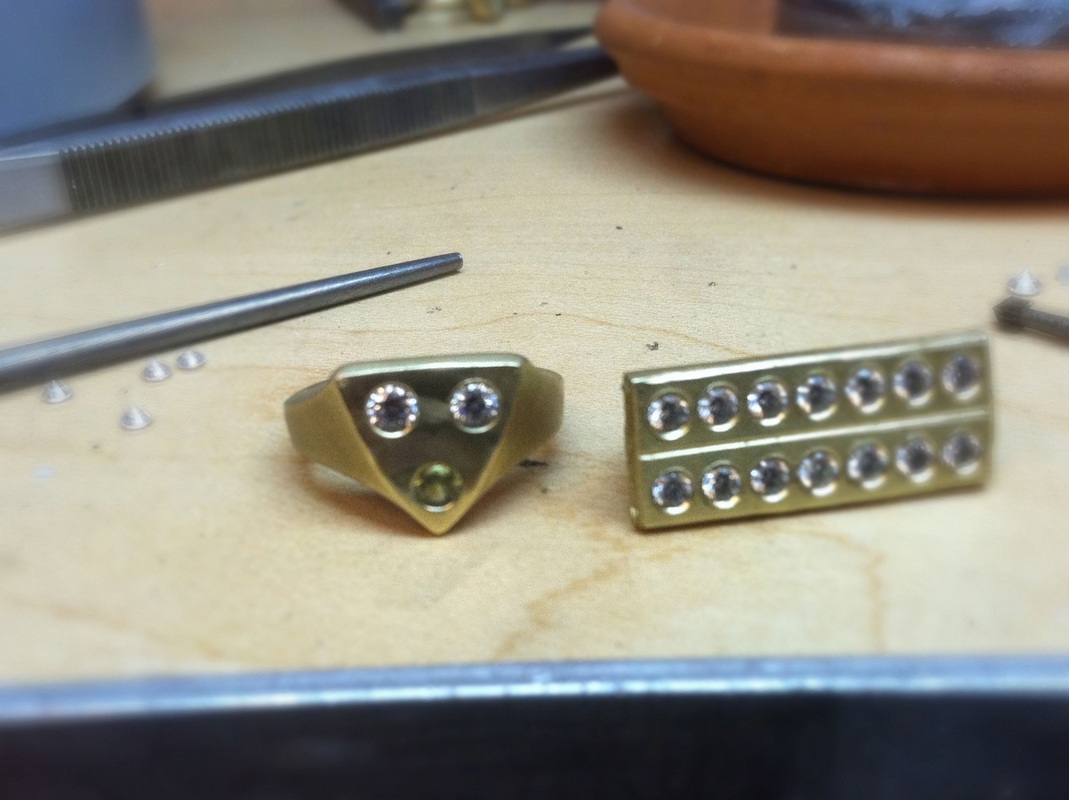
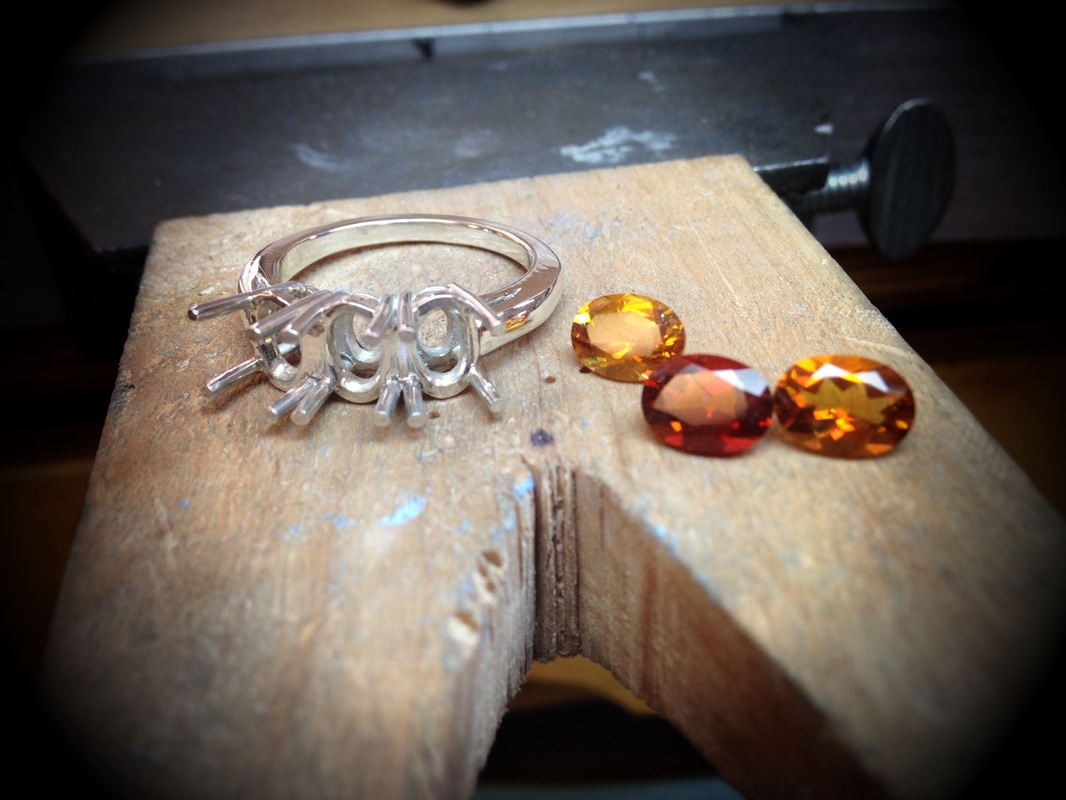
Side view of three stone oval ring with the gems that will be set. Eventually.


32 Comments

Tisket a tasket, gotta make a basket head?

10/1/2013

0 Comments

 
From scratch?  Like by hand?  Lordy.  I like little things.  Obviously, been obsessed with them since I was little.  If it was a miniature, I coveted it.  Making itty bitty, teensy weenie, little things are another matter.  I have successfully been making little things, because, hello?  I make jewelry.  But a hand made basket head?!?!  Gonna break me.

Jump rings.  No problem.  Now we have to file them with little grooves.  That are even.  That match.  And have the perfect angle to them...well ok then.  An hour later, I have what is acceptable.
Picture
Picture
A double secret method to assure prongs attach, and viola!  Basket head!  Blaine announces, "Now make one that matches."  Luckily the second one went much quicker.  A pair was born.

Picture
Picture

Three Stone Ring

This project leads us to the first "big" project of the course.  A hand built three prong oval basket style head ring.  The time estimated is 4-7 whole class days spent making it.  Woah.  That is a ton of time on one project. We start with simple strips of silver and magically we  transform them into plates for the three stone galleries.  Holes are drilled, top gallery has started to take shape.  Day one on the "big" project complete!  Next week is gonna be a doozie!  Open studio time on Saturday!! WooHoo!  Working on a pair of earrings made out of that pair of basket heads with a matching pendant.  Take a peek below at their beginnings!
Picture

Picture
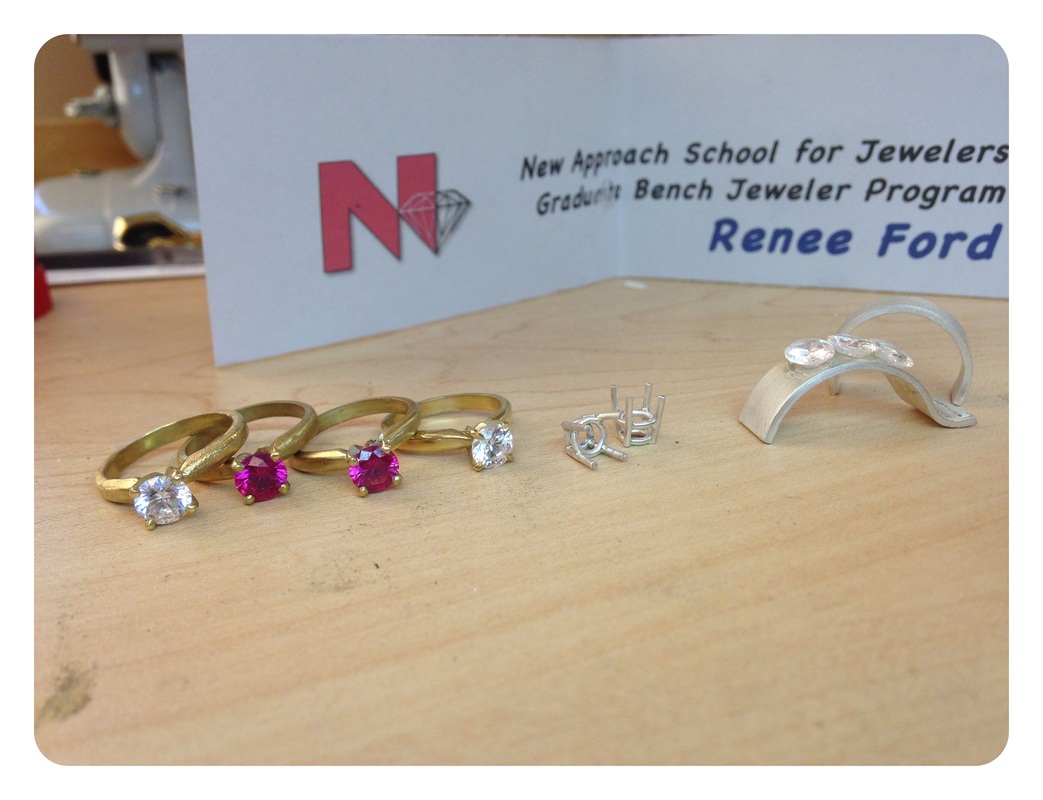
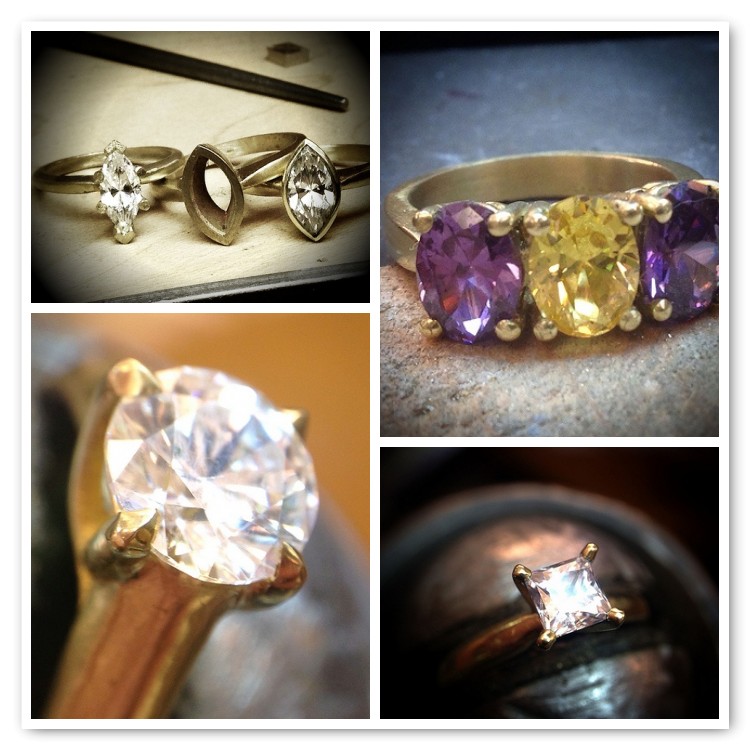
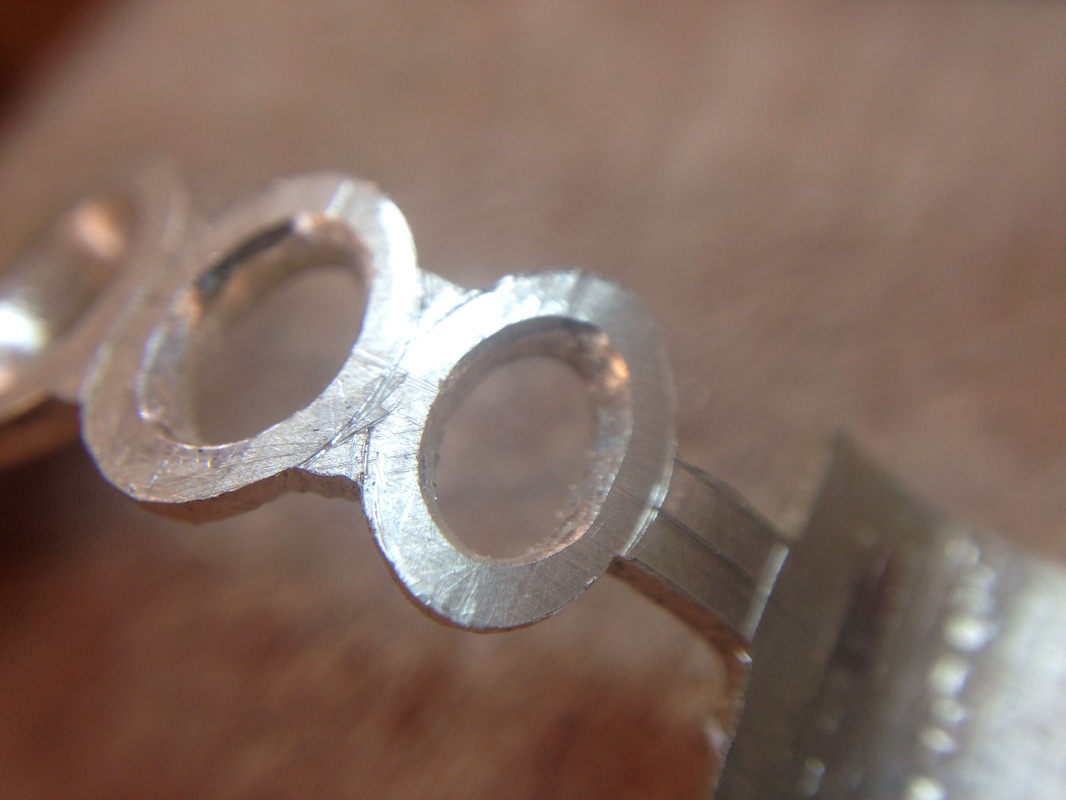
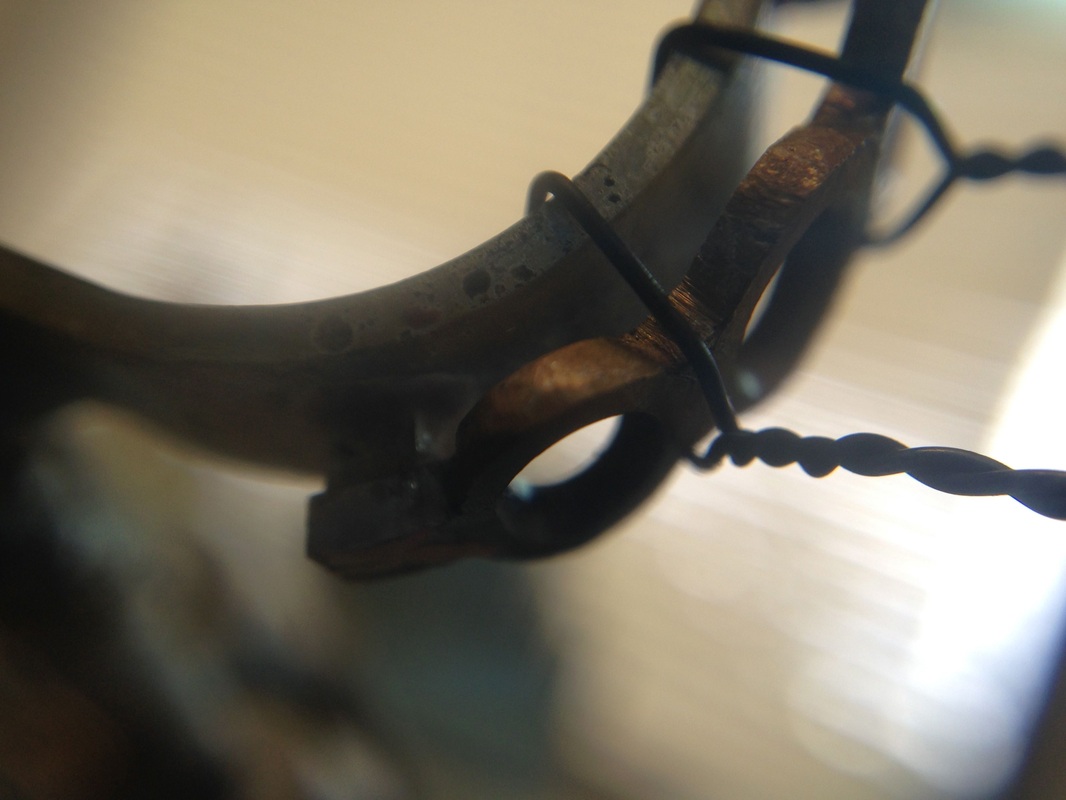
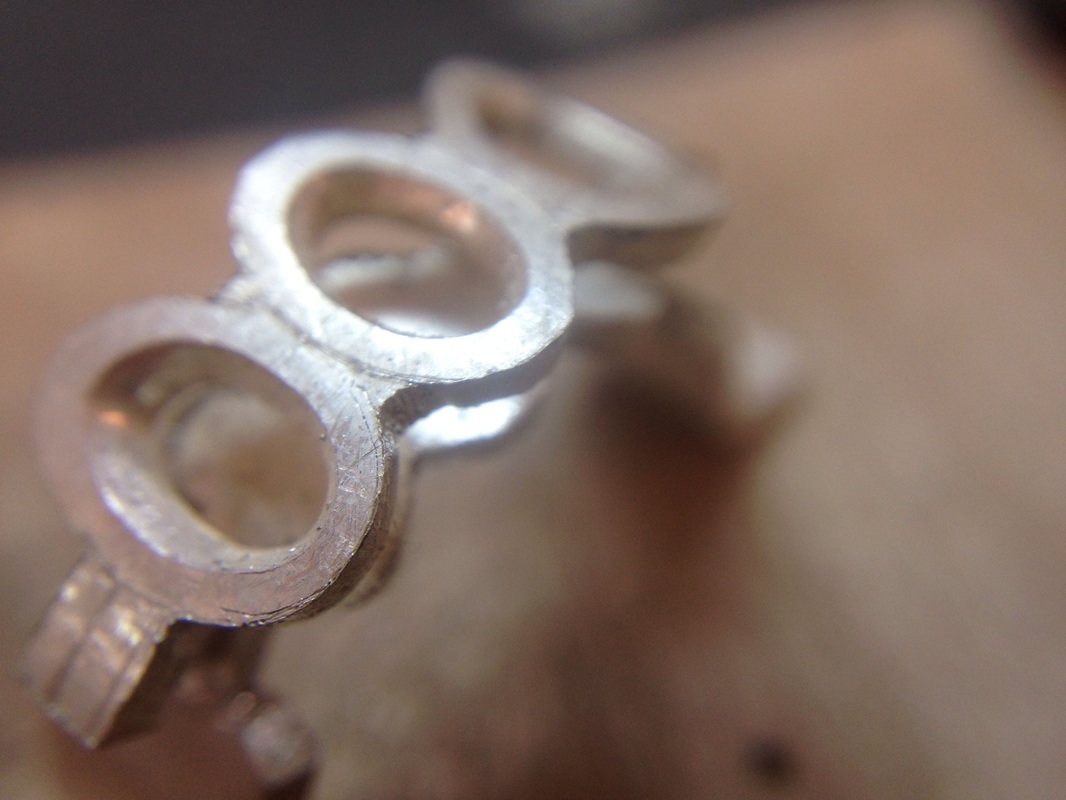
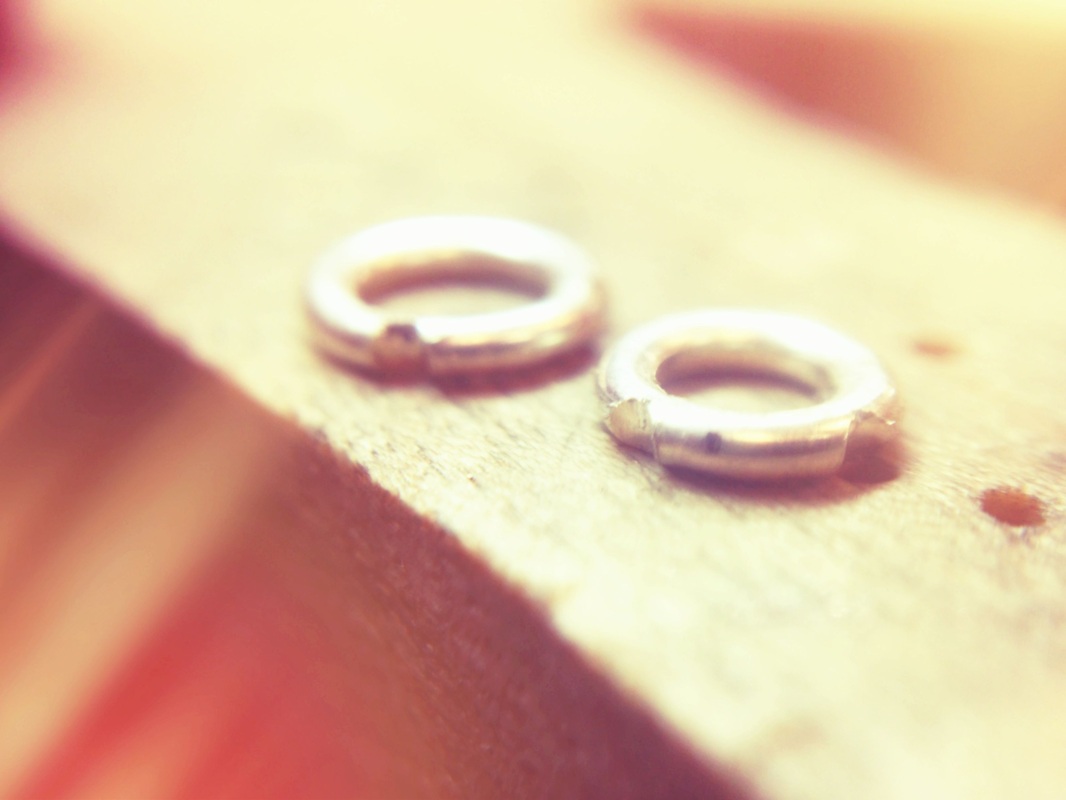
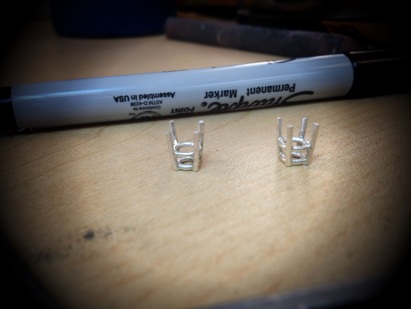
Week 4 Projects- Doesn't look like much but retipped 3 rings and set one solitaire "claw" style along with two basket heads and the start of the three stone ring.

Picture
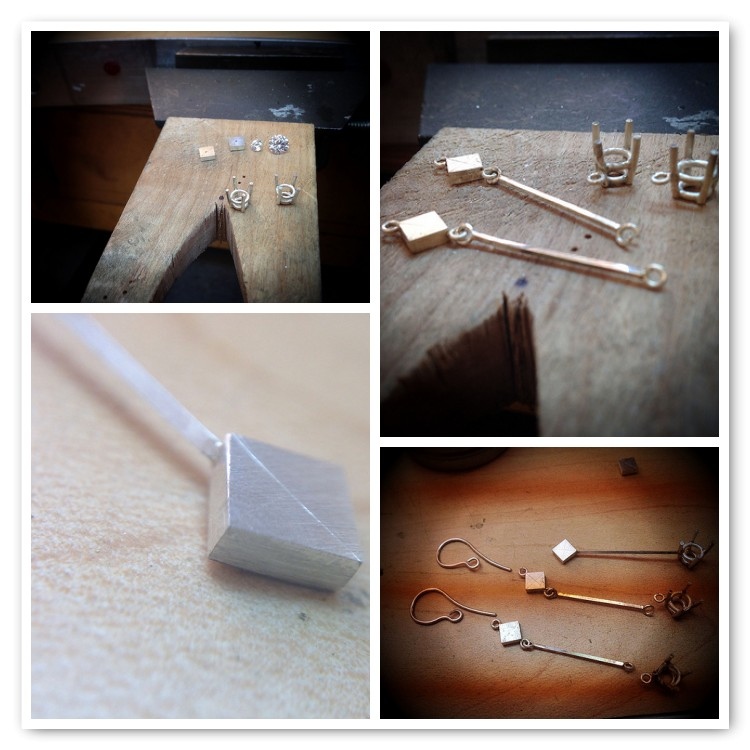
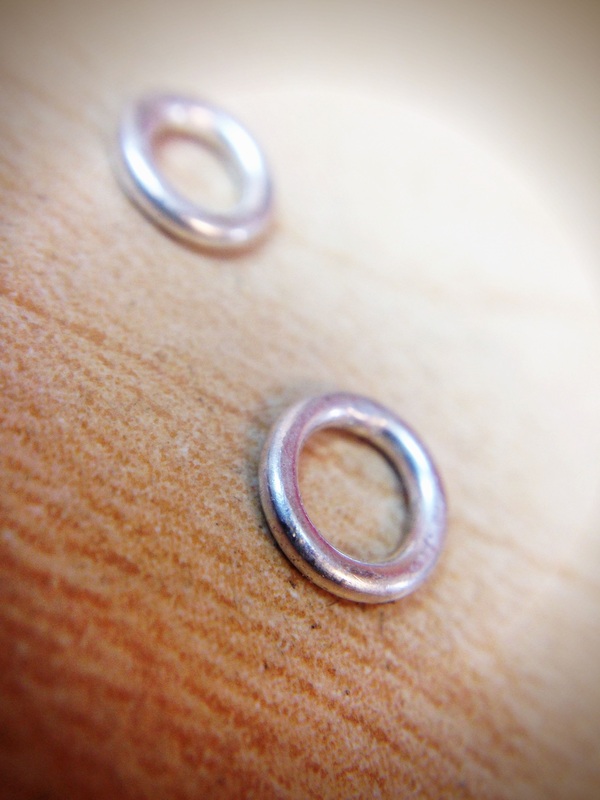
Extra curricular project for the basket heads. Earring and pendant set.
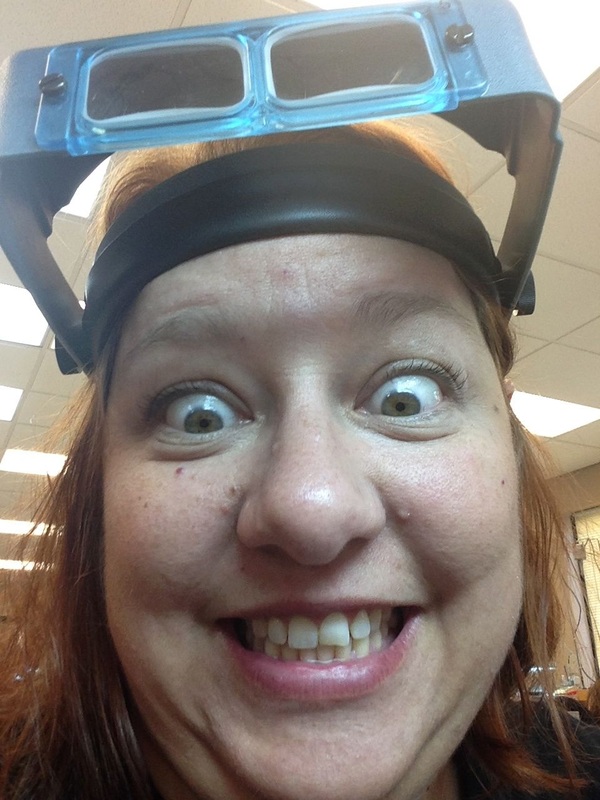
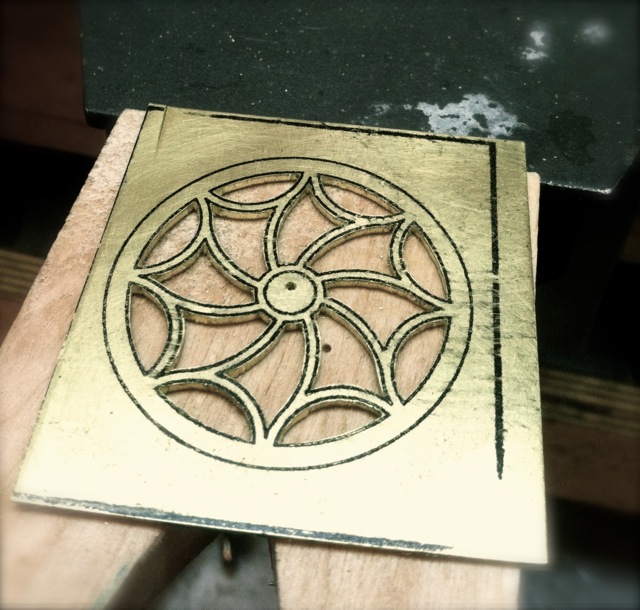
0 Comments

Tipping?  Is it required?

9/30/2013

0 Comments


Week 4- Part 1


Apparently it is required of me.  This isn't a situation of whether or not to leave 15% or 20% after your delicious dinner.  It's a save your ring or lose the stone kinda situation.  I know re-tipping ring settings is pretty standard basic bench repair knowledge but I never really was interested.  Seemed tedious and fiddly.  With a clean, simple approach (ha! The New Approach!) it really was easy and actually a good exercise in evaluating and problem solving.  I know a worn tip or prong when I see one.  Figuring out the best way to repair it was new for me.  I actually ended up enjoying the process and it will not bore me in the future when I help rescue rings.
Picture

Picture
Picture
Picture
Picture
Various types of re tipping or prong repair. And the finished results.

Part two of week four coming tomorrow!  Stay tuned for the adventures of graduate bench jeweler's school!
0 Comments

It's about to get real!

9/23/2013

1 Comment

 
PictureNew grill selfie :)
Week three, you kicked my ass.  Woah.  That was a rough road we traveled this week.  Tears were shed, tantrums were thrown, frustrations took over.  But we all made it through the battle and all are better jewelers for it.

It is amazing what some of the students who have never picked up a saw frame or even a file can do after just three weeks.  It's really incredible and wonderful to experience.  Blaine is our Miyagi, our Mickey or our Morpheus.  The confidence gained through the program is very empowering. 

Then he gave us a test... Well, you have to gauge progress some how, don't you?  Oh deer-in-the-headlights.


Beginning of Week Three

We started off the week with bead setting and channel setting round stones into bands.  Bead setting was quite the challenge but actually came together pretty well.  It's so much simpler to learn with huge screens showing you a step by step process broken down into parts.  It takes away the fear of too much information all at once and then trying to repeat it at your bench.  Blaine's approach to channel setting was a simple and clean technique that I have done a little before the program but not with the control he teaches.  The little things make all the difference.  It's in the details.  It really is.
Picture

Bezel setting came in between bead setting styles.  This technique is explained in great detail on Blaine's DVDs.  I learned a lot of my stone setting from these DVDs.  They are a very clear and descriptive way to learn bezel setting and flush setting.  Learning in class was similar to the video but on steroids.  Blaine teaches this in the Stone Setting Comprehensive week long class. 

Picture


Mid Week Three- Bead Setting Style 2

Here is where it started to get real for me.  This is the beast that kicked my ass this week.  I understood and felt good about bead setting the traditional method. (Style 1)  I understood bead setting Style 2 (Style 2 = Fancy Pants Style.)  Putting into practice was the difficult part.  Graver control is key.  I was swerving all over the road.  I could have easily gotten a DUI the way I was driving that graver.  Sigh.  I went home that day all frustrated, exhausted and a little bit pissed that I couldn't get it right away. 

End of Week Three

The next day, I came in determined to get it right.  Before I could even get in another practice stone, we jumped right into milgraining the edges after some minor shaping and clean up.  Milgraining is a beautiful thing.  It adds a little beaded rim to frame your bead set stone.  (It also is a wonderful concealer to hide blemishes that never seem to go away.)  It is done with a tiny little wheel that reminds me of a ravioli or pastry wheel just on a micro level.  It makes your stones pop, stand out and elegance to the piece.  I've used it before but not with bead setting.  I will be using it more often in my work as the look appeals to me.
Picture

The week is rolling along with it's own set of troubles and then it happenened.  We were surprised with a test.  But not on what we have been working on all week but something we learned in week two.  That was a thousand years ago!!  The pressure!  We were challenged with replacing a head on a solitaire ring and resetting the stone.  Ok, breathe.  Just unsolder and put it back together with the new one.  Well, this ring is not soldered, it's laser welded and we have to cut it out.  Now it got interesting.  We weren't supposed to ask questions or share info with each other.  I struggled through but remembered to just step back and examine what is at hand.  With some brief calming exercises, I tackled the task successfully in the end.  

Picture
My projects from week 1 through week 3.
Picture
My awesome bench neighbor, Nick, and his collage of projects. Check out his amazing wire wrapping! www.noyesdesigns.etsy.com

Whew!  With that behind us we dove into chain repair, a non-stressful repeat of the solitaire exercise, and a little sneak peek at ingot making closed out the week.  I know I was ready for the weekend.  Week three, you were quite the evil little beast but I know I am better for having gone through you.  Margarita time!  Off to celebrate my beautiful little girl, Ruby, turning 9.  Wow.  How does that happen? 

Picture
1 Comment

Rolling Along into Week Two- Part 2

9/21/2013

1 Comment


Woo Hoo!  Stone setting!  Something about setting stones is always exciting!  It's like you are putting the heart into the piece.  The part that makes it alive.  The spark that lights up the jewelry.  Needless to say, I was glad to jump right into this section.  I know that I have been approaching my setting with only partial knowledge, as most all of my stone setting knowledge has been self taught through books. Or by me pestering my generous goldsmith/metalsmith friends to no end.
Picture
Gypsy setting beginnings.

Picture
Flush setting practice.


We started with gypsy setting and flush setting.  Both I use regularly in my work.  While I struggled through the first few, I realized that I need to dial it back a step to really listen to what was being taught.  After a few more, making adjustments in how I had been tackling it, the new found approach became second nature.  Something I thought would be a no-brainer, took me a few tries to realize I needed to refine my current process to make for a better set stone.  Correct my depth, watch my burnisher angle and make a tight bearing. 

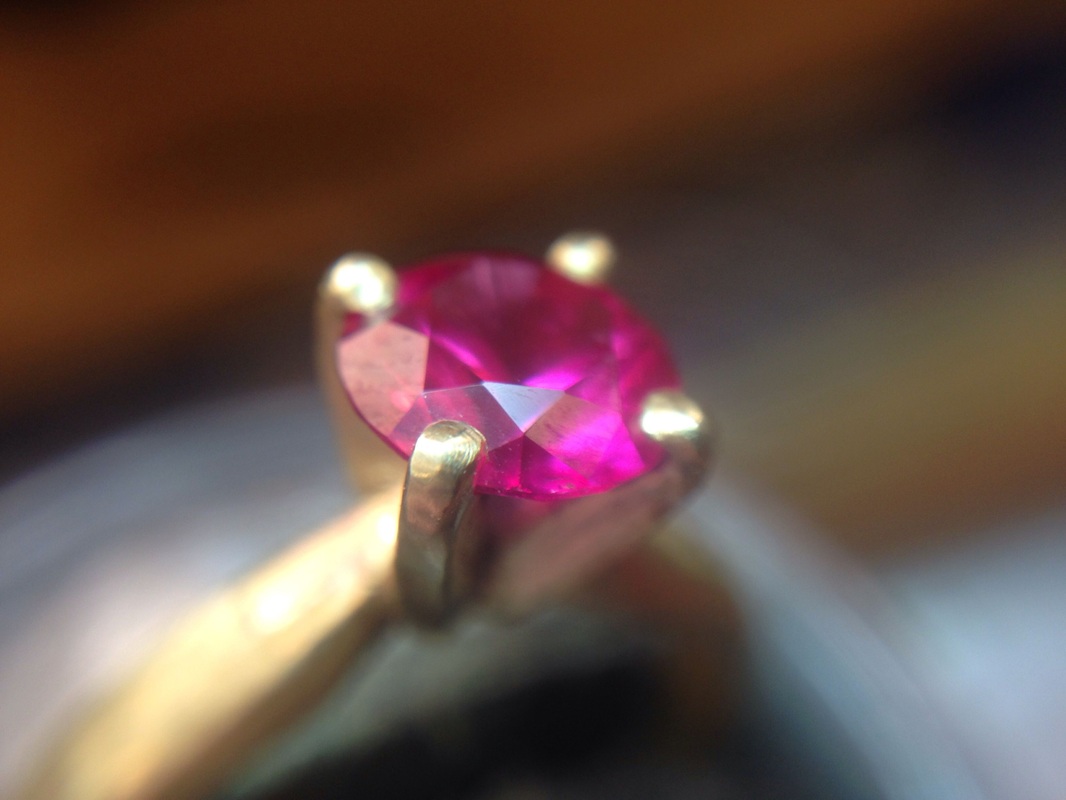
Moving quickly along to solitaire prong setting, Blaine directed us through bur control, angle alignment, vector tightening and the finer details that separate the average goldsmiths from the great goldsmiths.  Tiny adjustments can make a world of difference.  It is in the details, but the details don't really take that long.  They can make a huge impact visually.

I received a package of my work back this weekend from a gallery that unfortunately closed it's doors.  So many things I missed or just glazed over.  Not that any of it was horrible, just not what I want to pass as ok anymore.  Oh the humanity!!!  Naw, now I can see the little things that can make a difference in the overall appearance.  Next week starts bead setting!!  I've never done it before.  This should be an interesting ride...Hang on!  It's gonna get bumpy!

Picture
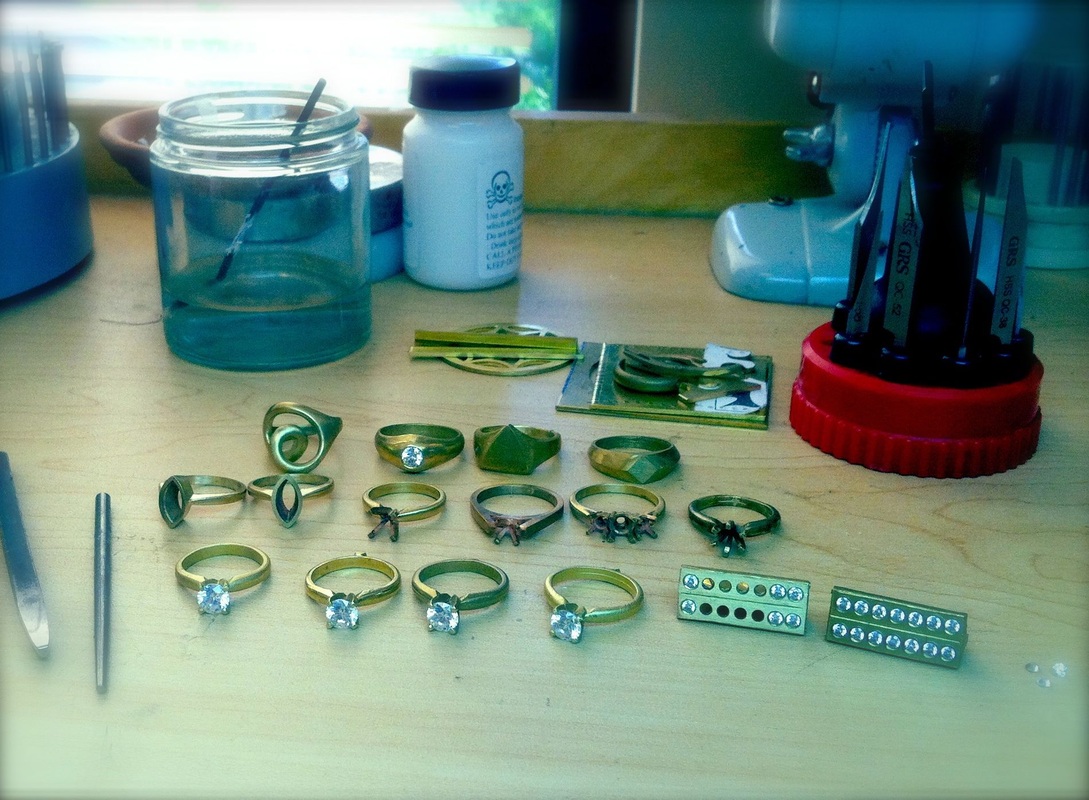
Two weeks worth of projects and tool making.
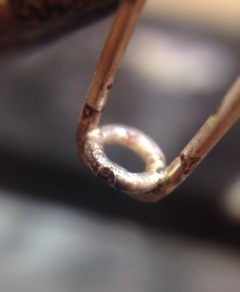
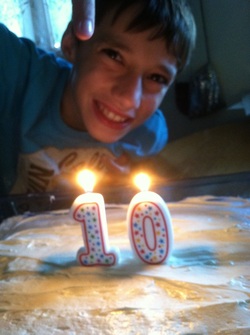
1 Comment

Here we go...

9/18/2013

0 Comments


Picture
Design transfer and pierce work.

Picture
Sanding, filing and shaping.

As week one closes of the Graduate Bench Jewelers Program at New Approach School for Jewelers, I am amazed at how much I have actually learned.  These are all skills I had coming into the program: sawing, filing, piercing.  However, I now do them much more efficiently and logically while viewing the techniques with a new appreciation of the process. 

With a new approach (ha! pun intended) to holding my saw frame, my files and flex shaft, I gained a new control over techniques that I have never experienced before this program. 

Death grip on the saw frame no more.  Three gentle fingers give me better control over the frame and blade action.  Files can actually be used in the backwards motion. Who knew?  I was previously taught it would clog my files and ruin the "teeth" if I ran a file back and forth over a surface.  I am not really finding that "rule" to be true.  The flex shaft actually seemed to be the biggest eye opener.  I held the flex shaft in a "potato peeler" grip for most operations.  I have now learned that a pencil grip will give me better control and smaller fine motor control.  I certainly did not think that putting my finger on the shaft of a bur (while running!) was a good idea before this week.   Now, I can't imagine having the control I need without using it that way.

I really thought I would sail through this week and maybe even be bored. So, so, so not the case.  I gained a whole new level of control and finesse.  Now to break those bad habits...they are already starting to fade. :)

0 Comments

Rolling Along into Week Two- Part 1

9/18/2013

2 Comments

 
PictureFire! Max turning 10.
FIRE!! Yo, yo yo!  Yes, we finally got to play with fire.  The basics of firecoating, flux and soldering all were incorporated into practical use by teaching ring sizing and assembly of heads to shanks.  A refresher in flame types was a good reminder as I often run my flame way too hot. Hence, the melting queen.  Blaine uses Hoover and Strong's flux and it is da' BOMB!  I have been suffering through with Handy Flux and Batterns for years.  Why?  Again.  Why??  This flux actually REMOVES oxidides from the surface when heated.  Never going back.  Nu-uh. Can't make me.

I have sized rings before but have a slight phobia as my first sizing I ever did, didn't go so well...That's another story for another day but it kind of shied me away from sizing for a decade.  Sizing techniques taught this week really made sense and had a certain logic to them that will apply across the board to many styles of rings.

Some solitaire assembly, three stone an shank assembly rounded out the fire section of week two.  Blaine's ability to explain the process in a humorous and witty manner has made the days fly by these past two weeks.  Looking forward to stone setting starting tomorrow!


Picture
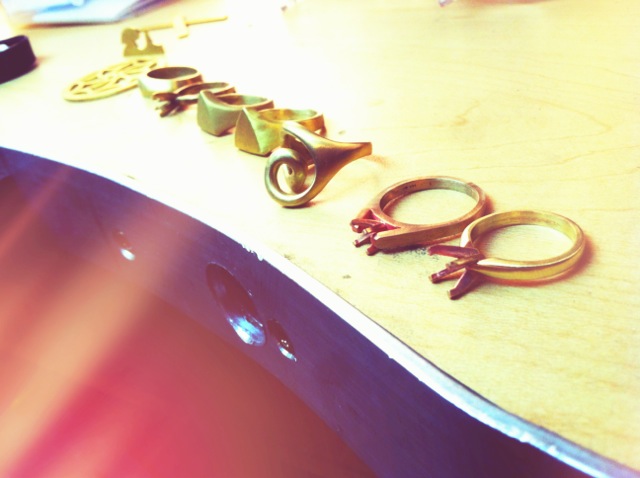
Week one projects and part of week two projects.
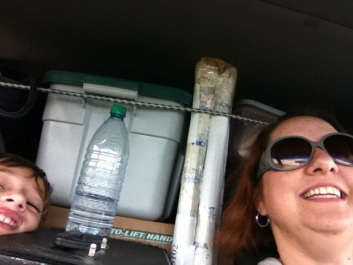
2 Comments

New Beginnings

9/16/2013

2 Comments

 
PictureRoad Trip pit stop!
Several years ago I heard of a school for jewelers called New Approach School for Jewelers.  I knew a few goldsmiths that had gone through some of the classes and had spoken highly of the school.  I had always dreamed of an opportunity to study in an intensive program really learning all the things I never was taught properly or was self taught half-assed. 

Well, the planets aligned in my favor or maybe I willed it to happen, either way, here I am in Middle Tennessee studying under Blaine Lewis at the New Approach School for Jewelers. 

Luckily, my little family was ready for a change, a new adventure.  We had lived in Oregon for 20 years and loved every minute of it.  (Well, most of every minute...)  We recently moved to Portland, Oregon in 2012 and found we were all having a hard time fitting in.  There were elements we loved but many we found not working for us.  After a little re-con trip in June to Nashville, we packed our bags and headed to Tennessee! 

2300 or so miles later, we landed and settled in to a town 25 minutes south of Nashville called Franklin.  After unpacking the neccesities and getting the kids started in their new school, my new jewelry adventure began! 

The program is 12 weeks long and intensive.  9+ hour days and a ton of material is covered daily.  Some people are starting having no experience at all, some with a little, and then there is me with 20+ years of mismash experience and learning that has led to bad habits and work that could be at a higher level than it currently is residing. 

I propose (insert attempt) to chronicle the program week by week sharing my thoughts, fears, and progress as I climb my way through the Graduate Bench Jewelers Program.  I hope you will take a peek over my shoulder and share my adventure at the bench. 

Edit:
A lack of internet for three and a half weeks, I am posting my first few posts this week to catch up.


Picture
Jam packed driving!
Picture
Well, at least we are protected!
2 Comments

Evolution of a Trade Show Booth~ Chicago Style!

2/23/2012

1 Comment

 
Picture
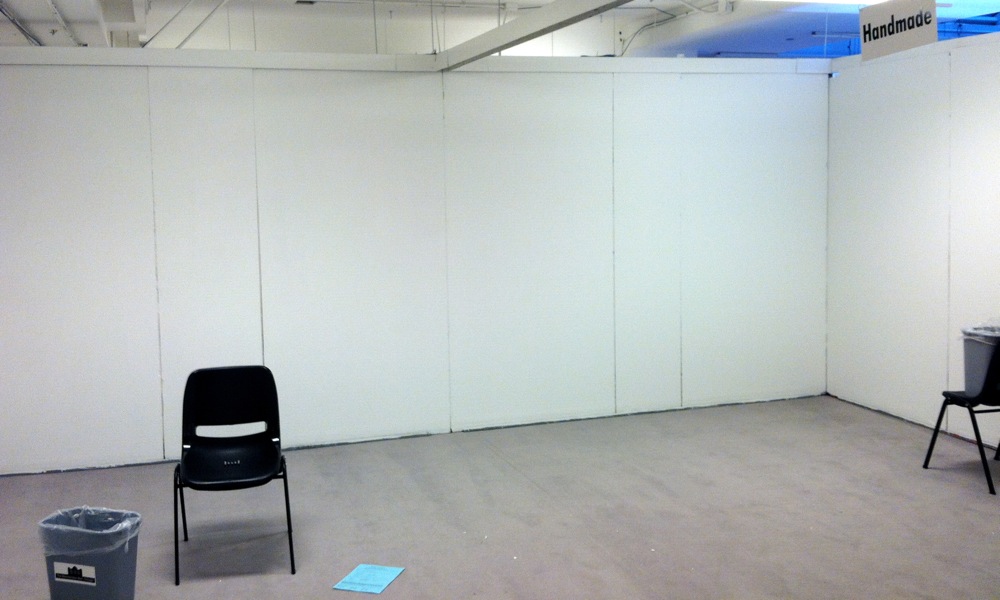
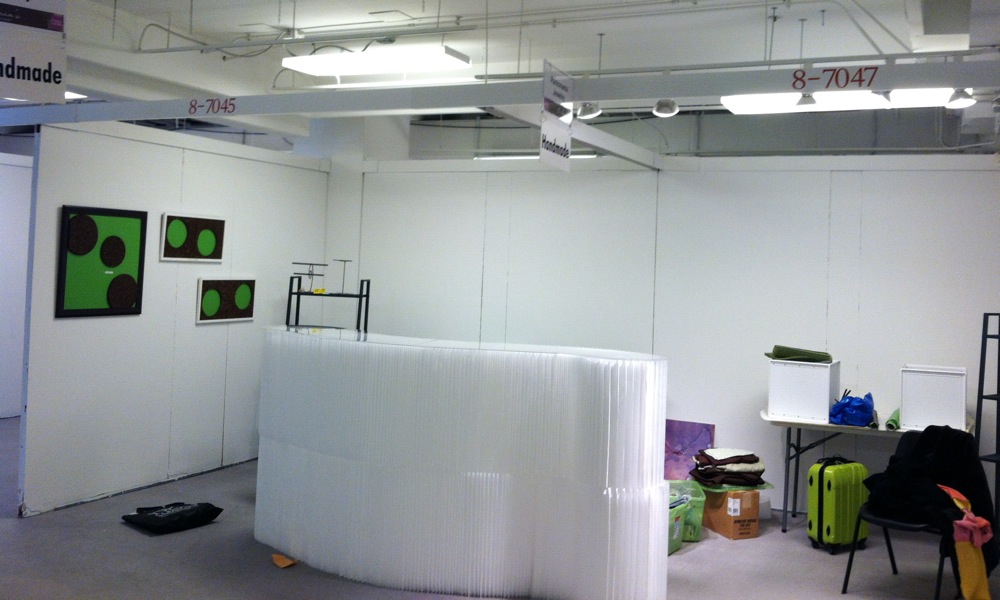
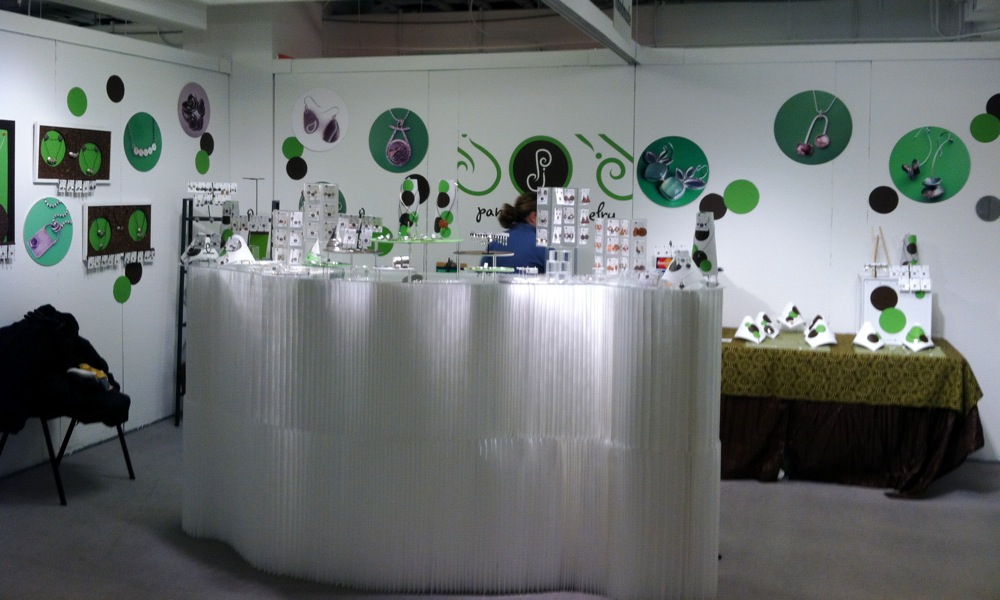
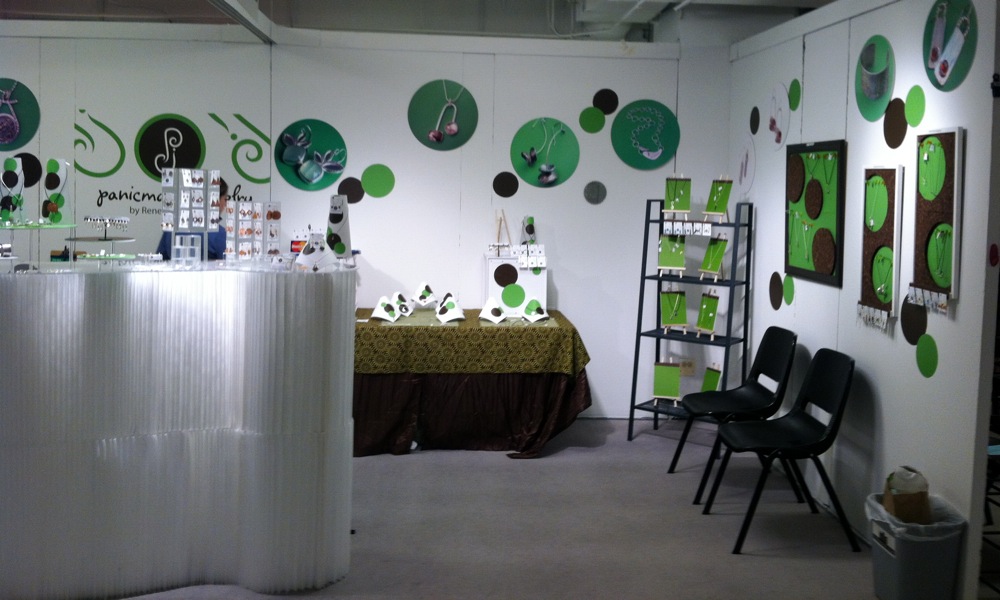
Recently I participated in the Chicago Gift Show in the Beckman's Handmade section of the show. This was my 5th consecutive time attending as an exhibitor. This show has always been a good show for my line and gives me a chance to see family and friends.  And eat Chicago style pizza!  My booth has evolved a bit from my first time attending but is still in constant flux.  Chicago has hard walls (versus a pipe with drapes as the dividers) and can make things so much easier.  A lot goes into creating this environment but I always receive compliments on the end result.
Picture
Picture
Picture
Picture
Picture
1 Comment
<<Previous
Forward>>
    Picture

    Renee Ford

    Metalsmithing maven and mind behind Renee Ford Metals.  I make the plain look interesting with fire, hammers & cool tools.


    Archives

    February 2024
    May 2017
    May 2016
    February 2016
    May 2015
    November 2013
    October 2013
    September 2013
    February 2012

    Categories

    All
    Booth Design
    Exhibitor Design
    Jewelers Bench School
    Jewelry
    Jewelry Booth
    Jewelry Exhibitor
    Jewelry Making
    New Approach School For Jewelers
    Panicmama Jewelry
    Renee Ford
    Trade Show Booth
    Website Building For Beginners

All jewelry is handmade in Nashville, Tennessee.  I use recycled, responsibly sourced metals + gemstones.  All designs + images are property of
Renee Busdiecker and Renee Ford Metals 2025
  • home
  • shop
  • about
  • custom design
  • contact
  • set-it! instructions
  • hold-it! instructions
  • teaching
  • The Hammer and Anvil
  • the journal