|
Life has been weighing heavy on my heart. I got a diagnosis on my hand pain that has steadily grown worse over the last couple of years. To the point where the pain takes my breath away when I grip a certain way or grab a tool and squeeze without a thought. These hands of mine might ache day in and day out but they are most happy making.   I can’t imagine not being able to make anymore…but there will surely be a day when: I can’t hold my file steady to make the smooth strokes. I can’t bend the thin bezel tightly around the tiny stone. I can’t grip the graver strong enough to push. I can’t steady my hands to set the whisper of a diamond. I can’t hammer the metal to my will. I can’t hold my flame steady to guide the solder to flow. But today, I still can. The question heavy on my heart is: For how long? 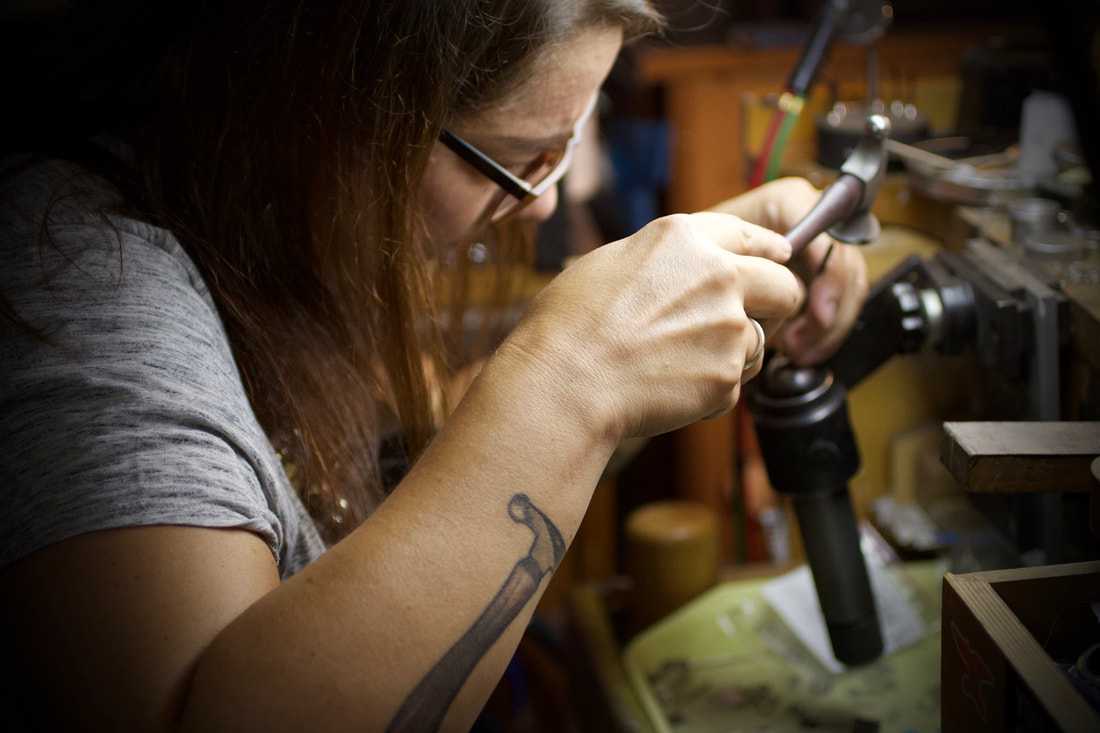 While I don’t have these answers, I’m trying to find my way with this news. I am struggling to understand but also grieving limitations that lurk around the corners. I am ALSO ok. And hopeful treatments and care will allow for more time. Confusing as that seems, it’s all true, all at once.
So changes are happening. Self limits are imposed to preserve whatever time I am granted to make. I don’t really know how this will go. For now, I am grateful I am still making. That I am still A Maker.
0 Comments
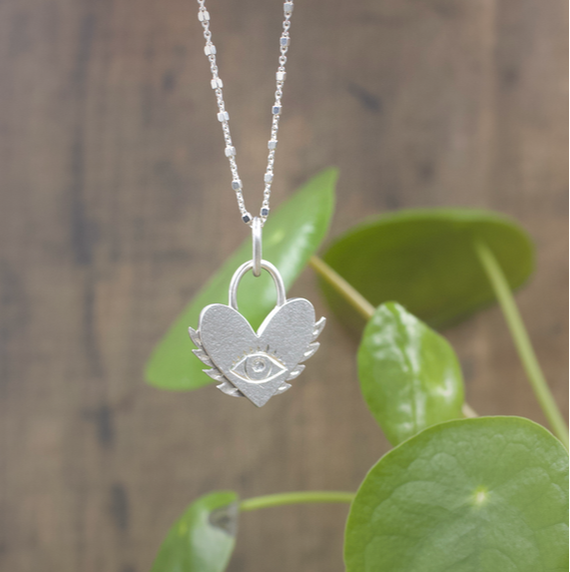
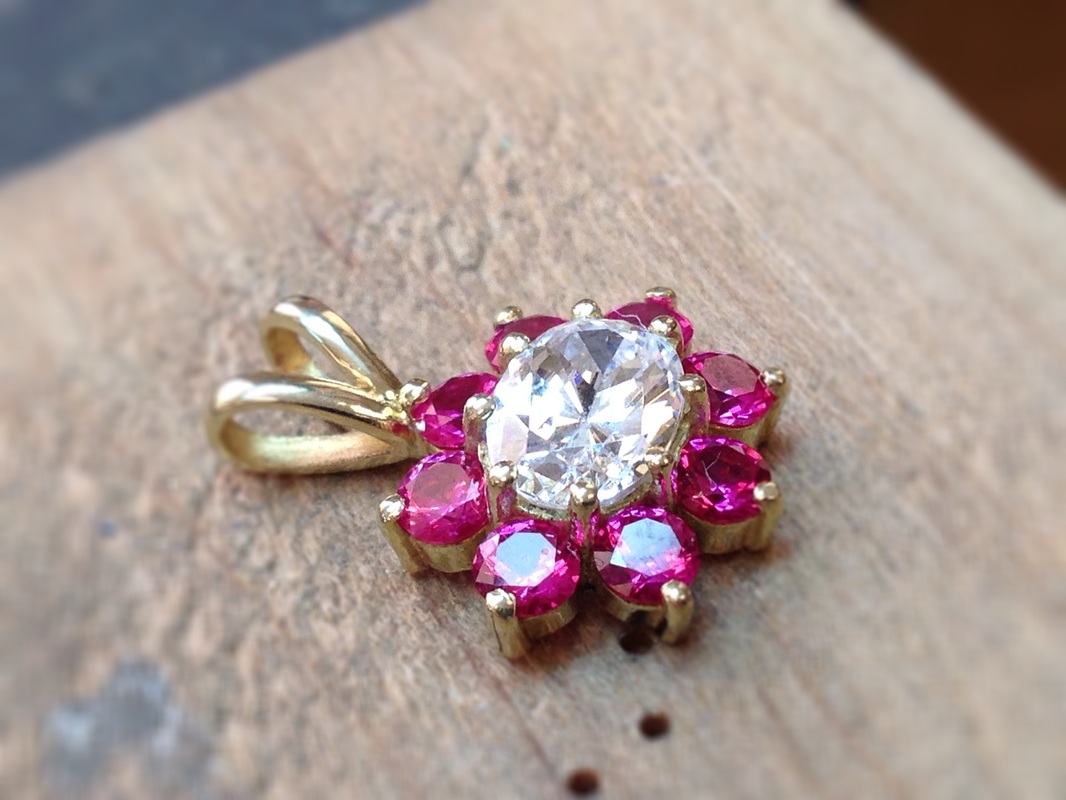
:: Eye Heart U :: Hi. I know it’s been a minute. Life keeps happening (exploding) and I decided something needed to give. A social media pause was it. It gave room for a whole slew of other things that needed to be addressed both personally and professionally. Things are happening behind the scenes over here. Big changes (for me) are coming. I am not quite there yet, but I will be. Sometimes we don’t get to choose. Sometimes life chooses for you. Sometimes it’s heartbreaking. Often times it’s freeing. Sometimes it’s both. There is a deep rooted feeling of being in the mid 50’s that you somehow have got things figured out. Yes, the experiences are more vast and varied for most. So that gives you a certain sense of power and confidence. Knowledge to make better decisions for YOU. Yet with that feeling there comes this veil of invisibility. Feeling insignificant and irrelevant. Both as a person and professional. What happened to when the experienced artist was revered for their knowledge and skills? It is now a world where quick 5 minute knowledge is two clicks away and the sage becomes shoved aside. I am trying to say the struggle is challenging me. To my very creative and passionate being. I want to keep on creating art and continue to share my knowledge and skills. But somedays I find it hard to feel (and be) relevant in a forest of so many other voices doing the same. I’ve come to realize, I am a unique voice. I am the only one who can speak for me. To tell my story. To share my journey. Give to the world my jumbled expressive work. I am becoming more invisible to some. But just maybe, more clear to others that look a little deeper and find their way to see. **Sterling Silver Eye Heart U winged pendant. Hand fabricated on a faceted bead and cable chain. Yes, valentines is tomorrow but heart jewels are delightful any day of the year. Available! Eye Heart U pendant!* 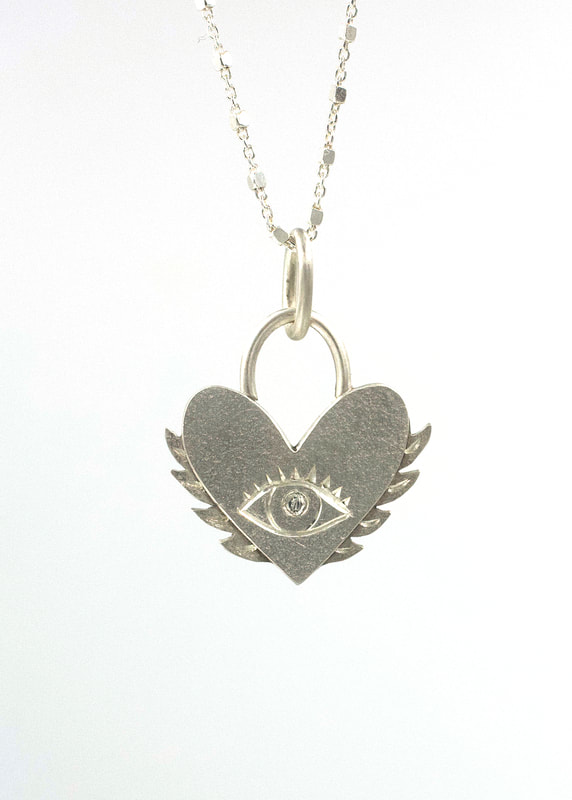 We all go through transformations many times in our lives. Some are easier to accept, others make us feel like our world will never be right side up again. You feel lost, alone, scared....hurt, rejected, devastated. The process of transforming makes you face yourself. Really look at who you are...who you really want to be. It is painful. It is hard work. It is life changing. I struggled for months in a fog during a transformation. Trying to understand who I was and what I wanted to change. And the why. Facing my issues, struggling with roadblocks along the way. But I did it. I came out of the gray mist and into the light. I believe in myself again. I like myself. I learned to love myself for the first time. Today I embrace my dreams. I am making them my life. I am LIVING. My "soul" purpose is to live a joyful life. To LOVE. It seems so simple...yet it is something I work on everyday to maintain and pursue. I will transform again. Probably many more times. I am no longer scared at that idea but know I will face my fears head on. I know I am capable. I will be able to overcome whatever comes my way and SHINE. >>>>>>>>>>>>>>>>>>>>>>>>>>>>>>>>> What does this have to do with jewelry? Well, EVERYTHING. Every project starts out as just parts, bits, metal and stones. The potential sits waiting to be unleashed. I TRANSFORM these parts into something beautiful. A treasure for someone to wear and cherish. Metal gets cut, hammered, bent, torqued...even torched beyond recognition. But it is all done with the intent of transforming into something wonderful. Jewelry is personal. It has HUGE emotions attached to it, underlying meanings. It celebrates milestones. Symbolizes love. Is passed down through generations. Holds memories. It empowers. It expresses. A tiny adornment means so much more than the sum of its parts. I am humbled and grateful that I get to make these treasures that hold so much meaning for you. Some of you I get to meet in person, learn a little bit about you. Others I don't. Either way, know my heart and soul go into each piece. I am forever grateful that you chose me to create your treasures. Thank you from my whole heart. Peace and love. Always.  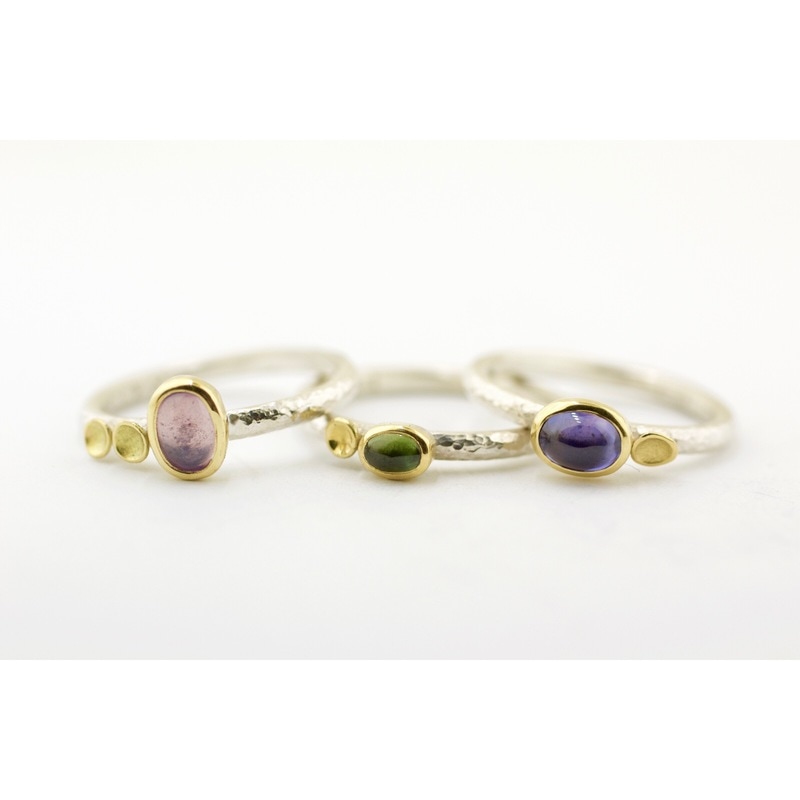
 The last four months I have been immersed in designing and developing a new collection of jewelry. The collection has grown to over 90 pieces and I'm not out of ideas yet! It's been a beautiful journey and I am really excited about the work. Portrait painter extraordinaire, Chuck Close expressed once that young artists should: "...not to wait around for inspiration. Inspiration is for amateurs; the rest of us just show up and get to work. If you wait around for the clouds to part and a bolt of lightning to strike you in the brain, you are not going to make an awful lot of work. All the best ideas come out of the process; they come out of the work itself. "
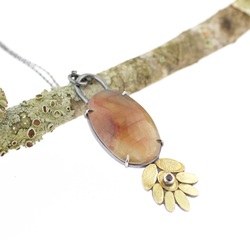
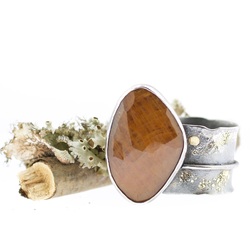
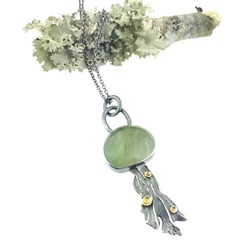
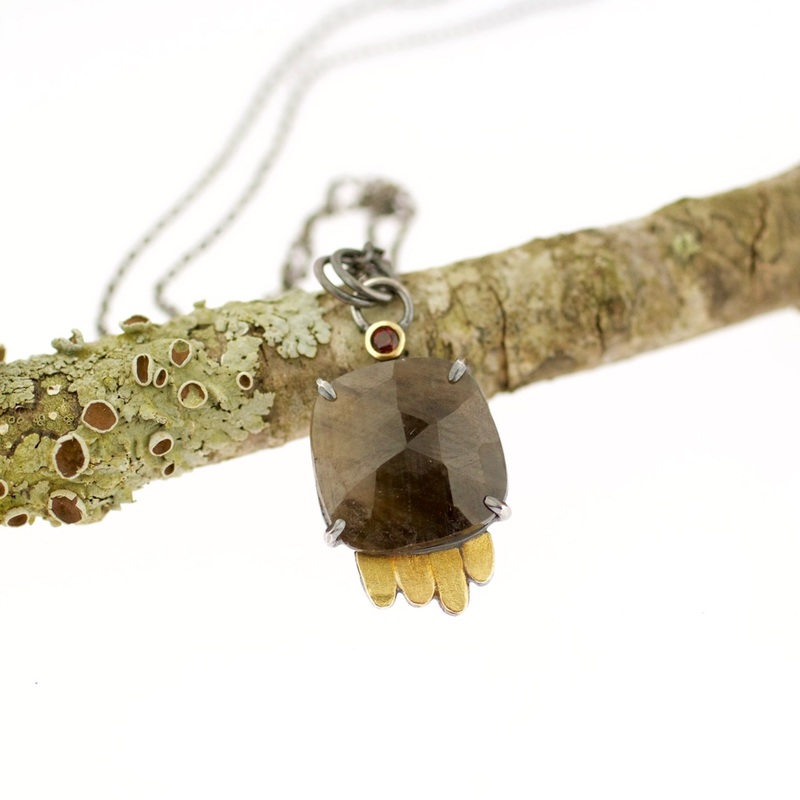
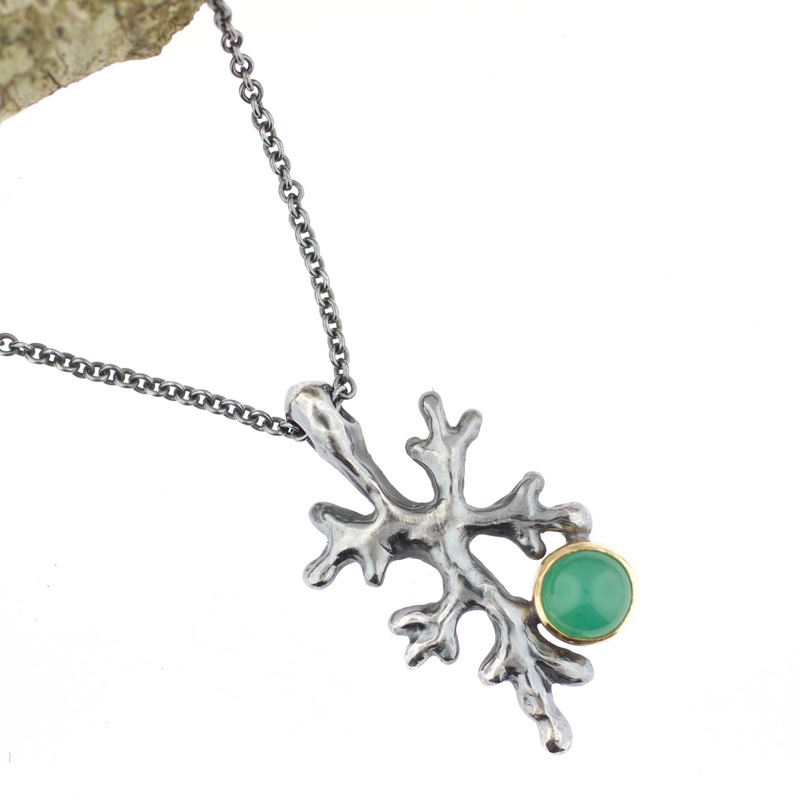
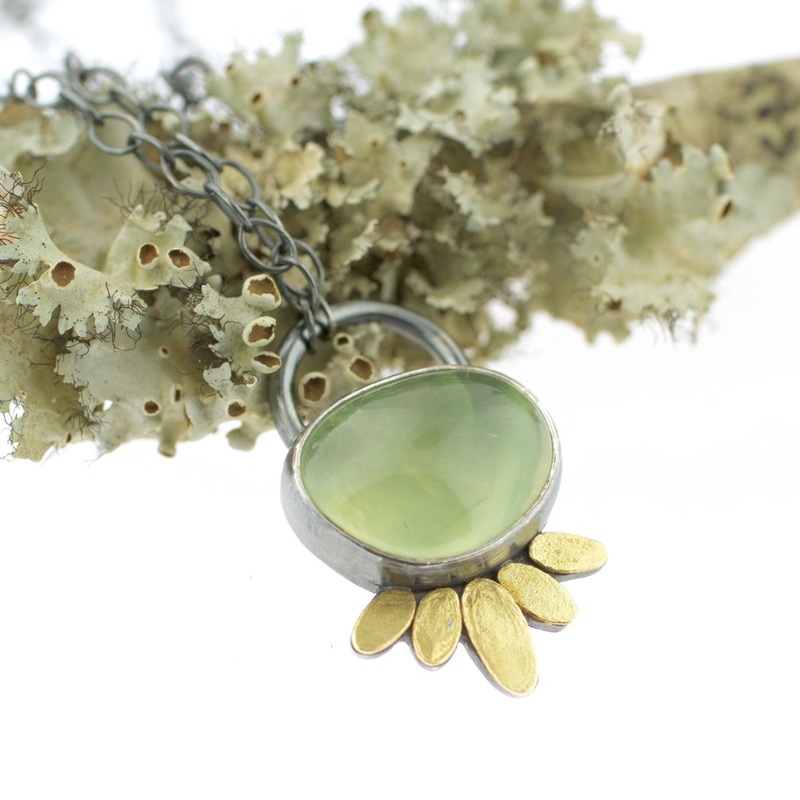
 I've taken this to heart in how I approach my work. I always have ideas brewing and try to get them into reality as quickly as possible. Do they all work? No, of course not. But I LEARN something each time. This learning helps me build better designs, more skilled executions and work that I LOVE making. This collection started out with tons of sketches but the majority of the pieces developed as the making process took place. I have taken my time to stay focused, centered and develop a cohesive collection. I hope you enjoy it as much as I have enjoyed making it! Go take a peek and let me know what you think! The Lichen Collection Enjoy!
Super excited to announce that I will be teaching a Beginning Jewelry Series at New Approach School for Jewelers this summer. New Approach is an amazing professional jewelry school that has trained thousands of successful jewelers over the years. I am forever grateful for the knowledge and skills I was able to learn and refine during my time in the Graduate Bench Program.
The Beginning Jewelry Series will encompass 4 different jewelry workshops.
Things are shaking up here in 2016. I've been busy sketching, planning, creating and preparing a new collection for spring called the Lichen Collection. I've been taking my time, enjoying the process letting me savor the journey. This has really helped me focus and create a cohesive collection that I can continue to expand and grow over time. The new pieces began from making these tiny little forms I call Lichen. The are inspired by the multitude of varieties of lichen found everywhere from blacktop to mountain top. These painstakingly slow growers fascinate me. Their textures, range of colors and delightful forms inspire me to create pieces influenced by their tiny details and richly layered textures. The sketchbook is overflowing with idea and pieces are coming to life. Launch date for the Lichen Collection is March 1st! Back to work! Can't wait to show y'all! 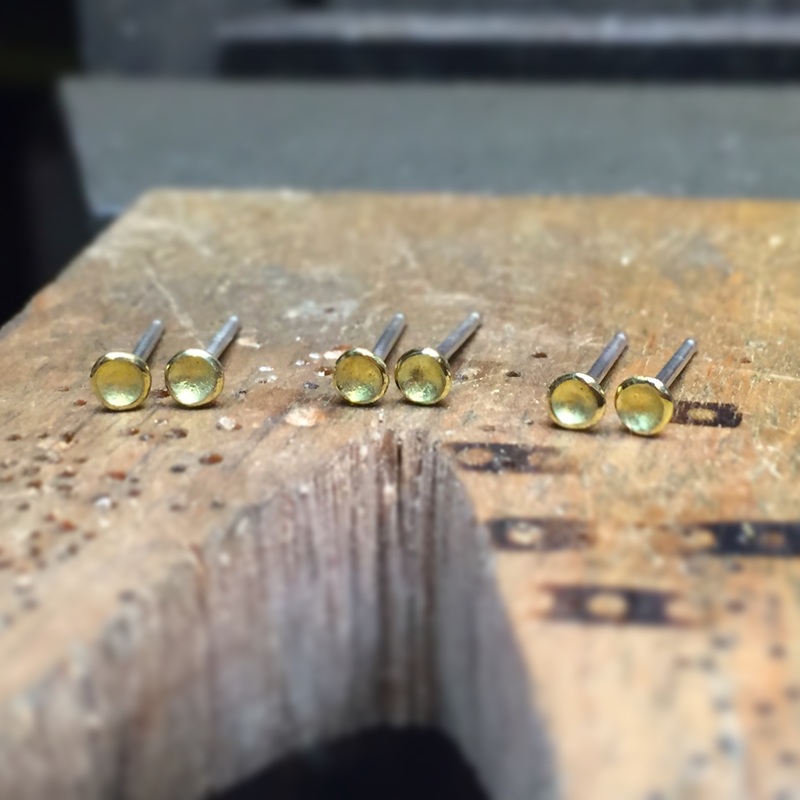 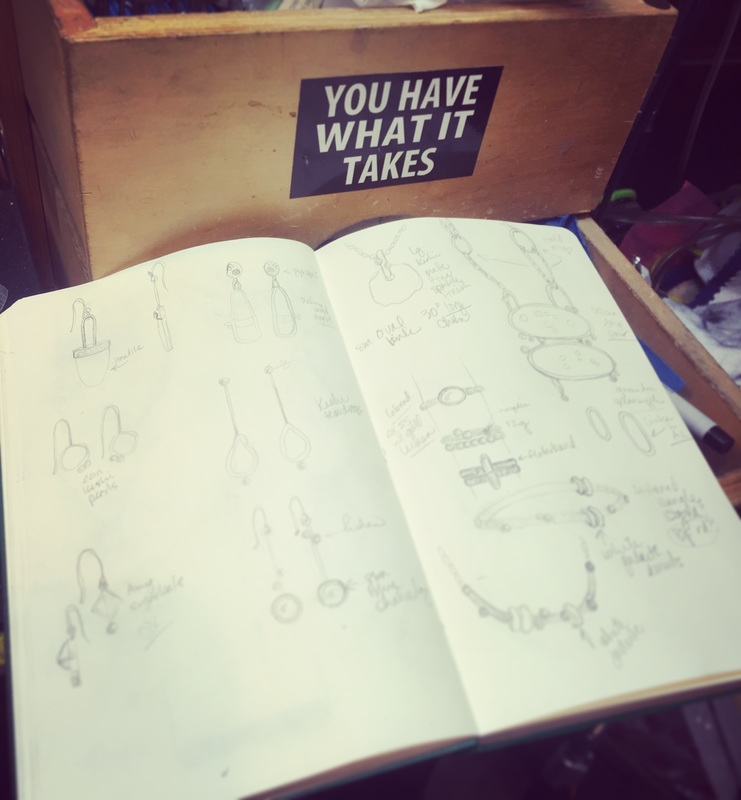 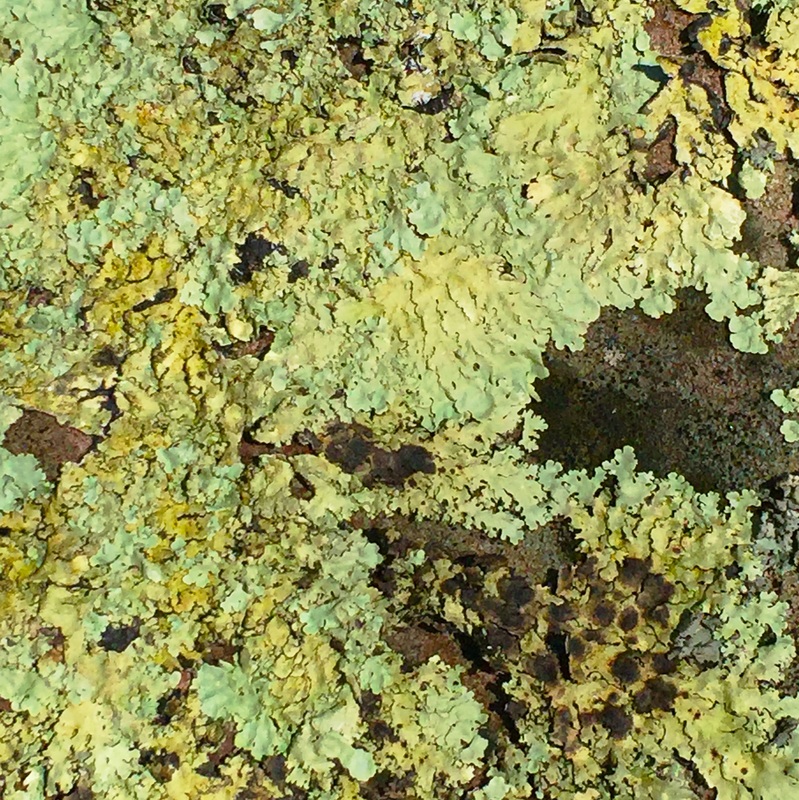 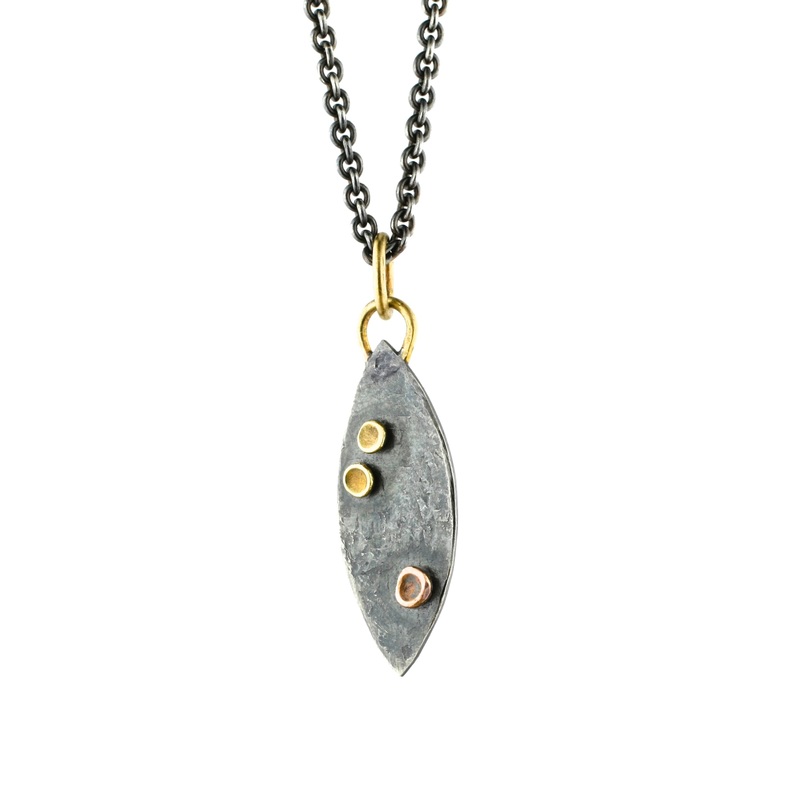 I have been Panicmama Jewelry for quite awhile now, since 2008. I have spent many countless hours and days making it my brand. But it really wasn't me. It was a nickname that became me. It was hard to explain and often ended up with confusion for the customer. With the many changes that I have encountered over the past few years, I needed to make my brand me. It needed to be associated with my name and what I do. So here it is. The new ME. The change feels right. It fits me. It is me. All traffic will be directed to reneefordmetals.com. I will continue to use Panicmama in connection to Renee Ford Metals until I no longer need to use it. Search engines will still connect you through "panicmama" searches. Excited to leap...finally.
We were privileged to be taught by a master engraver for our engraving portion of the 12 week Graduate Bench Jeweler course at New Approach School for Jewelers. Jason Marchifava was a delightful instructor and very inspiring to observe. His career at his age is impressive and extraordinary. It was an honor to learn the basic skill set of engraving from him.
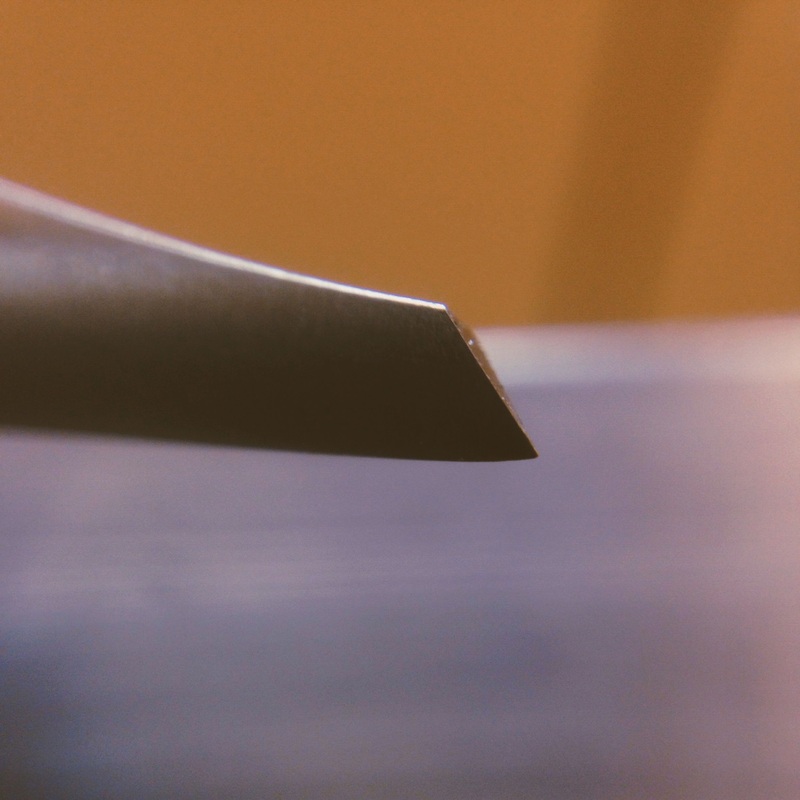
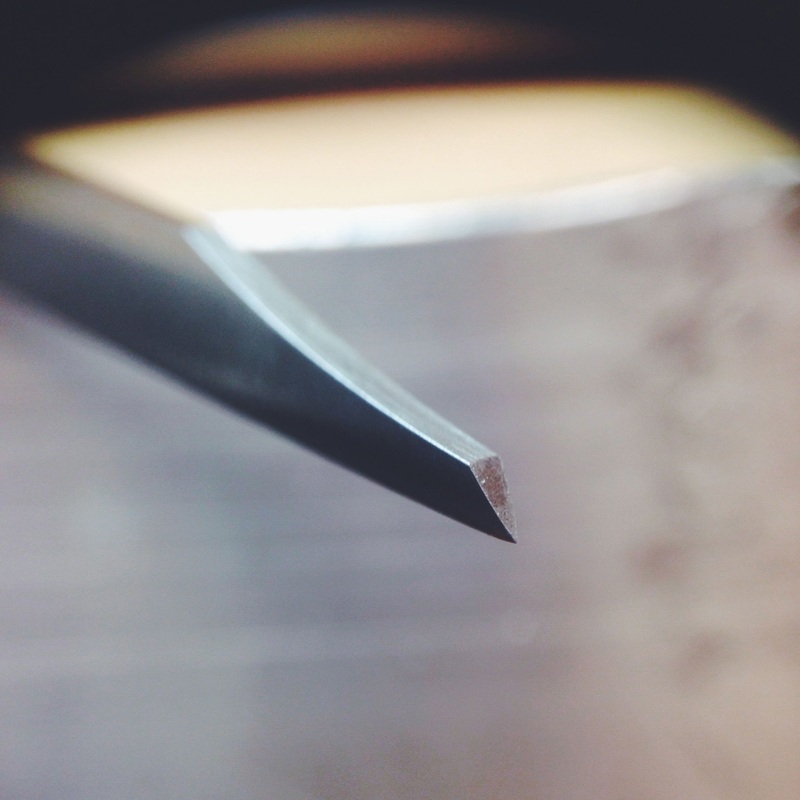
One of the first things we learned about engraving is having proper tools. You don't need a thousand different engraver shapes. You need two. Yes, two. An onglette and a flat graver. They do need to be shaped for engraving. The fine straight lines we use with stone setting do not apply here. You need a very slightly rounded heel at the tip to successfully engrave. Getting this angle correct, straight and even was the hardest part for me all week. It's harder than it looks. Too steep and you slip. Too shallow and you have chatter in your lines. Not even and the graver doesn't make the line you expect. And keeping it sharp. Another dilemma. Such a first world problem, but it drove me nuts. I spent one morning on a "slip n slide" until I finally got my graver properly sharpened and angled.
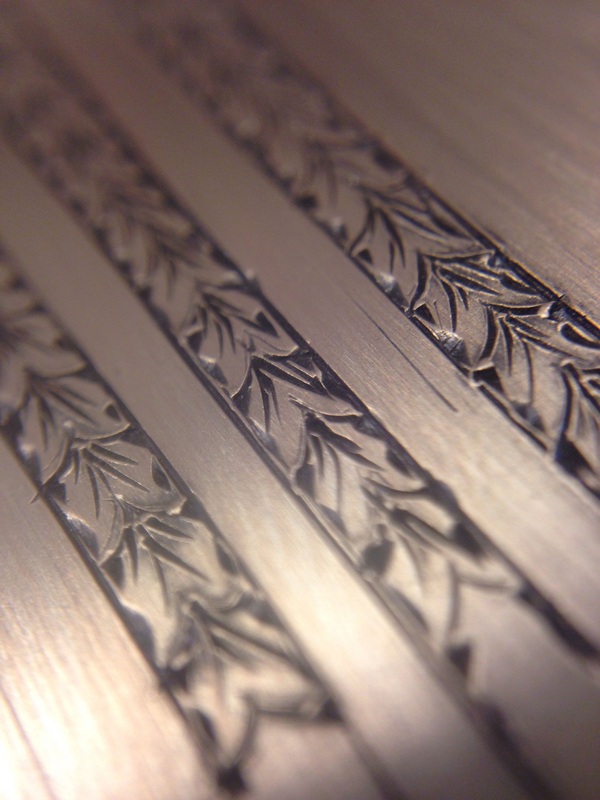
We spent a good amount of time just practicing basic cuts. These cuts then make up patterns. These patterns then become a design. It was satisfying to actually make a pattern. It felt like you got your drivers license and were able to go drive for the first time by yourself. While I accomplished the basic cuts, I still need lots of practice. Lots and lots of practice. Then add a few more years of practice. Luckily, I kinda love it. Ok, ok, I actually am in love with it. It's a skill I hope to utilize in my jewelry making and bring another element of texture. And I do love me some texture on jewelry. Seriously love texture.
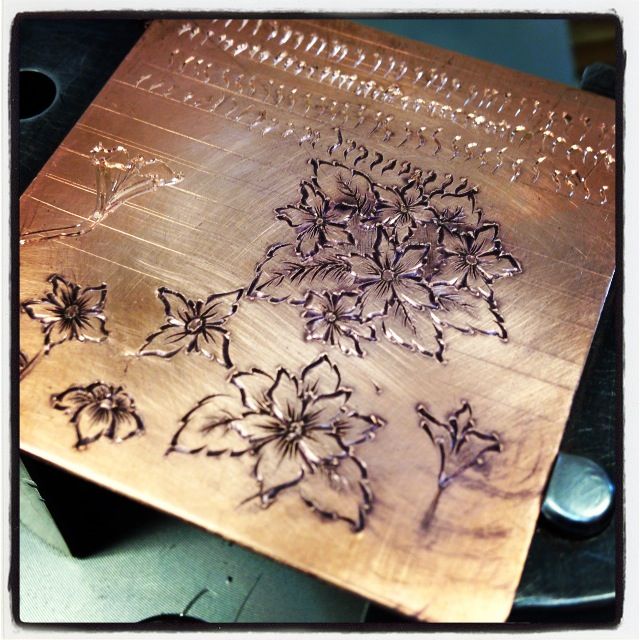
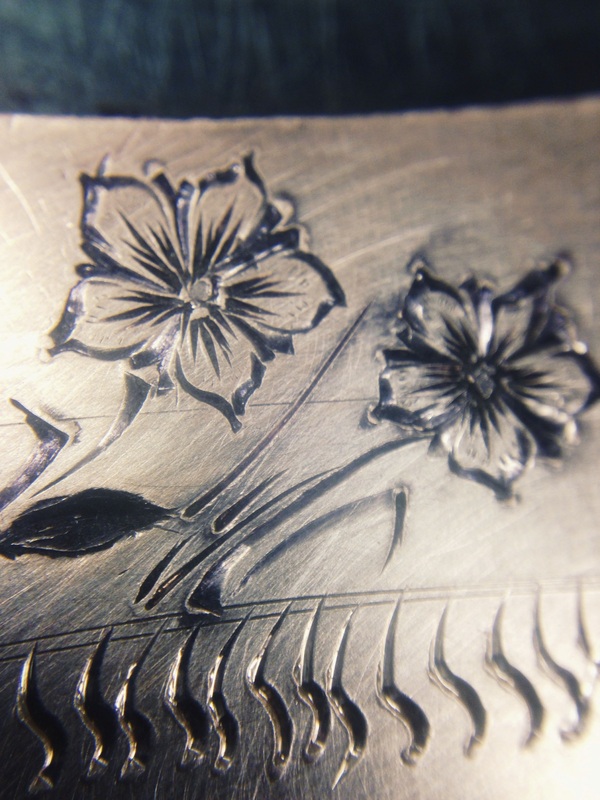
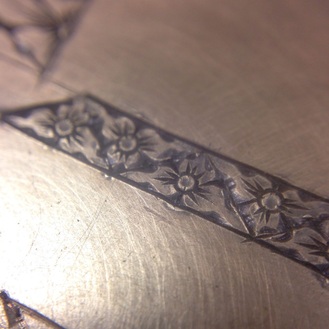
"Fava Flowers" with leaves and practice "S cuts" above.
After flowers came flowers in grid patterns. These were fun too and really eye catching. The pattern grid can be any shape and you just make the flowers fit the space. A nice skill to develop for those spaces that need something to "finish" off the engraving.
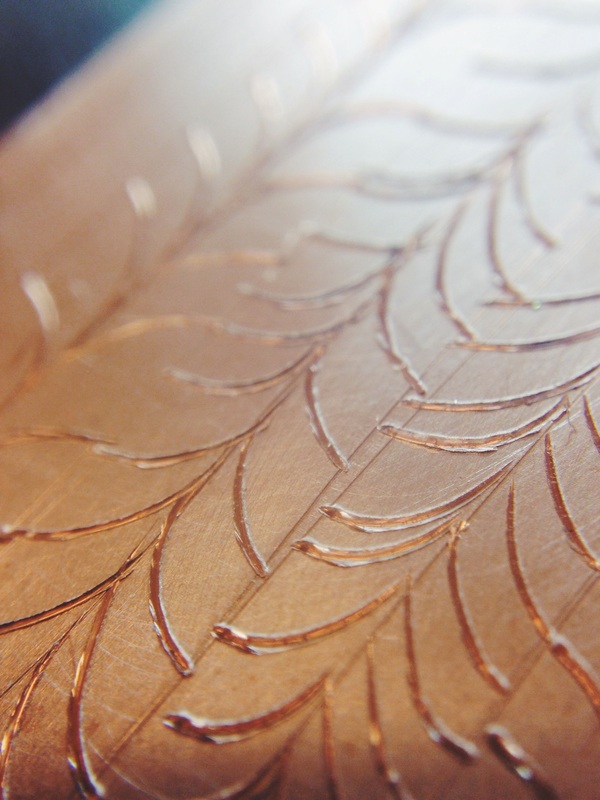
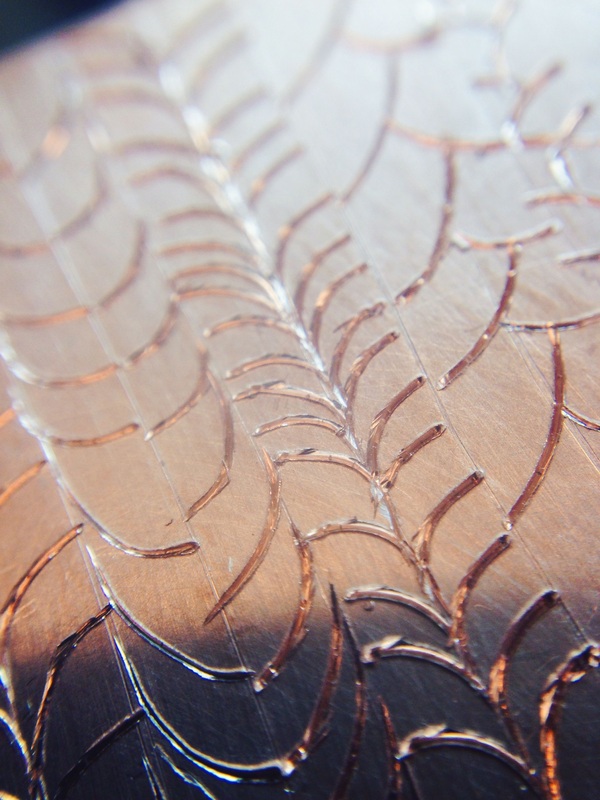
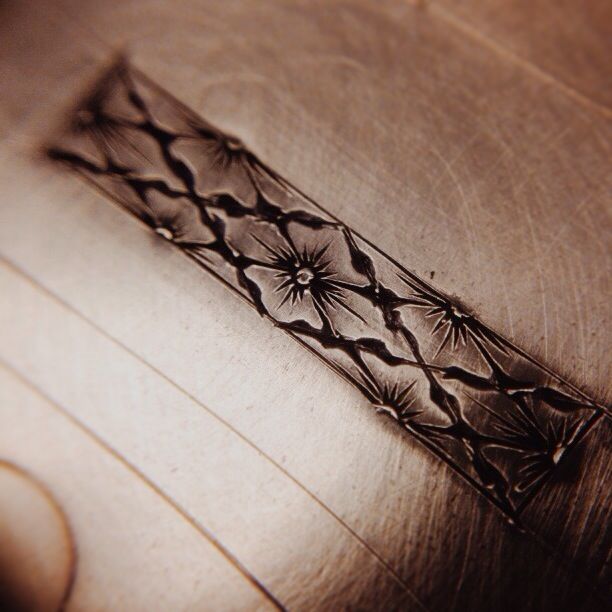
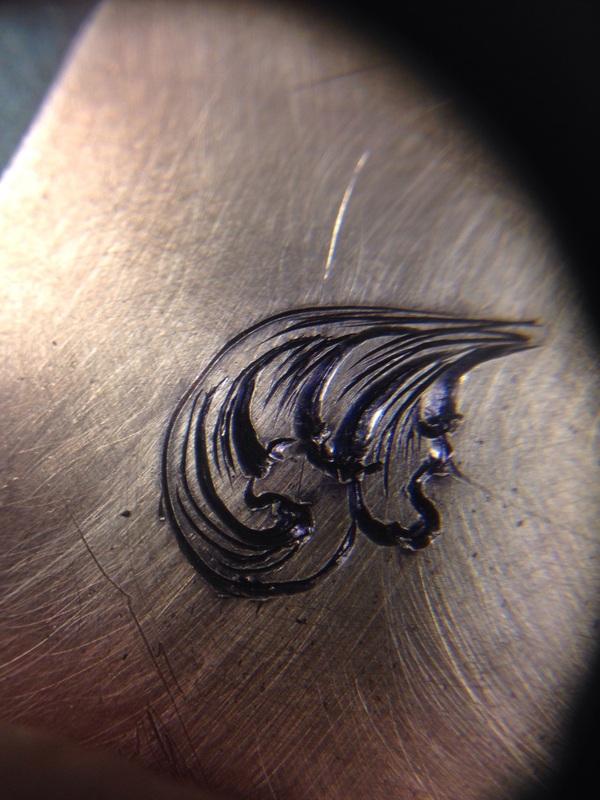
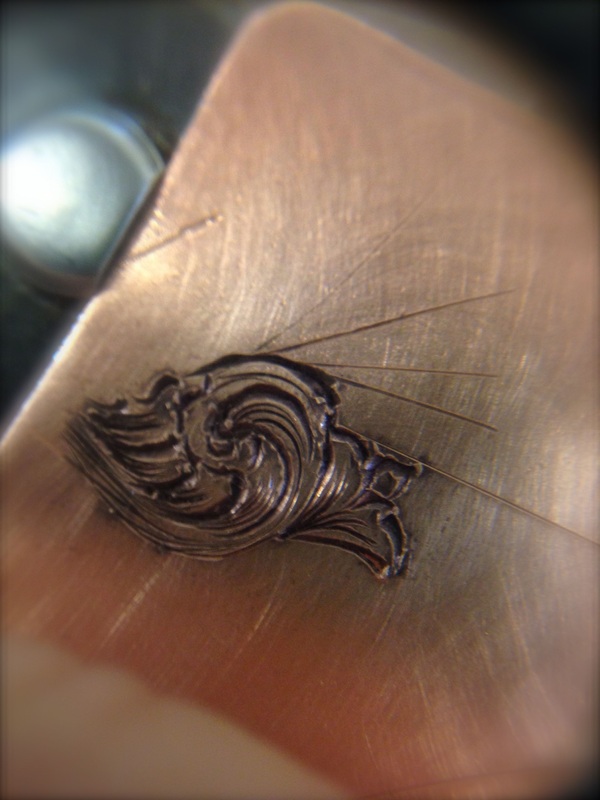
So the week is rolling along and I feel I am getting the hang of things. Even enjoying my self, putting flowers on all my test plates...and then came scrolls. Scrolls are hard. REALLY hard. First is deciphering the "code" of a scroll. Then to actually accomplish a scroll cut without "slipage." Then figuring out how to shade the scroll. It's complicated. It's frustrating, but the result can be beautiful. See >>>> http://jfava.com Lordy. I have a lot of practicing to do.
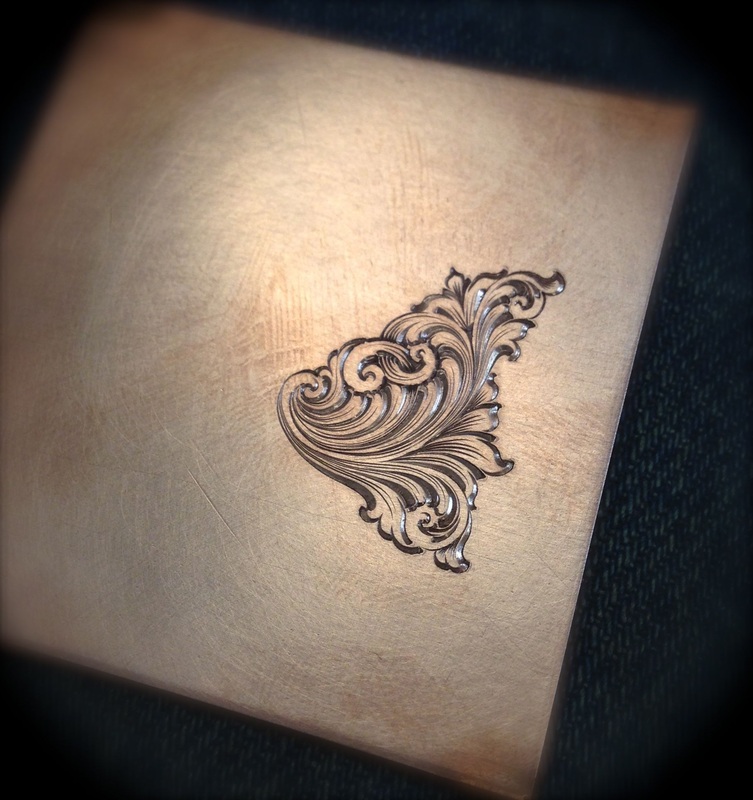
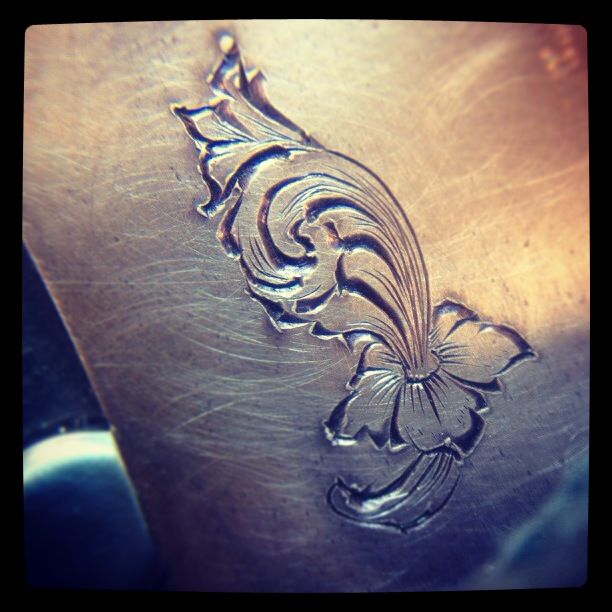
Example of the master engraver, Jason Machiafava, demo plate from class. Awesomeness. Beauty and perfection.
I ended the week by trying to do a leaf pattern on a silver ring. It was quite the challenge as you constantly slip when you are trying to engrave on a curved surface. I will continue to practice as soon as I get my engraving ball and microscope. I want to spring for a Lecia microscope, but not sure it is in the cards. Oh the tools. I am beginning to sort through the neglected tools I already own and see if someone else out there can use them. Our last three weeks are here! I am getting excited to put my skills to work. All of my super patient (and loyal!) clients that have been waiting for projects to get finished (or even started!) are the first priority to testing out the new skills! Thank you for hanging in there dear readers, peers, friends, family and clients through out my adventure.
Much needed fun time at Franklin's Annual Pumpkin Fest!
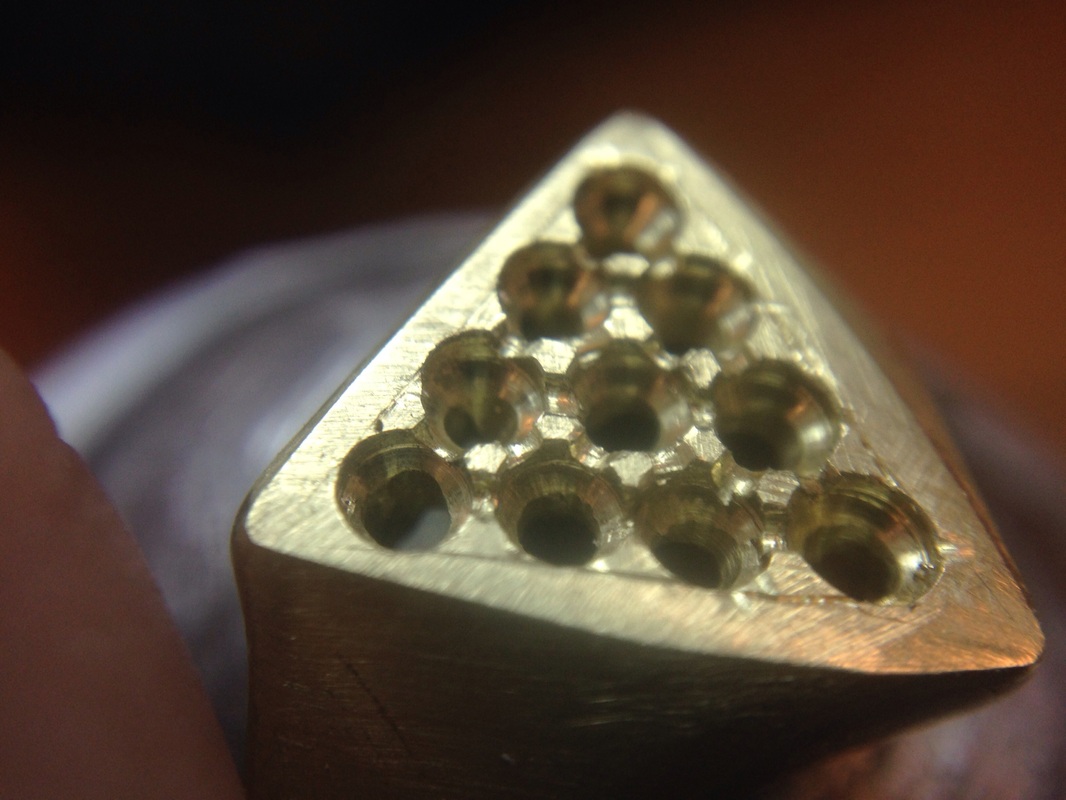
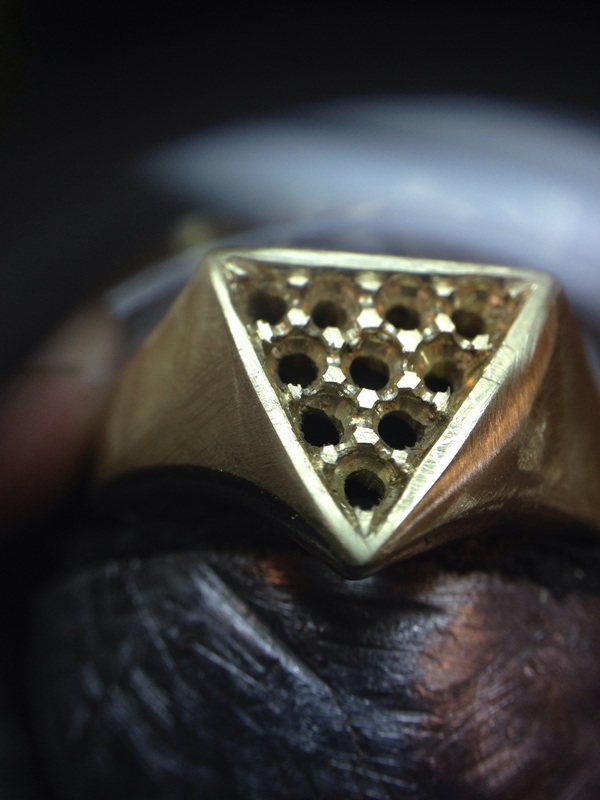
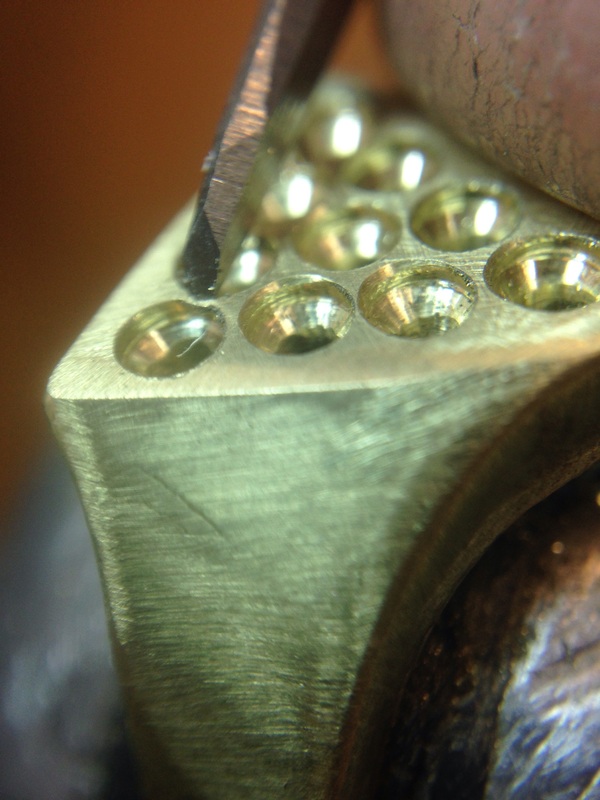
We've turned the 8 week corner and are quickly approaching the end of the road. It is amazing what we have learned. It's amazing to see the progress of everyone in the class. It is magical. There was a time in my life when I never thought I could pavé set, bead set, hand build a basket setting...Well, I can. I truly appreciate the teaching method that Blaine uses at New Approach School for Jewelers. I never found a book, video or school out there that can teach like Blaine is able to do in this program. You will learn, improve, refine, advance, push, excel in an extremely short amount of time. It's been an amazing experience and I am anxious to put my skills to work.
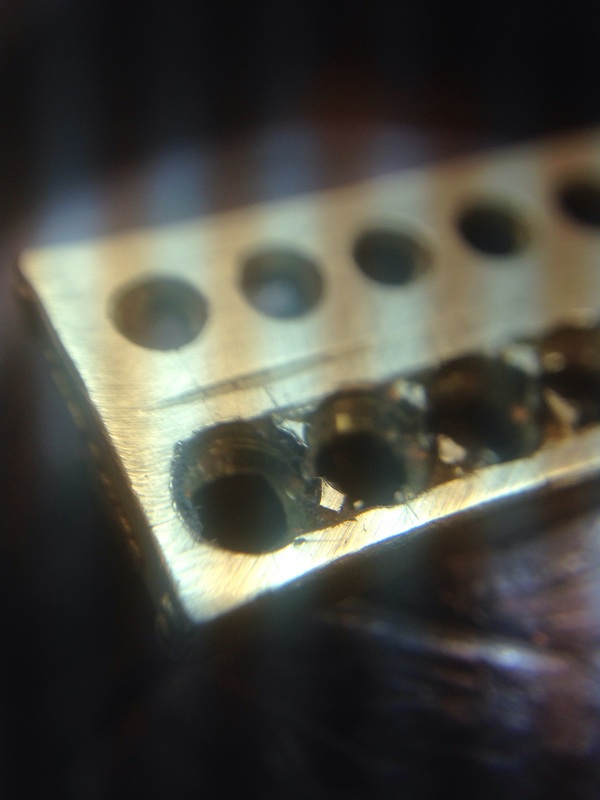
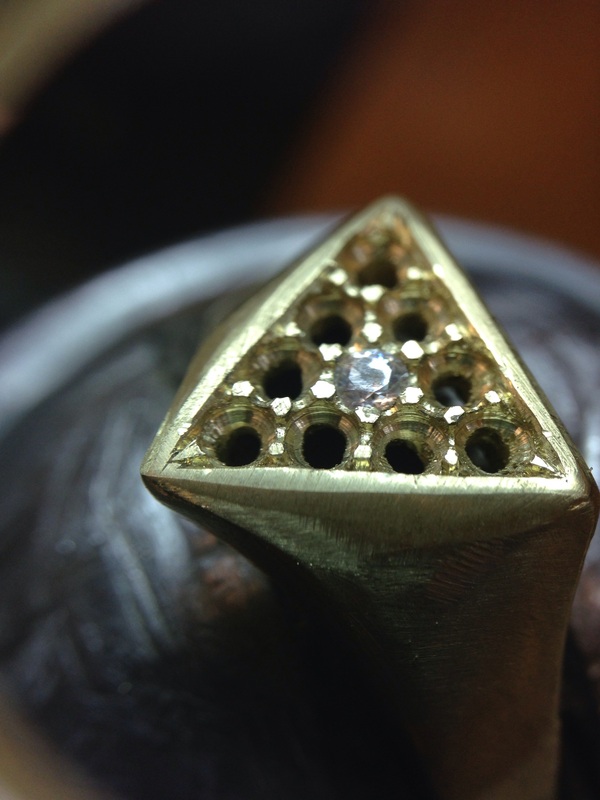
With a little free time in the clasp/hinge instruction, I finally finished my bead set-hand fabricated basket head earring side project. I had fun doing these and hope to have them for sale in my Etsy shop for the holidays! 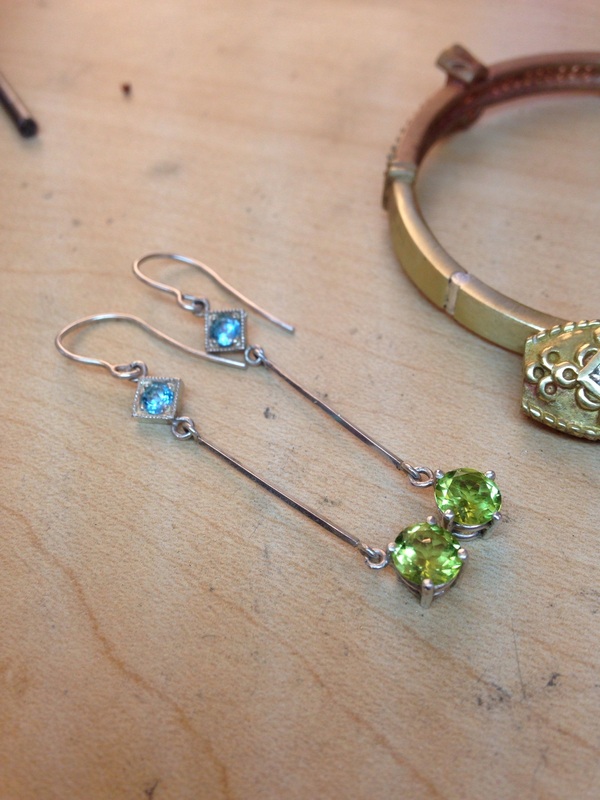
New Earrings!! Blue Topaz bead set at top with Peridot rounds in hand fabricated basket settings.
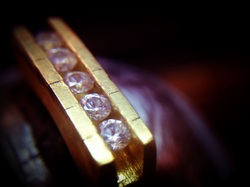
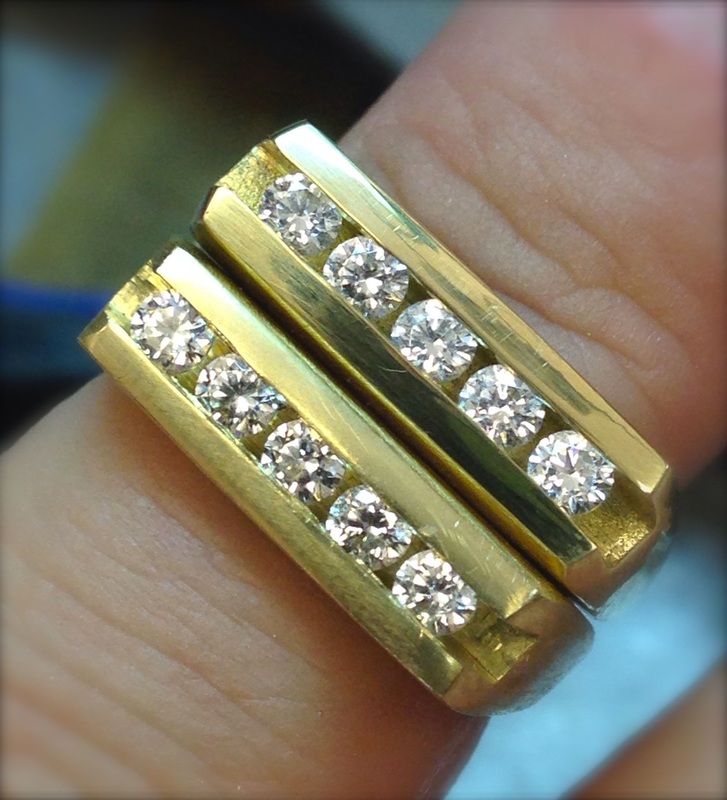
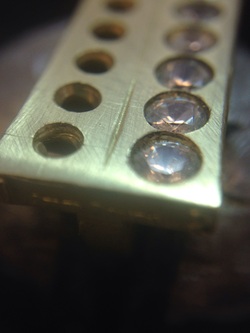
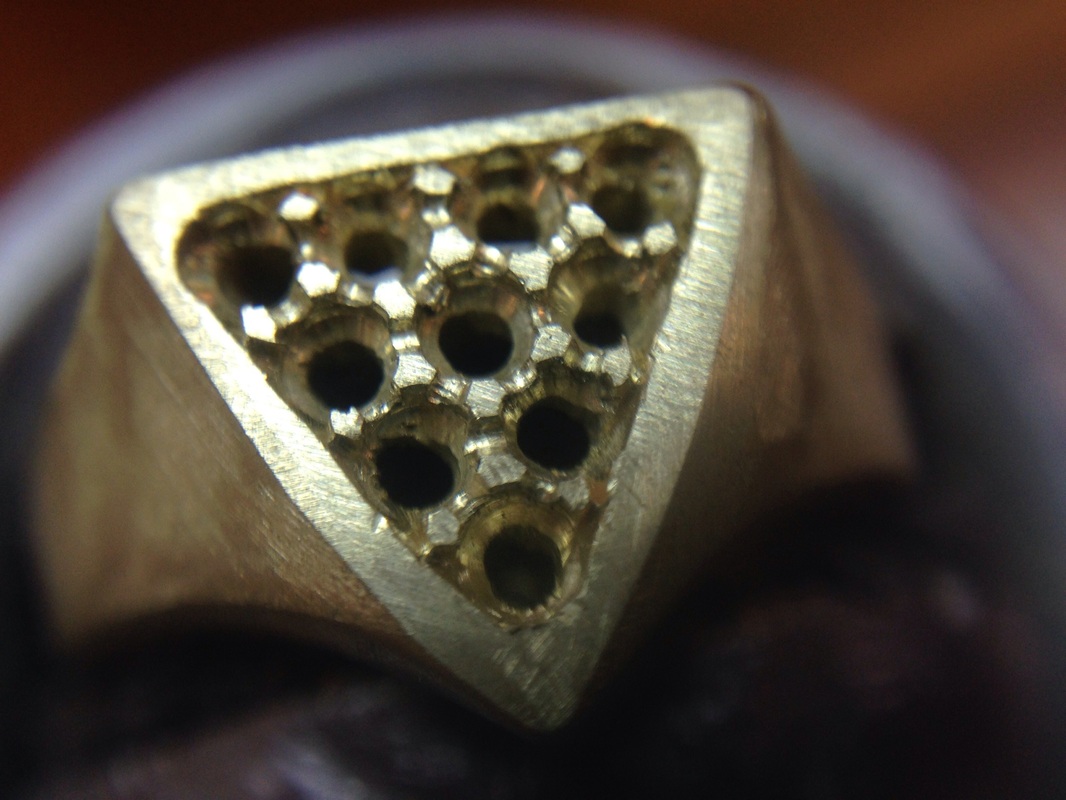
After all the beads were ready and all my stone seats were carved out, the process of setting stones began. You follow a criss-cross or zig-zag pattern to set the stones by bringing the metal over a stones edge and using a beading tool to make a round half sphere to give the piece a finished appearance. For my first attempt, I am pleased. I want to repeat this same layout a few more times to work out issues and challenges. 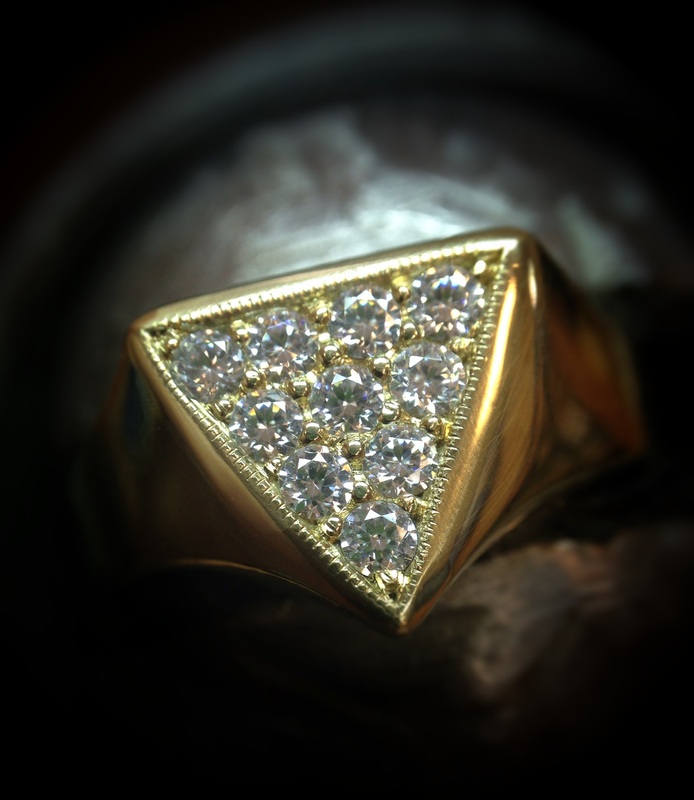
|
Renee FordMetalsmithing maven and mind behind Renee Ford Metals. I make the plain look interesting with fire, hammers & cool tools. Archives
February 2024
Categories
All
|