RENEE FORD METALS
  • home
  • shop
  • about
  • custom design
  • contact
  • set-it! instructions
  • hold-it! instructions
  • teaching
  • The Hammer and Anvil
  • the journal

the journal
occasional musings of my obsession with metal

​

NEW! Gravée collection

Potato, Poh-Tah-toe.

10/23/2013

5 Comments

 
"So it's pavé setting."
"No, it's thread setting."
"Then when you add migrain its pavé setting."
"No, it's thread setting."
"Everyone would call that pavé setting."
"But it's thread setting."
"But it is bead setting, right?"
"Yes. But specifically, it's thread setting, a type of bead setting."
"Regular people don't call it thread setting. They call it pavé setting."
"But it is called thread setting."
*Sigh*
"So what should I call it?"
"Thread setting."
"But no one will know what that means.  I wanna call it pavé setting."
"Potato-Poh-Tah-Toe. But you should call it what it is: Thread setting."
"Ok, fine. I'll call it thread setting."

Anyone that knows me, knows I like my information correct. I want to get my facts straight and clear.  I don't particularly take to blended foggy information or information that contradicts what I have been previously informed about (instert: doesn't like to be wrong, but will grudgingly admit when I am.)  Hence the conversation that took place this week. 

Week 7- Open Channel Setting

We began our week with open channel setting.  Stones all hanging out suspended between two sides.  Carefully, we aligned the stones and created their little seats and hammered them into place.  Simple but careful layout and attention to levels is needed to be successful.  The clean lines and sleek modern look of this setting has always been appealing to me.
Picture
Picture

Picture


The graver is an indispensable tool.  All of them.  Flat, round, onglette.  And the many more I have yet to pick up.  I love them.  I am not sure how I made jewelry without them.  The details are just lost without them.  I love them.  Did I say that already??


Picture


Graver control is crucial in getting this to work.  You need to know the proper type of gravers to use as well as how far to cut the metal with the gravers.  And you must keep them sharp.  Blaine uses a diamond coated sharpening plate at the bench to keep the graver sharp and adjusted for specific techniques.  It's quick and easy to use and less fiddling and musing happens than using a sharpening stone.


Picture

One slip up and you could blow your whole piece.  which comes back to the "patience" part of the process.  I enjoyed the process as much as the end result.  I am hopeful to get in more practice soon, as to be any good at pavé, I am going to need lots of practice.  Like hours and hours.  Maybe days and weeks.  Who am I kidding?  Probably years and years.  Who doesn't want to aspire to be half as good as Alexander Sidorov. 

Picture


Thread Setting

The conversation above was to clarify what this type of setting is called.  I personally have always called most all types of bead setting, pavé.  I know there are differences: plate set, bead set, pavé set but I had never heard the term "thread set."  So.  It's bead setting in a row that has shared beads for setting. Don't call it pavé.  Cause it's not.  We all clear on that?  Good. 

The practice plates are set up for us to quickly learn and concentrate on the task of learning the setting versus messing with certain elements a design may have.  They are great tools to get the basics down.  I kinda love my little plates.  I'm a bit attached to them.


Picture

Pavé Setting

I was so excited the night before pavé setting, that I couldn't sleep.  Seriously.  I never thought that I would have the skill level to even attempt this type of setting.  It is crazy precise and detailed.  But I do.  And I did.  It was so much frigging fun!!  I now want to pavé EVERYTHING.   It is very time consuming and requires patience but it really can add a look that no other type of setting can.  It means "to pave" as in pave it with diamonds.  Um, YES!  I will be paving anything and everything.  Well most anything...maybe not this.  But ya' never know!

Picture

Picture

Picture

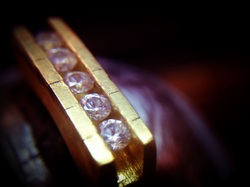
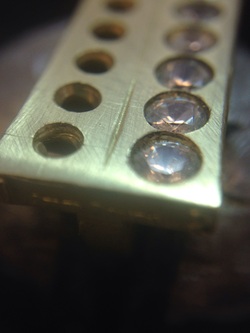
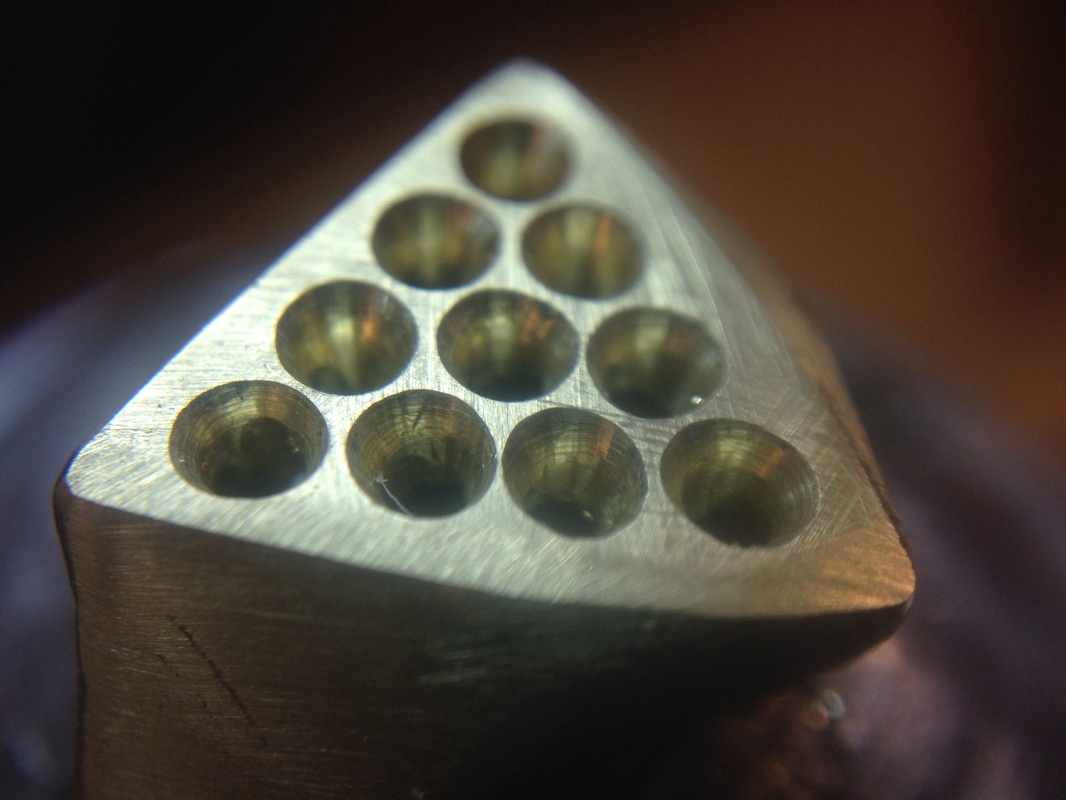
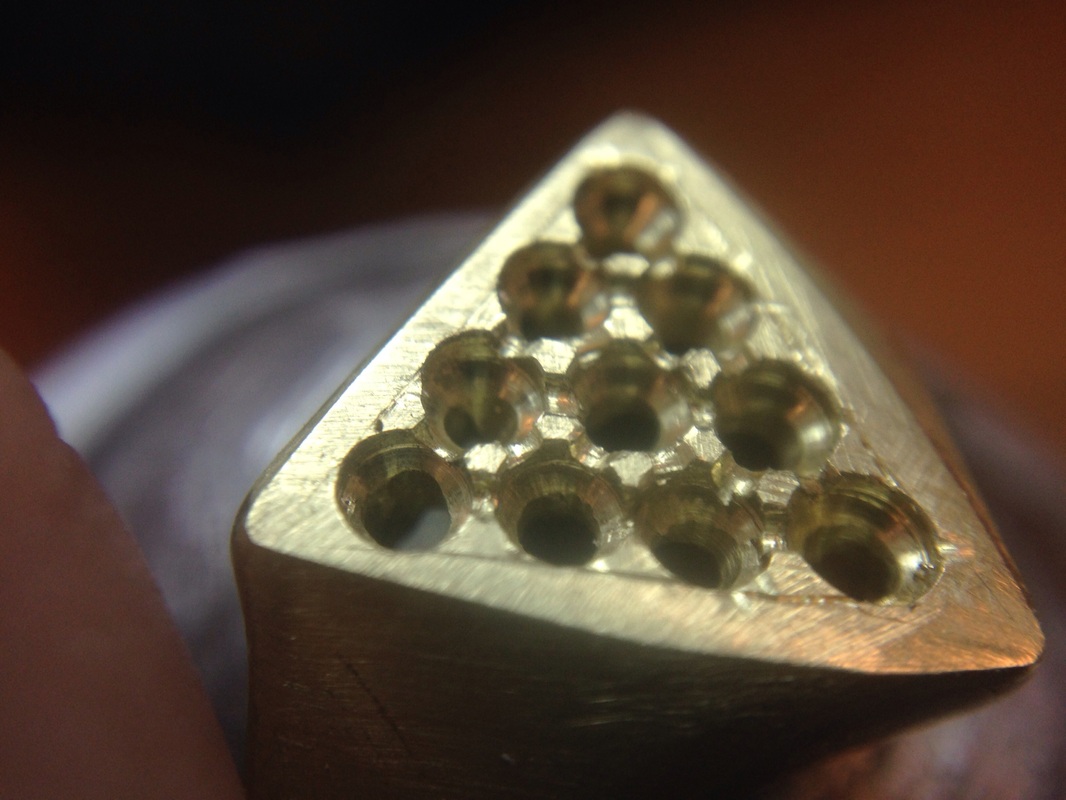
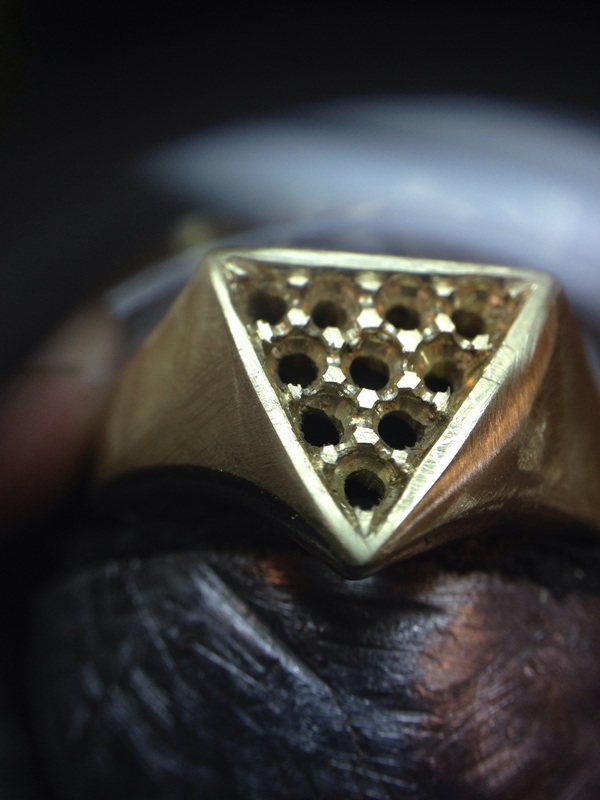
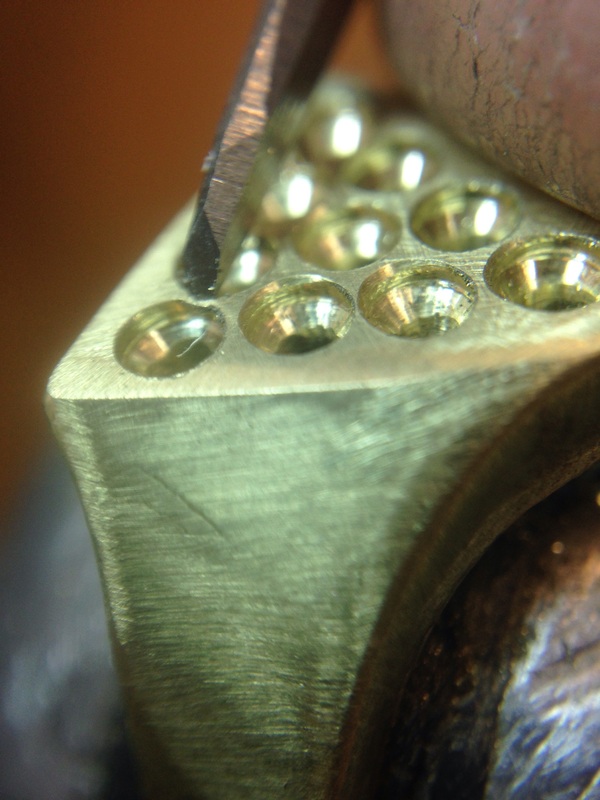
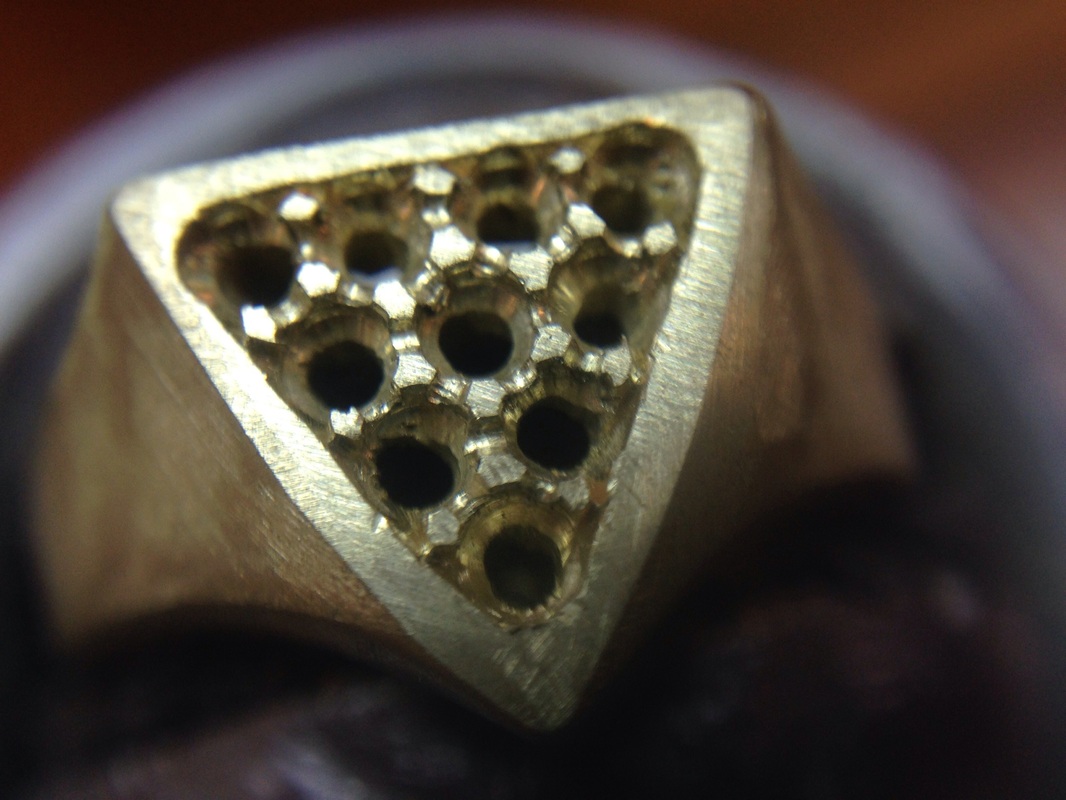
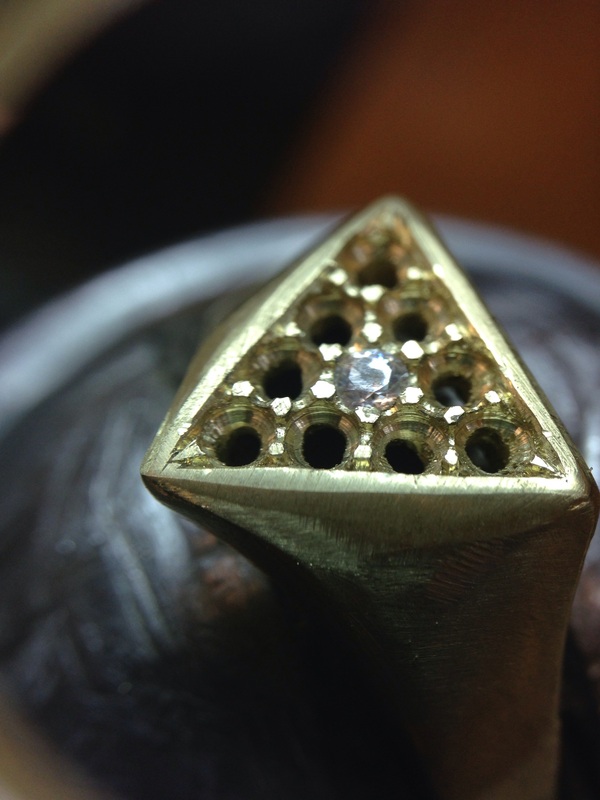
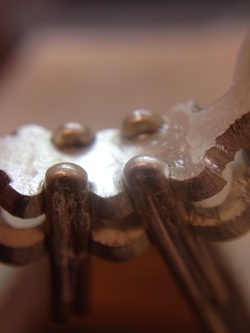
After all the beads were ready and all my stone seats were carved out, the process of setting stones began.  You follow a criss-cross or zig-zag pattern to set the stones by bringing the metal over a stones edge and using a beading tool to make a round half sphere to give the piece a finished appearance.  For my first attempt, I am pleased.  I want to repeat this same layout a few more times to work out issues and challenges. 
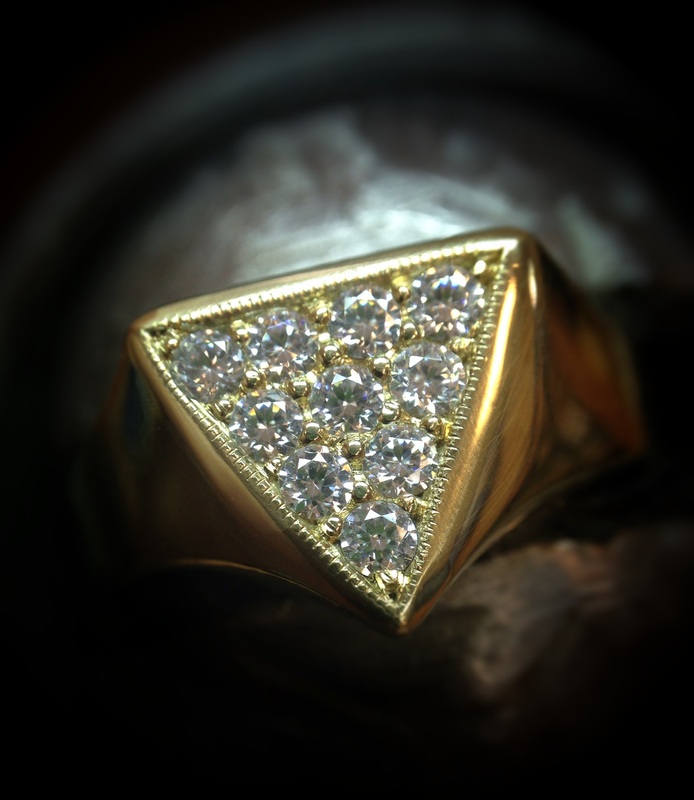
Picture

Picture


Oh yeah.  And we set this.  And then retipped it.  Sweet.


We completed the 7th week. Wow. Time is flying by.  I am excited about the next few weeks: more advanced stone setting, more hand fabrication, ENGRAVING!!!!! and a few other fabulous things to keep us on our toes.  Can you tell I am excited about engraving??  Beyond belief excited.  Weeeeeeeeeeeeeee!
5 Comments

Sometimes I paint...

10/13/2013

7 Comments

 
Picture


Yes it's true.  I like to paint too.  During one of my "Mommy needs quiet time" moments, I decided on a pet portrait of one of the most adorable dogs, Taco. (Instagram: frenchtac0 follow him.  You won't be sorry.) He's a French Bulldog and so friggin' cute.  It was nice to let my mind wander from jewelry...

Week 6

But back to the jewelry...We pretty much worked on stone setting all week.  It was a bit of a "meh" kinda feeling for me after the "Big Project" ring last week.  I wanted another.  Instead we set.  And set.  And set.  Much of it was fancy shapes: princess cuts, marquise cuts. The exercise of setting the stones was very informative and I learned a ton about effectively avoiding breaking the fine tips of pointed stones.  The "pocket" or "parking garage" are key in making a space for the tips.  I've set a few princess cuts and pear shapes over the years but really got a clear picture of how it is actual done. 
Picture
Making a parking garage for the point of a princess cut.

Picture
Crabby McCrabby.


Marquise cuts were on the menu, much to my dismay. Marquise cut (aka: Football or eyeball) aren't really my favorite cut.  Actually I kinda think they are fugly.  Yup. Fugly.  The v-tip prongs with the four standard prong setting pretty much looked like a crab.  It made me a little crabby to be setting the marquise all day long. *Snort* Even with the lack of enthusiasm on my part, I finished them up and learned some very practical details.


The middle of the week a little milgraining practice was thrown in.  I love milgrain.  I want to milgrain everything.   It's kinda like "bedazzling" but on a micro scale.  It makes it all sparkly!! 

More setting: a semi bezel, teeny bezels, marquise bezel and oval basket head settings (to prep us for setting our "Big Project" ring.)  
Picture
Milgraining. It is in the details.

Picture
Bug eyed from setting.


With all of this stone setting going on, I began to get a little bug eyed from all of the micro vision.  Lots of breaks and giggles from my bench neighbor, Nick, were helpful in keeping me entertained.  


Picture
Nick, the funniest awesome-ist bench neighbor a girl could ever want.

Picture
Week 6 projects.


The week rounded out with another bench test.  We half shanked a ring, set and polished a ring and made a chain repair.  We had about 1 1/2 hrs to complete.  I think it went well for everyone and the tension was much less than our last test, er, timed exercise.

Picture
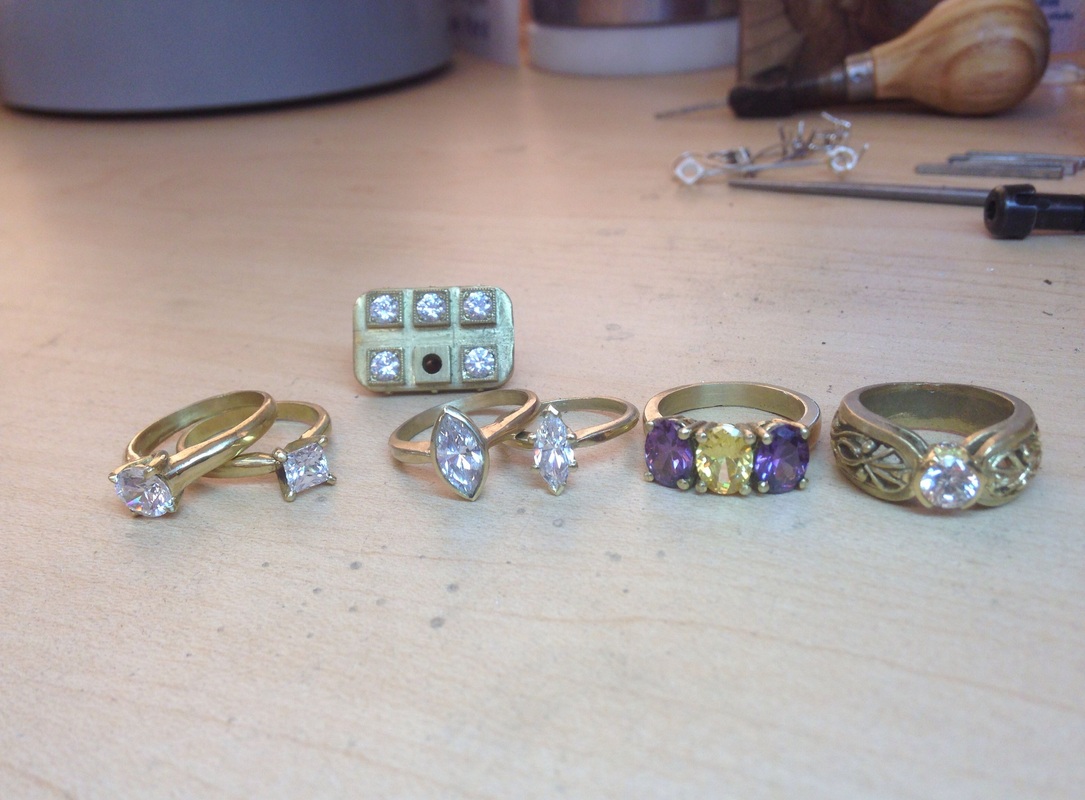
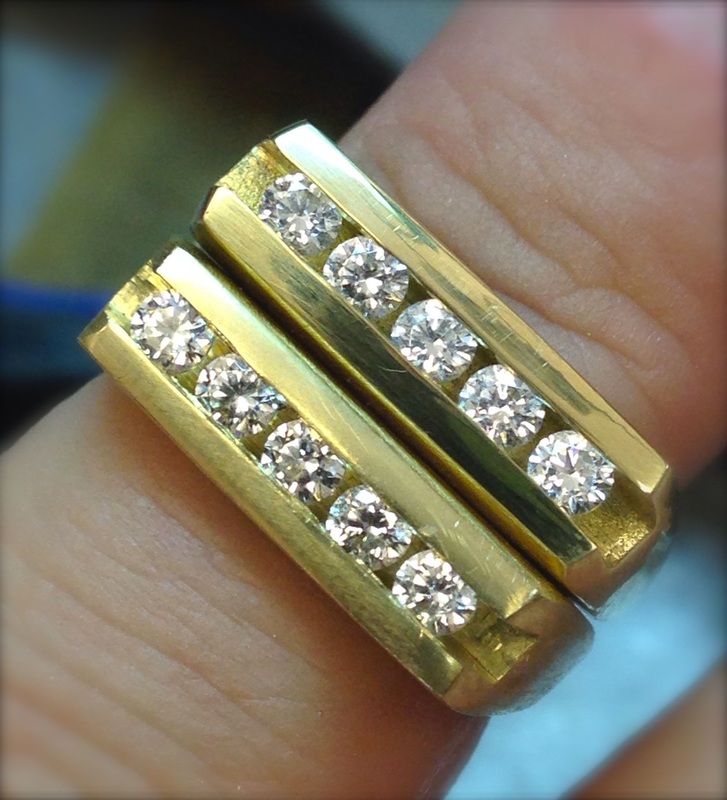
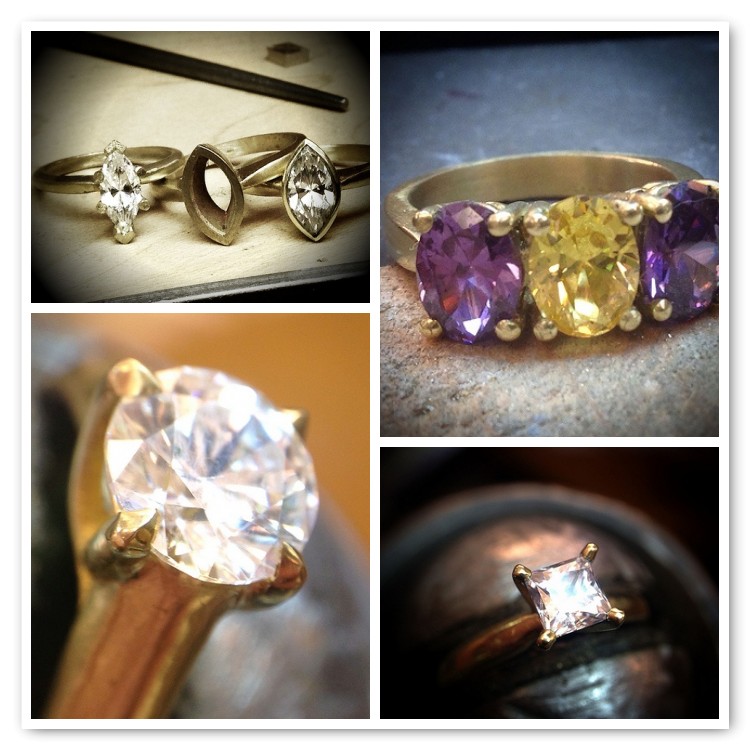
Week 6 projects (minus our bench test pieces.)


After spending all day, every day at the bench during the week, I find it difficult to sit at the bench much on the weekends.  With the holidays around the corner, I have got to get some new product in my Etsy shop.  A moissanite rose gold wedding set and a two tone gold ruby ring were finished and are soon to be listed for sale!  All that stone setting came in handy!  These were a breeze and much cleaner than BB (Before Blaine.)
Picture
New work!! Soon to be listed at http://panicmama.etsy.com
7 Comments

The "Big Project" Ring

10/7/2013

32 Comments

 
Picture
Upper gallery beginnings.
Week 5

5.5 days.  49.5 hours.  2970 minutes.  178,200 seconds.  All spent on this ring.  Well, ok, maybe I went pee once or twice and maybe I ate a Chick-fil-a sandwich and had cupcakes (yes, plural, don't judge me) to celebrate Christina's B-day.  But realize, this is pretty much all we did this week. 

We began last Friday with the shaping of the plates for the three stone oval ring and the layout of the top gallery. Monday morning began the rest of the story...


The upper or top gallery was established first.  We cut out our layout pattern to stone size and left guides or arms to help us hold the piece.  The stone size is 8x6mm oval faceted stones.  I was using CZ's to establish sizes, while deciding which type of real stones I wanted to set into the finished piece.
Picture
Pretty oval upper gallery.

Picture
Brick for spacing galleries.


Little "bricks" were added to establish the spacing between the upper and lower galleries.  The bricks helped keep spacing between the galleries while we attached the wire prongs.


The top gallery was then soldered on.  Carefully we cut out the lower gallery to taper in from the upper gallery.  The lower gallery outer shapes we established and then clean up of the outer ovals to perfection.  It really was beginning to take shape. 
Picture
Soldering bondage. 50 Shades of Jewelry.


Each step was explained with care and diligence to make sure we understood the exactness and care that is needed to make this come together.  The huge 3 screens are a huge help but can also drive you nuts!  I want to be able to see everything at 150 times magnification.  Obviously, my eyes can't do that.  Even with a loupe or microscope.  Using a loupe has changed my jewelry making world, but a microscope is in my near future.  I just can't see myself wanting to create without one. 
Picture
Upper and lower galleries cut out and shaped.

Picture
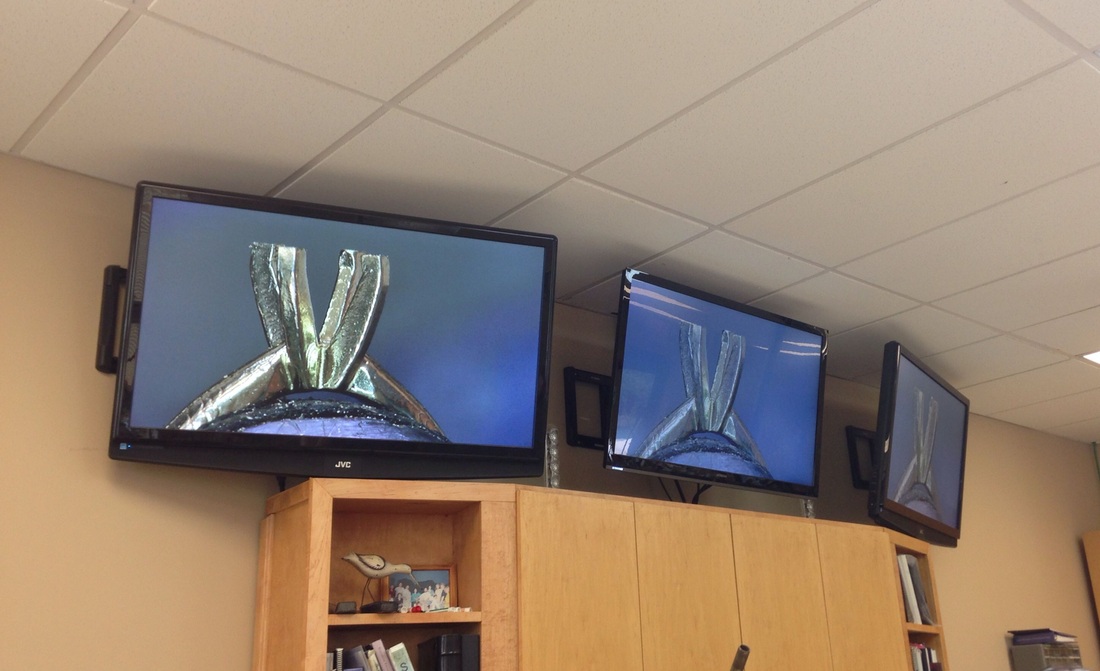
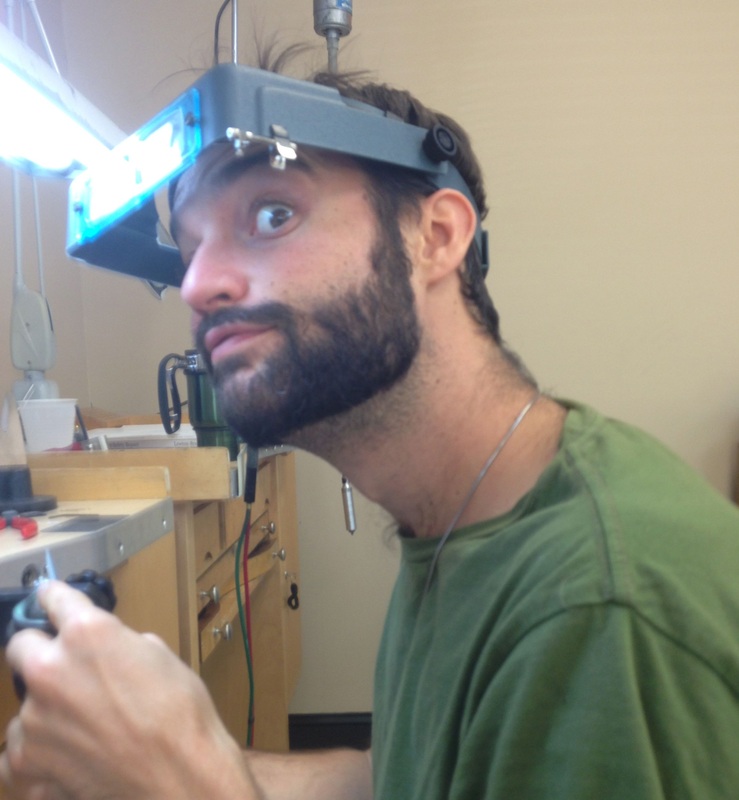
Large three screens 150 times magnification is awesome. But drives you crazy too.

Picture
Under side of prongs being attached to lower galleries.


Next came careful filing of grooves for prongs to be applied.  This part kinda bummed me out.  My perfect little ovals now were all indented with slots for prongs.   Once the prongs were attached, I was less annoyed with them, but I was a little pissed they invaded my ovals.  Little buggers.


Prongs in place, a little magic clean up and we were ready to start the shank.  Well, ok.  Maybe the prongs didn't go that smoothly.  This point really was a critical step.  One wrong move and your ring goes to shit.  Prong angles and alignment are crucial to have the ring look proper and balanced.  Gaps, off angles, wonky attachment... all can pose problems with the end product.  I resoldered one prong three times and another twice.  Frustration could be felt in the air in the classroom.  It was thick as pea soup.  And honestly, who really likes pea soup?  Bleh.
Picture
Prongs attached and in their proper place.

Picture
Tapered shank.


Day 4 on the ring we created the shank for the ring.  The shank began as an ingot that was then was pulled into square wire.  The square piece of wire was grade rolled down into a taper.  Once the shank took shape and finger size was established, it was time to cut throats in the sides and attach the pieces together!! YAY!  The "Big Project" was finally coming together.


Careful alignment and angle adjustments are required for a well executed fit of heads and shank.  We learned way back in week two how to attach a shank and three stone head together.  I had lofty ideas of adding side bezels and all kinds of other foofy additions. But in the end, I just wanted to keep it simple.  I could get fancy pants with my next one. 
Picture
Shank and head assembly.

Picture
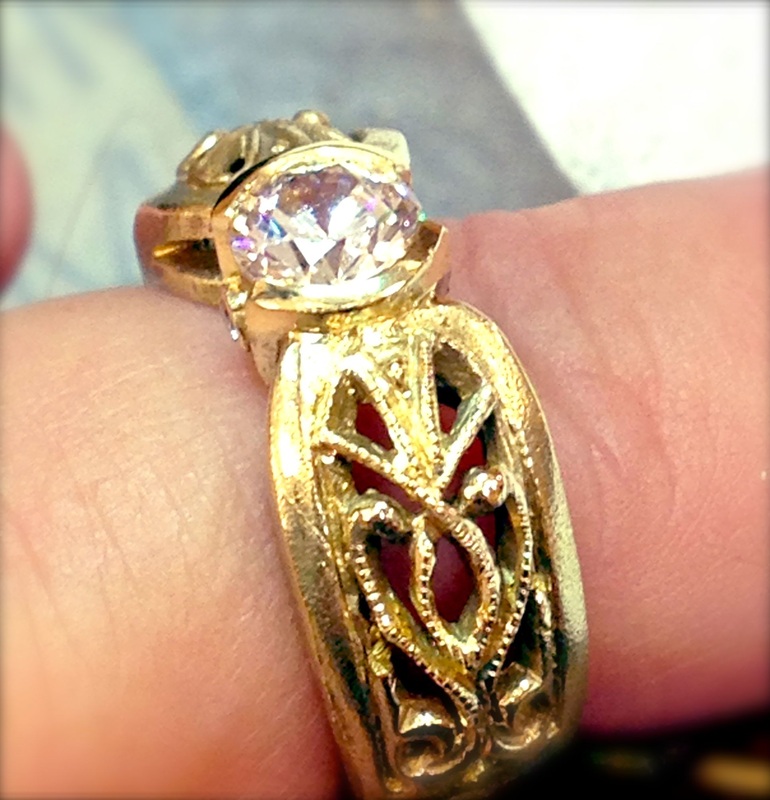
The "Big Project" Ring complete. Sorta.

String polishing (thrumming) and final polishing to get the ring all gleaming!  Anxiously awaiting the stone setting part, we were informed that we would not be setting at this point in time.  Huh?  That is like saying you can have cake but not the frosting!!  Not. Fair. Groan.

I never really have been a fan of prong settings. I now have a new appreciation for them.  Especially hand fabricated ones.  I find myself looking for new ways to incorporate prongs into my own designs.  I think this could be an interesting adventure, Mr. Prong.  You and I could become friends.  Let's see where this journey takes us...

Picture
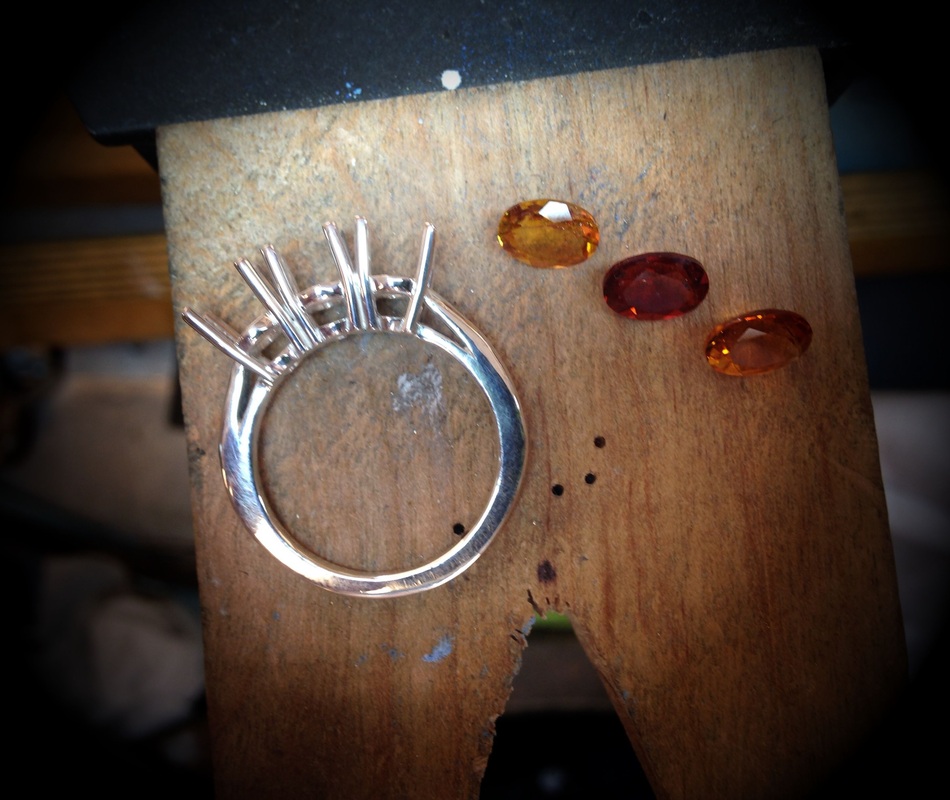
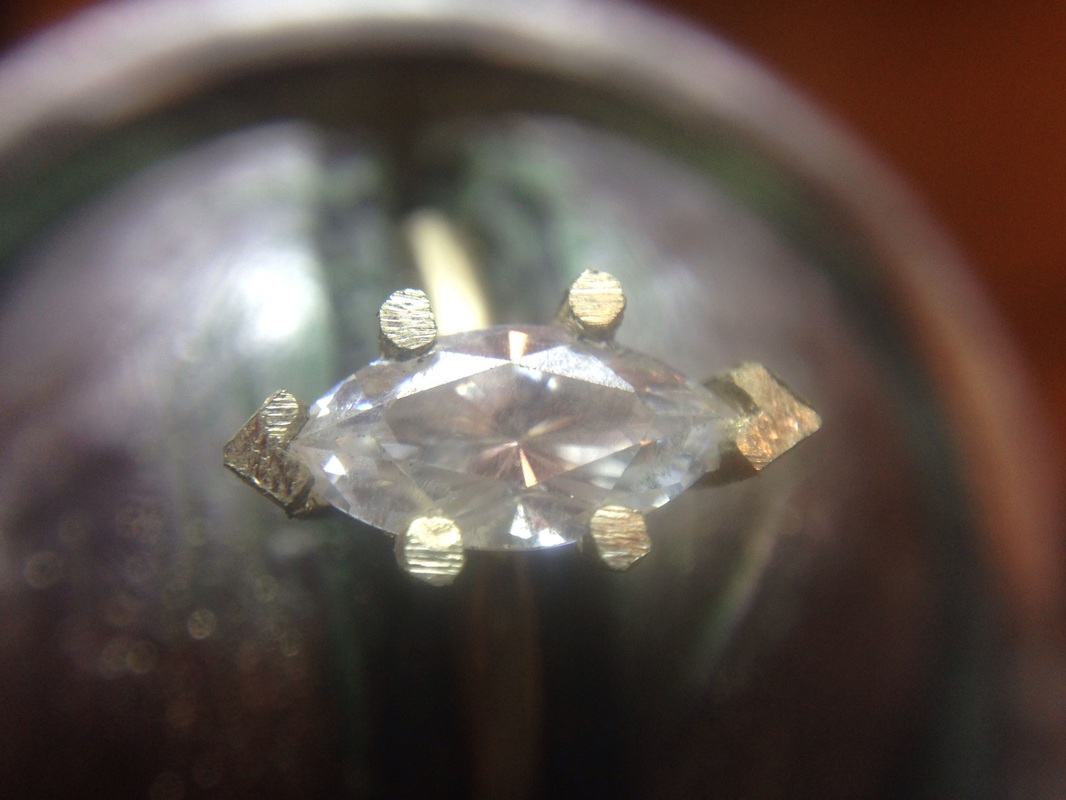
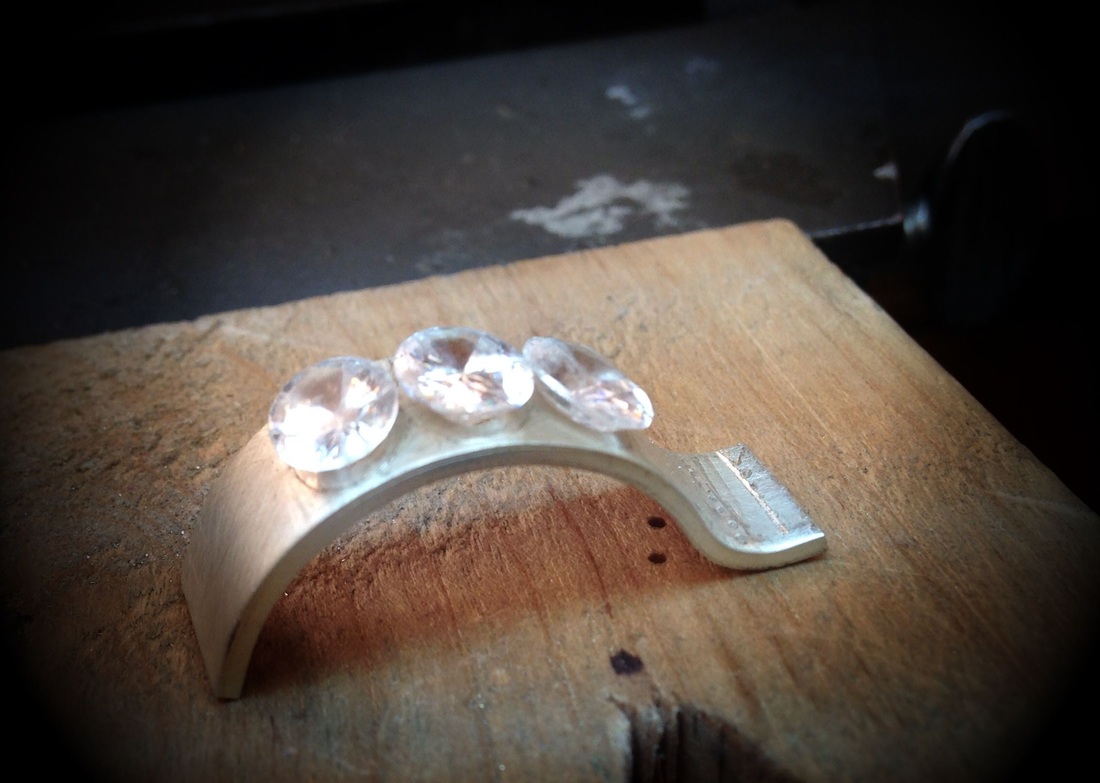
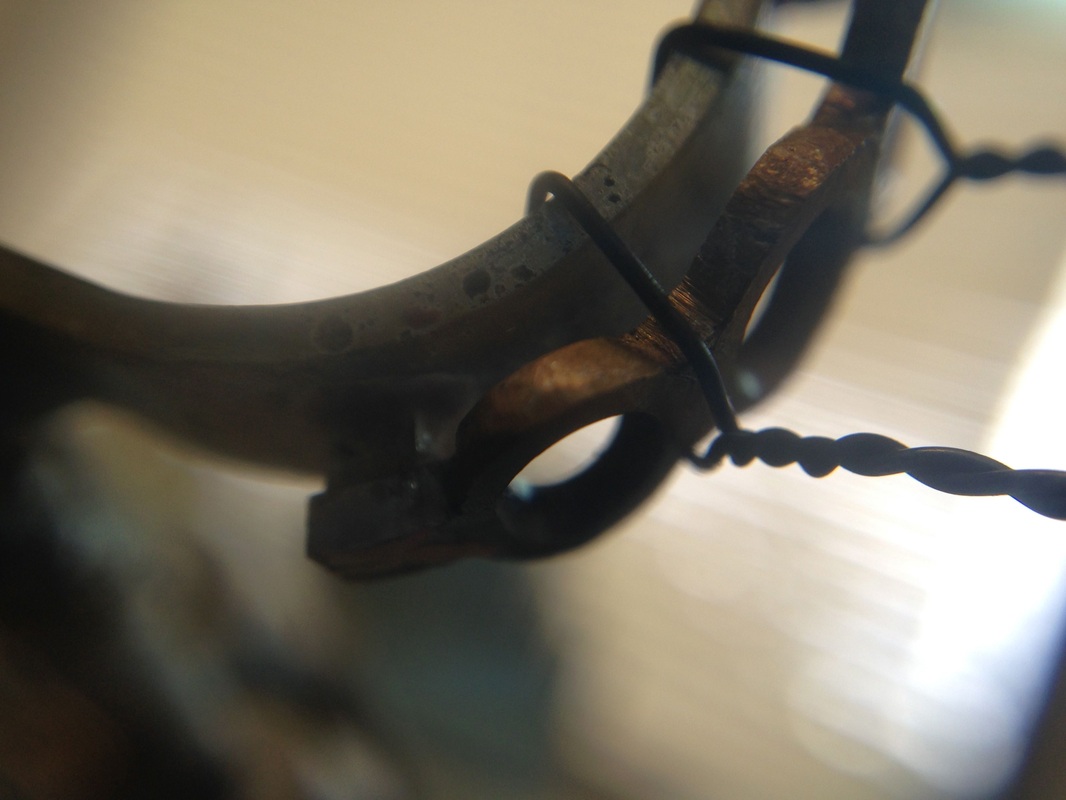
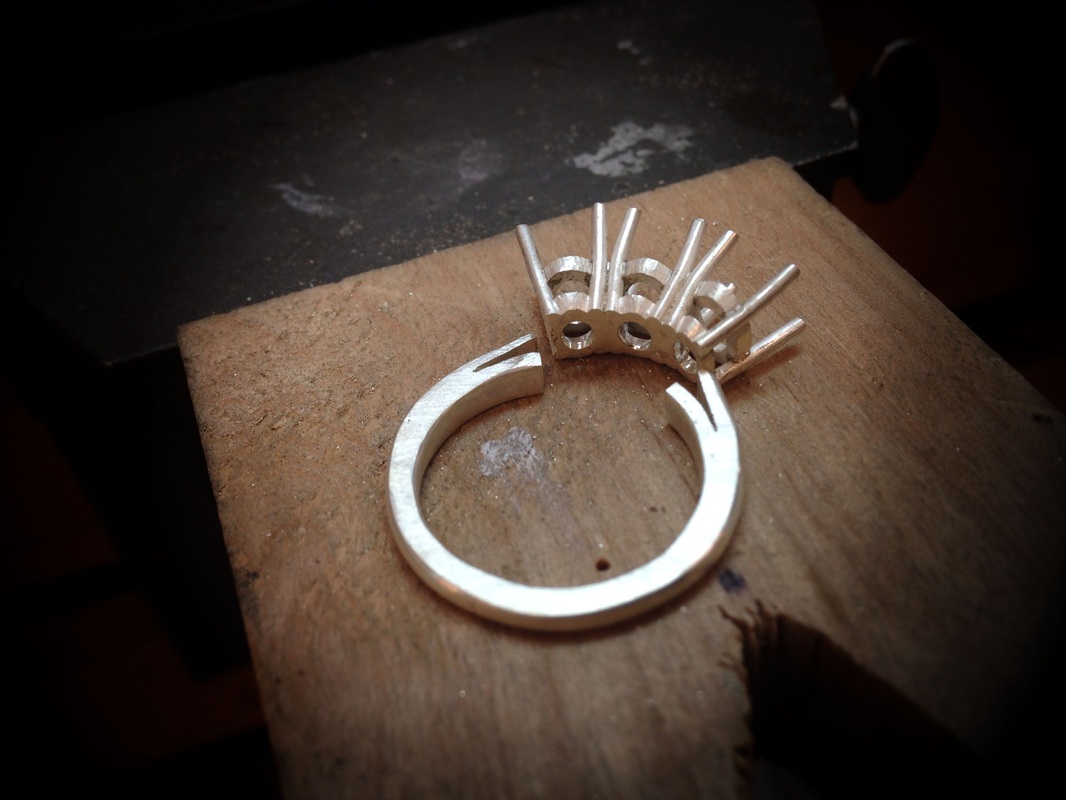
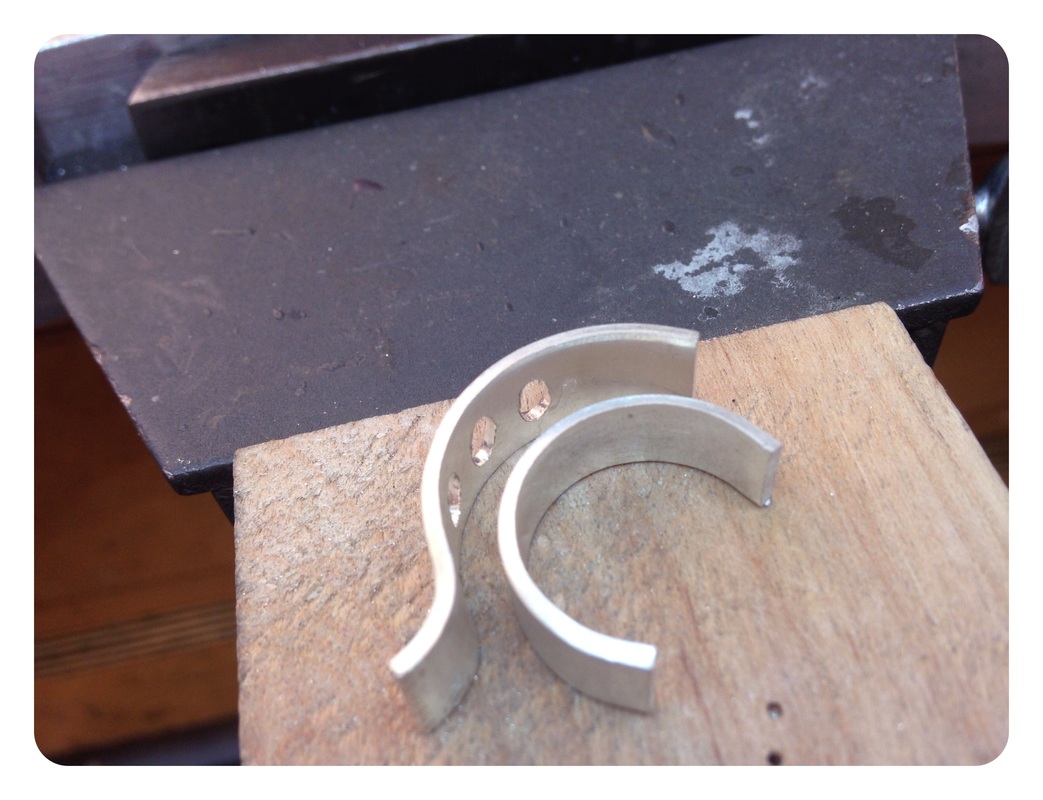
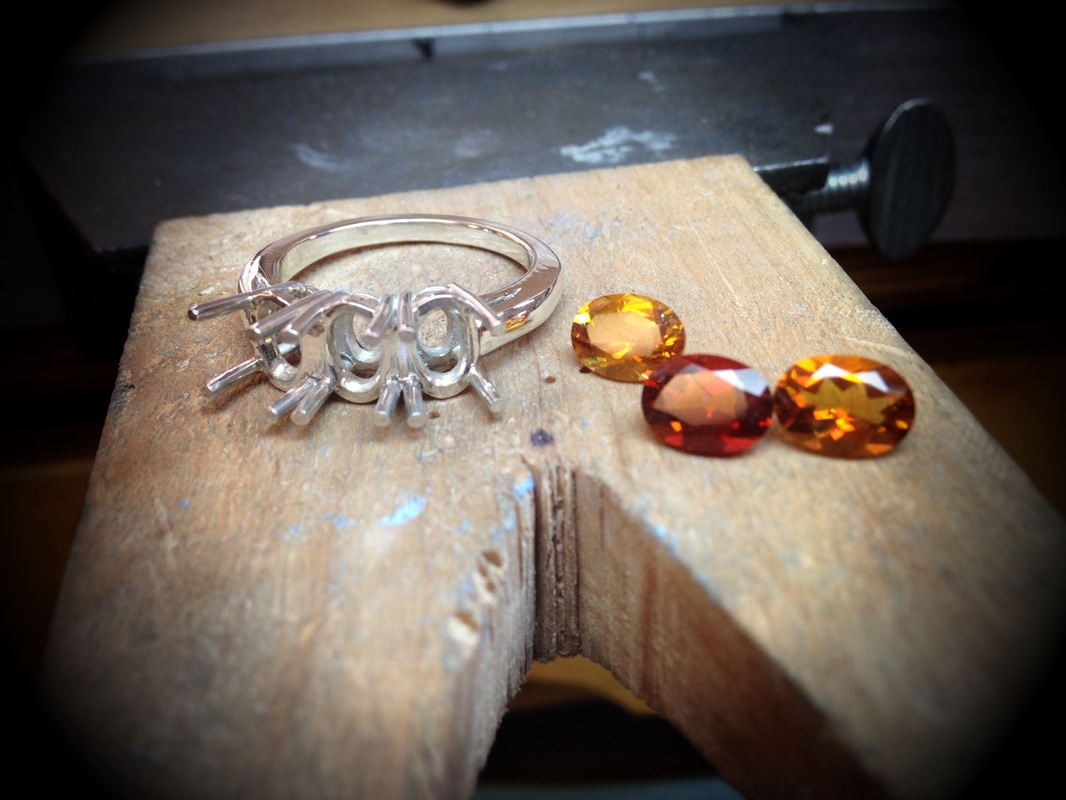
Side view of three stone oval ring with the gems that will be set. Eventually.


32 Comments

Tisket a tasket, gotta make a basket head?

10/1/2013

0 Comments

 
From scratch?  Like by hand?  Lordy.  I like little things.  Obviously, been obsessed with them since I was little.  If it was a miniature, I coveted it.  Making itty bitty, teensy weenie, little things are another matter.  I have successfully been making little things, because, hello?  I make jewelry.  But a hand made basket head?!?!  Gonna break me.

Jump rings.  No problem.  Now we have to file them with little grooves.  That are even.  That match.  And have the perfect angle to them...well ok then.  An hour later, I have what is acceptable.
Picture
Picture
A double secret method to assure prongs attach, and viola!  Basket head!  Blaine announces, "Now make one that matches."  Luckily the second one went much quicker.  A pair was born.

Picture
Picture

Three Stone Ring

This project leads us to the first "big" project of the course.  A hand built three prong oval basket style head ring.  The time estimated is 4-7 whole class days spent making it.  Woah.  That is a ton of time on one project. We start with simple strips of silver and magically we  transform them into plates for the three stone galleries.  Holes are drilled, top gallery has started to take shape.  Day one on the "big" project complete!  Next week is gonna be a doozie!  Open studio time on Saturday!! WooHoo!  Working on a pair of earrings made out of that pair of basket heads with a matching pendant.  Take a peek below at their beginnings!
Picture

Picture
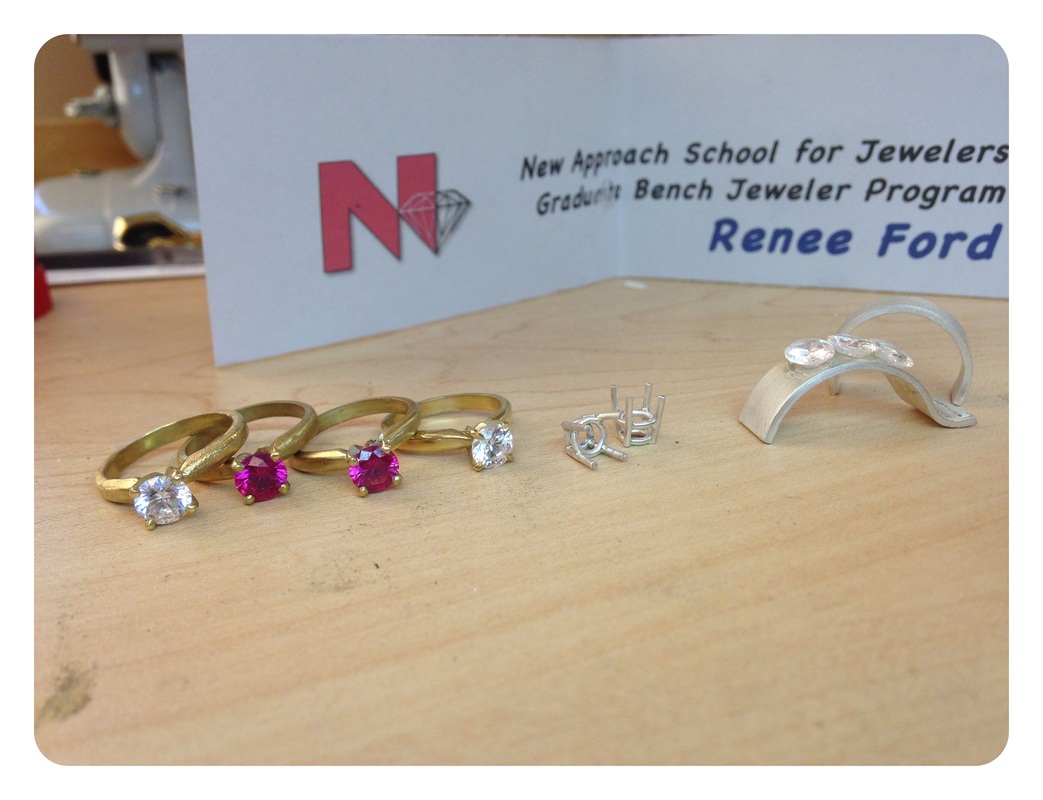
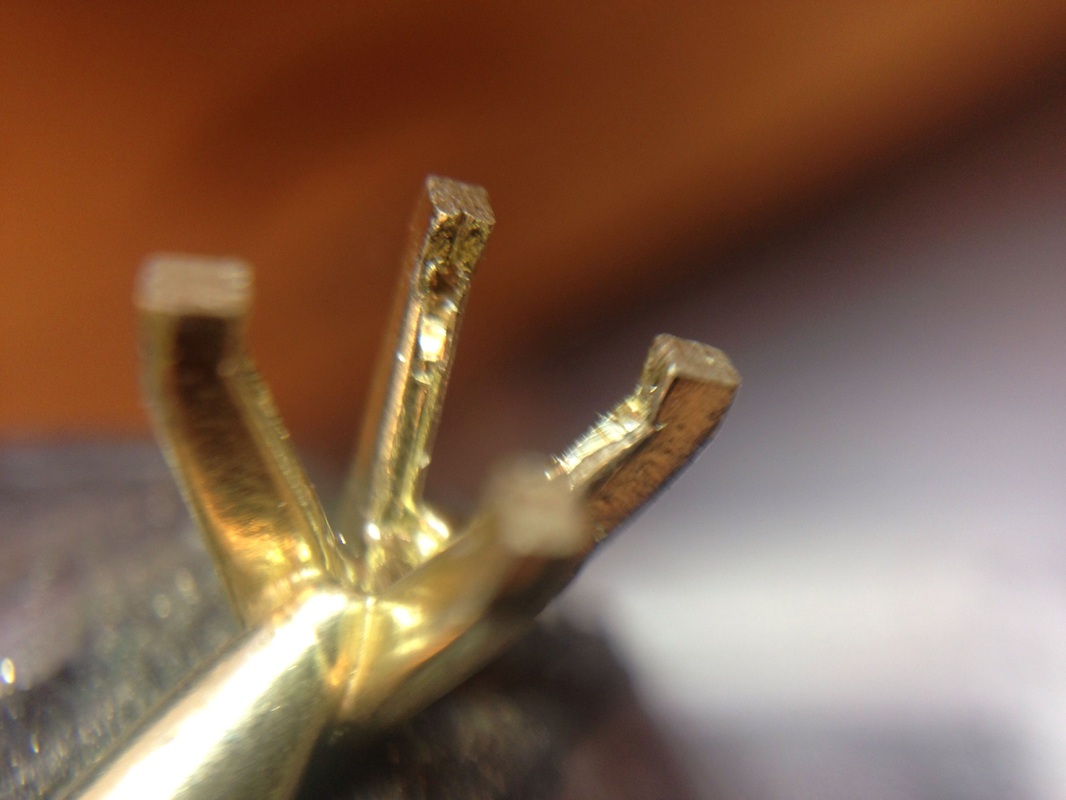
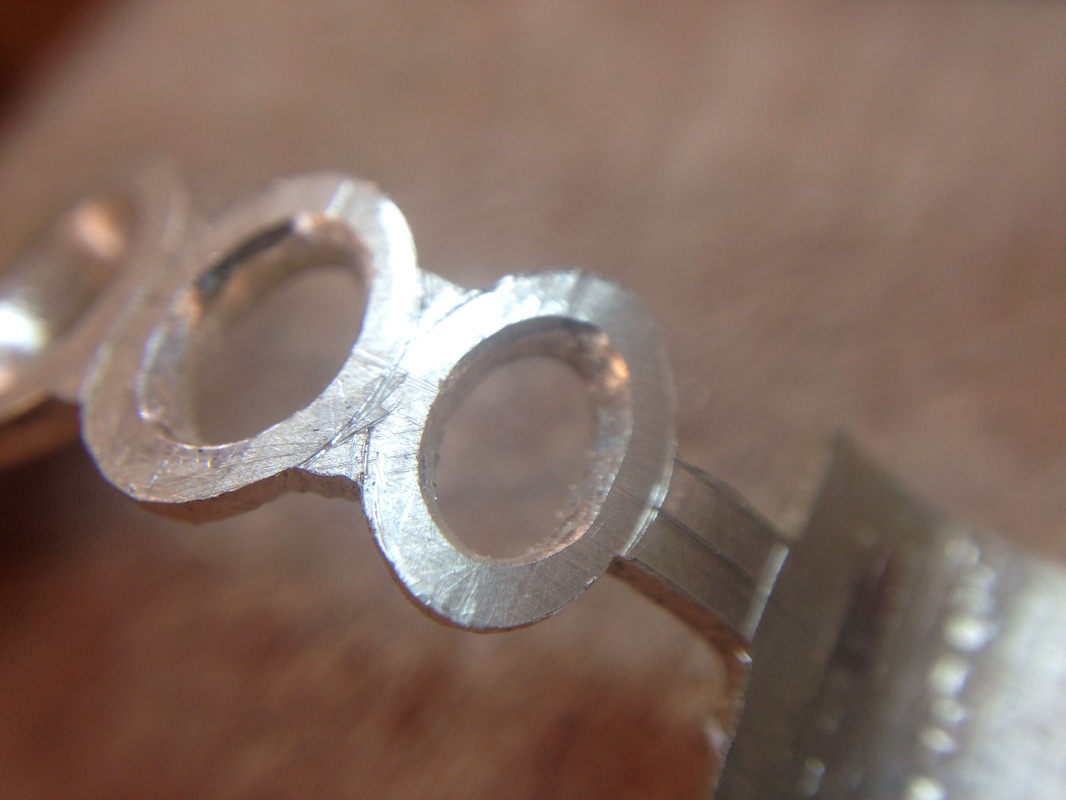
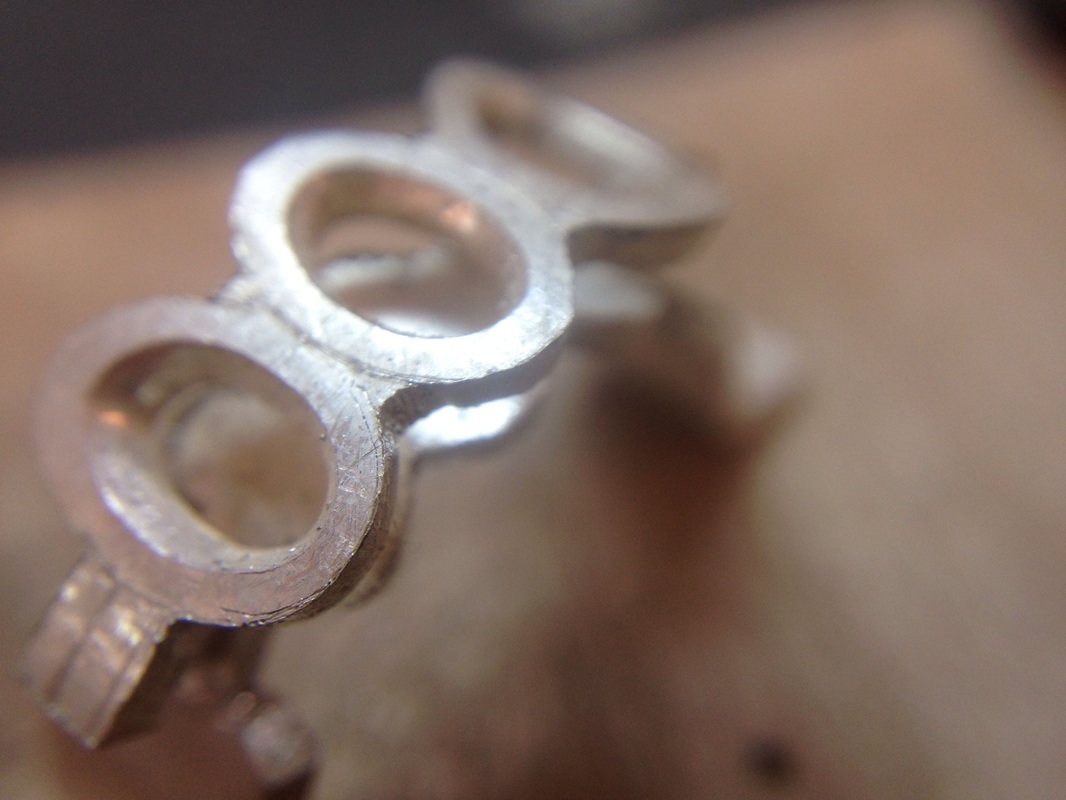
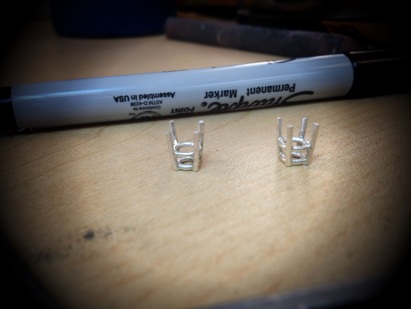
Week 4 Projects- Doesn't look like much but retipped 3 rings and set one solitaire "claw" style along with two basket heads and the start of the three stone ring.

Picture
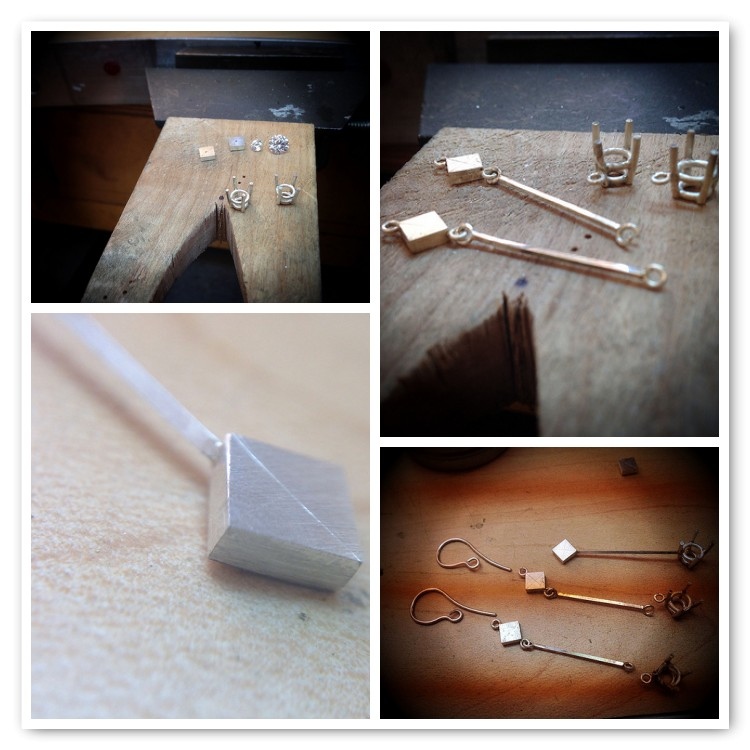
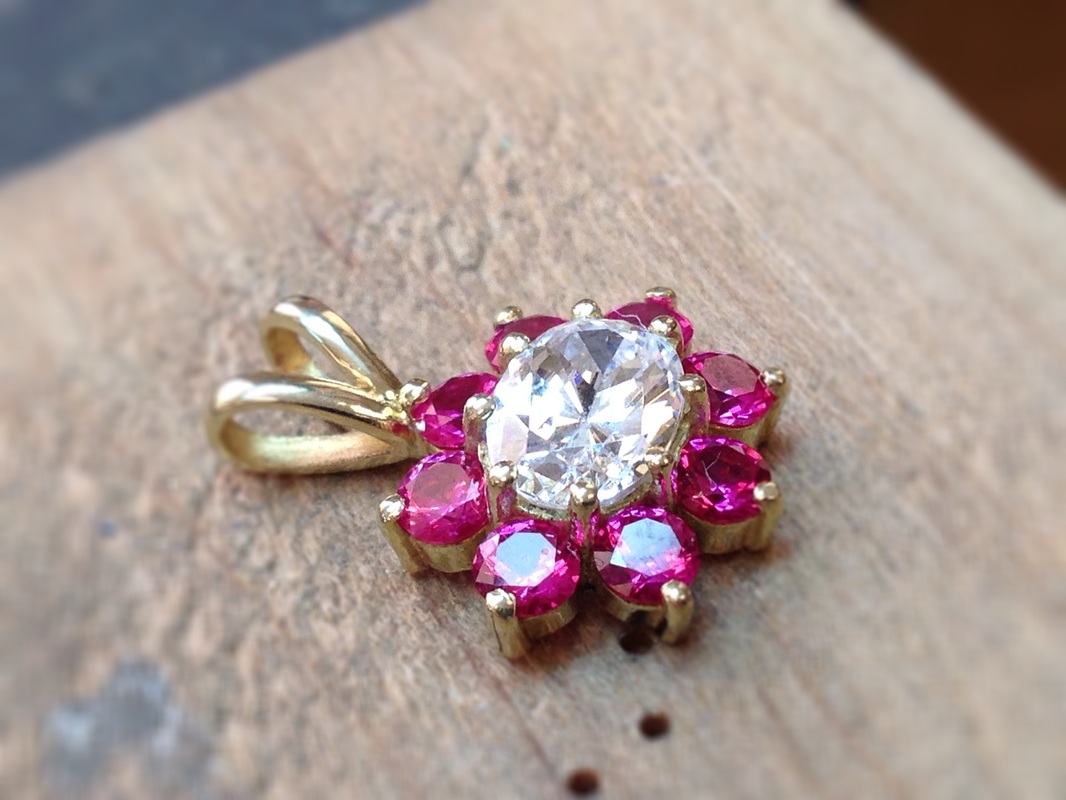
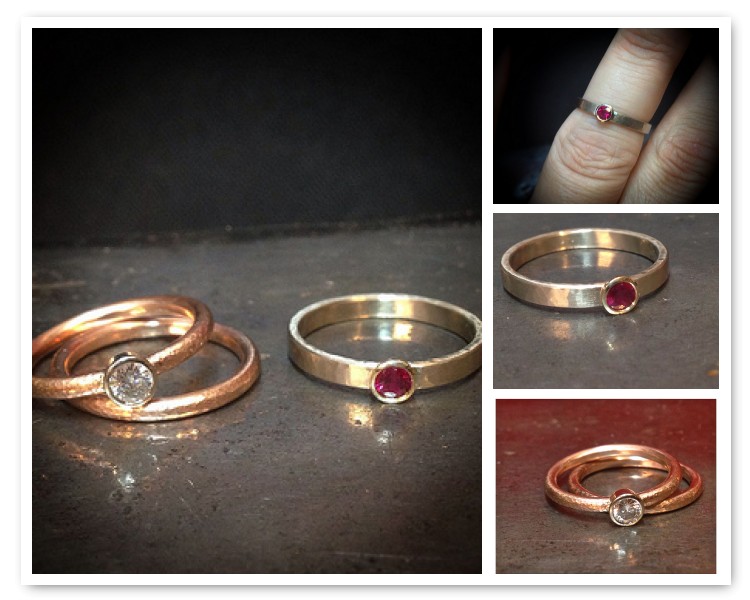
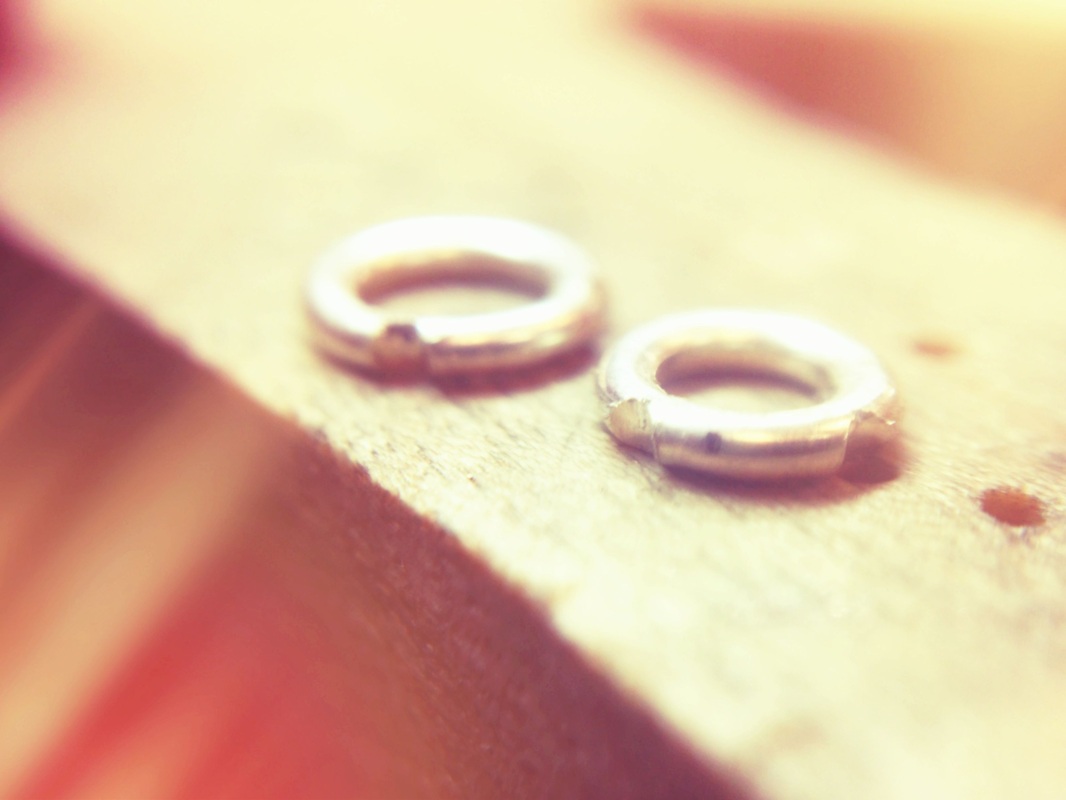
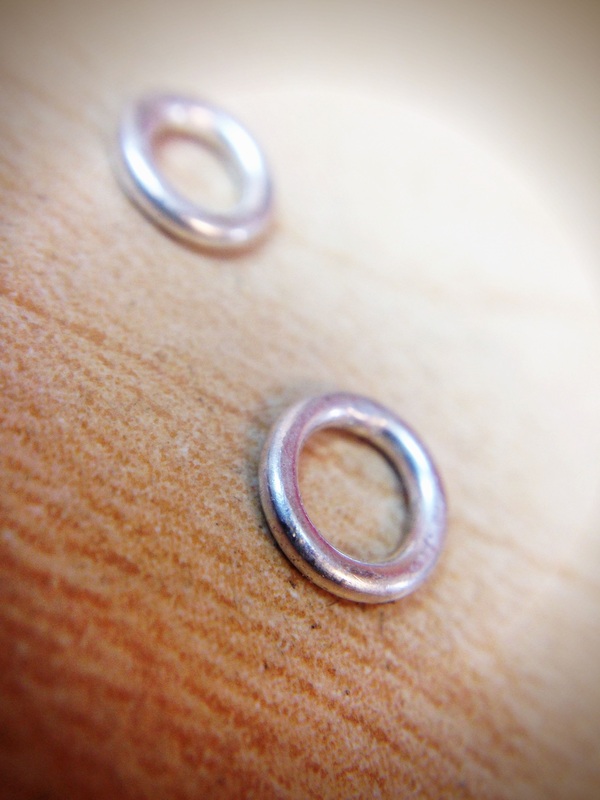
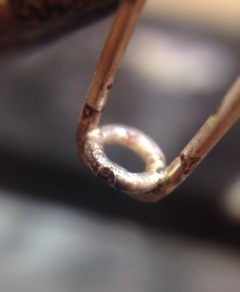
Extra curricular project for the basket heads. Earring and pendant set.
0 Comments
    Picture

    Renee Ford

    Metalsmithing maven and mind behind Renee Ford Metals.  I make the plain look interesting with fire, hammers & cool tools.


    Archives

    February 2024
    May 2017
    May 2016
    February 2016
    May 2015
    November 2013
    October 2013
    September 2013
    February 2012

    Categories

    All
    Booth Design
    Exhibitor Design
    Jewelers Bench School
    Jewelry
    Jewelry Booth
    Jewelry Exhibitor
    Jewelry Making
    New Approach School For Jewelers
    Panicmama Jewelry
    Renee Ford
    Trade Show Booth
    Website Building For Beginners

All jewelry is handmade in Nashville, Tennessee.  I use recycled, responsibly sourced metals + gemstones.  All designs + images are property of
Renee Busdiecker and Renee Ford Metals 2025
  • home
  • shop
  • about
  • custom design
  • contact
  • set-it! instructions
  • hold-it! instructions
  • teaching
  • The Hammer and Anvil
  • the journal