|
We were privileged to be taught by a master engraver for our engraving portion of the 12 week Graduate Bench Jeweler course at New Approach School for Jewelers. Jason Marchifava was a delightful instructor and very inspiring to observe. His career at his age is impressive and extraordinary. It was an honor to learn the basic skill set of engraving from him.
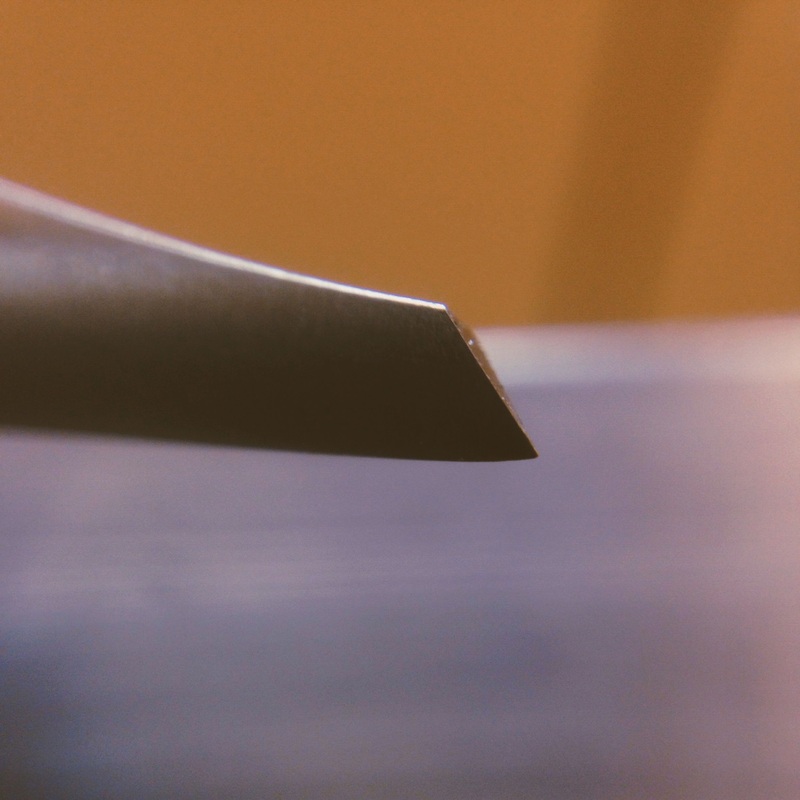
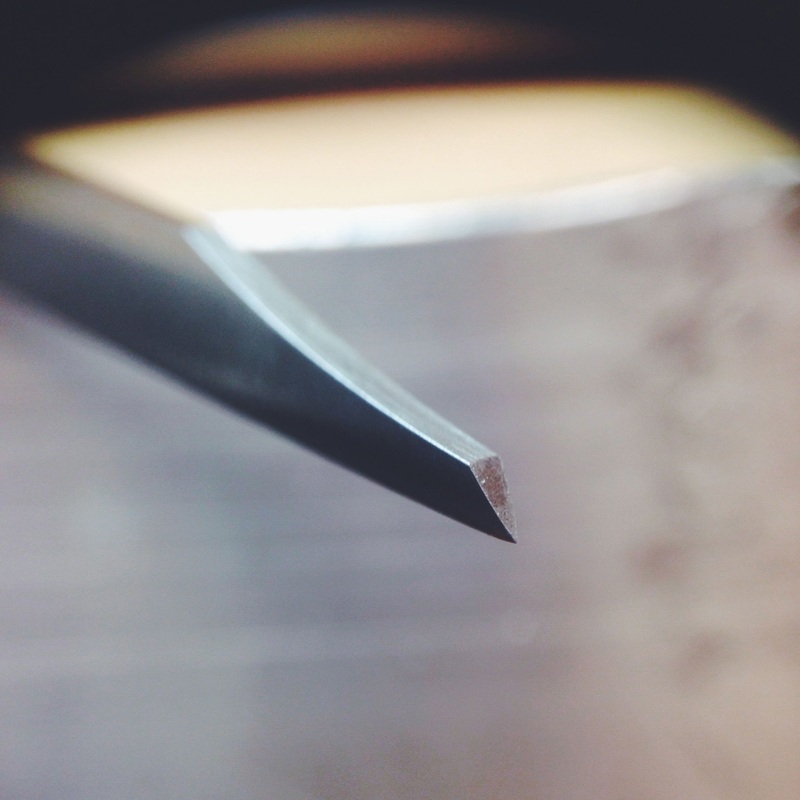
One of the first things we learned about engraving is having proper tools. You don't need a thousand different engraver shapes. You need two. Yes, two. An onglette and a flat graver. They do need to be shaped for engraving. The fine straight lines we use with stone setting do not apply here. You need a very slightly rounded heel at the tip to successfully engrave. Getting this angle correct, straight and even was the hardest part for me all week. It's harder than it looks. Too steep and you slip. Too shallow and you have chatter in your lines. Not even and the graver doesn't make the line you expect. And keeping it sharp. Another dilemma. Such a first world problem, but it drove me nuts. I spent one morning on a "slip n slide" until I finally got my graver properly sharpened and angled.
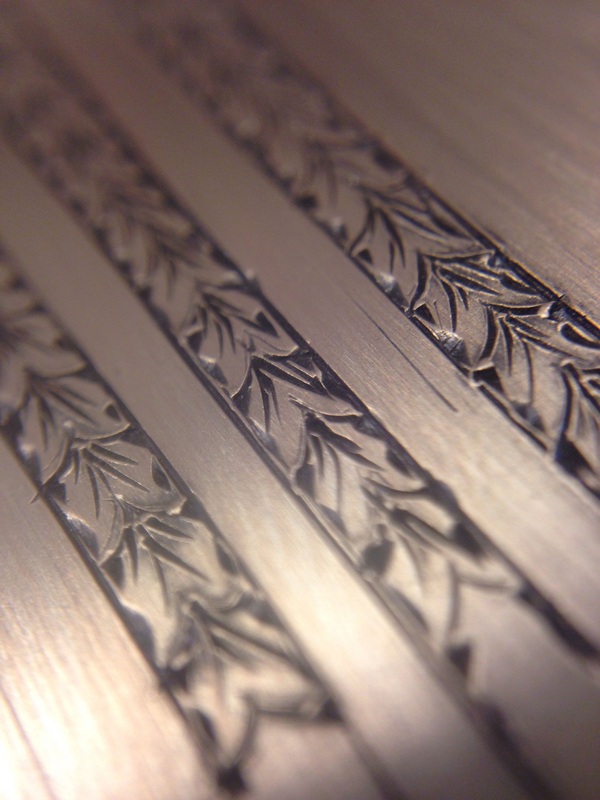
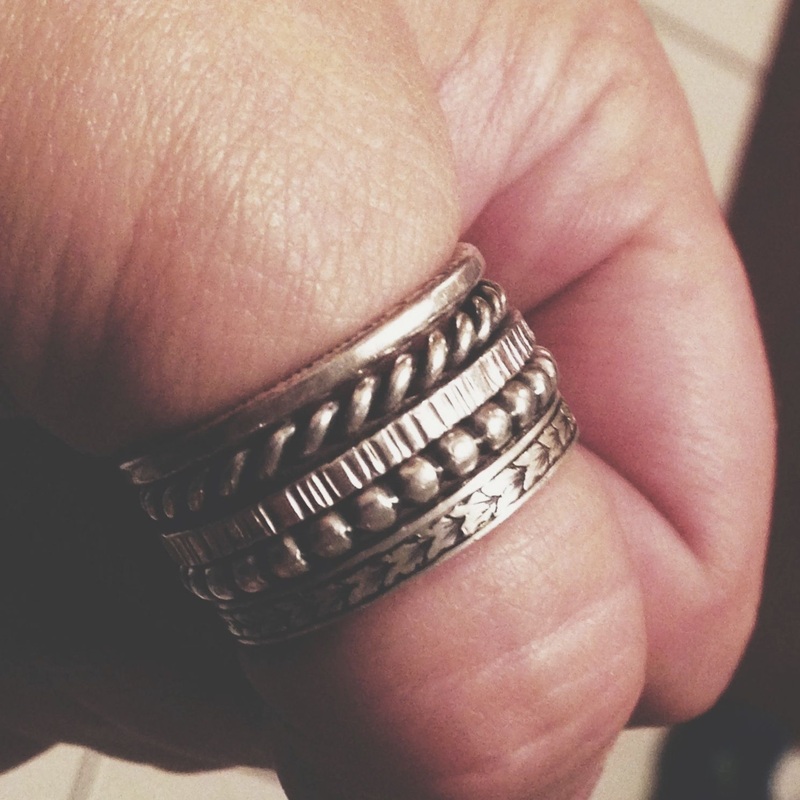
We spent a good amount of time just practicing basic cuts. These cuts then make up patterns. These patterns then become a design. It was satisfying to actually make a pattern. It felt like you got your drivers license and were able to go drive for the first time by yourself. While I accomplished the basic cuts, I still need lots of practice. Lots and lots of practice. Then add a few more years of practice. Luckily, I kinda love it. Ok, ok, I actually am in love with it. It's a skill I hope to utilize in my jewelry making and bring another element of texture. And I do love me some texture on jewelry. Seriously love texture.
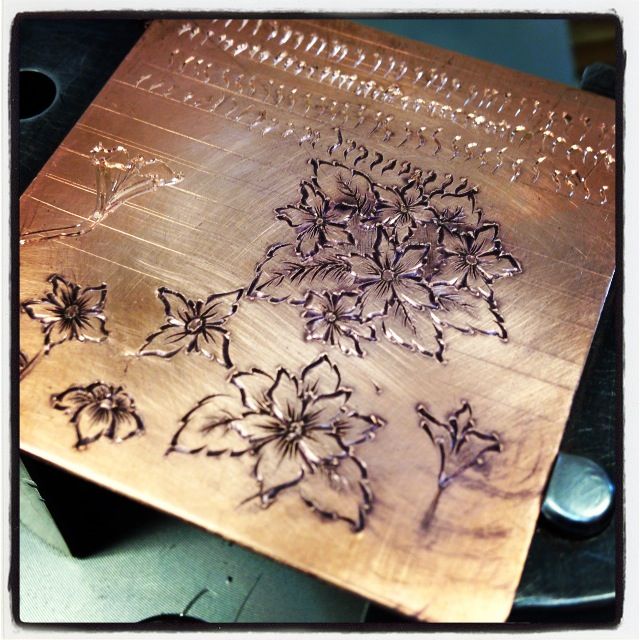
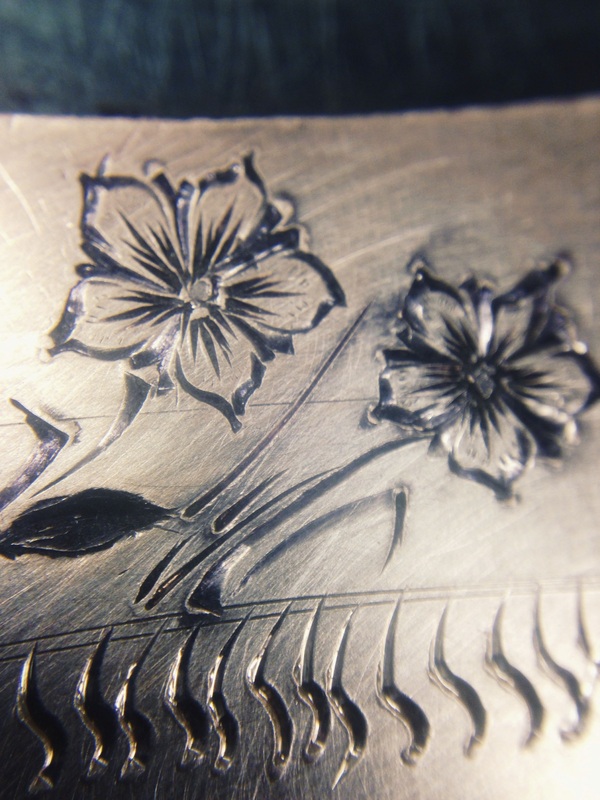
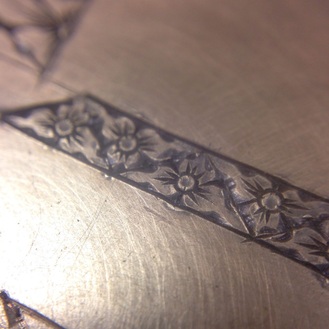
"Fava Flowers" with leaves and practice "S cuts" above.
After flowers came flowers in grid patterns. These were fun too and really eye catching. The pattern grid can be any shape and you just make the flowers fit the space. A nice skill to develop for those spaces that need something to "finish" off the engraving.
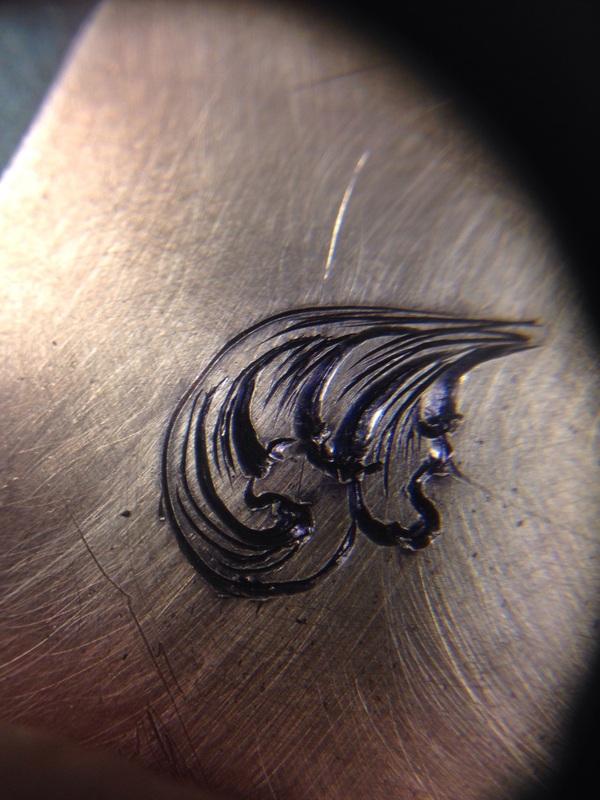
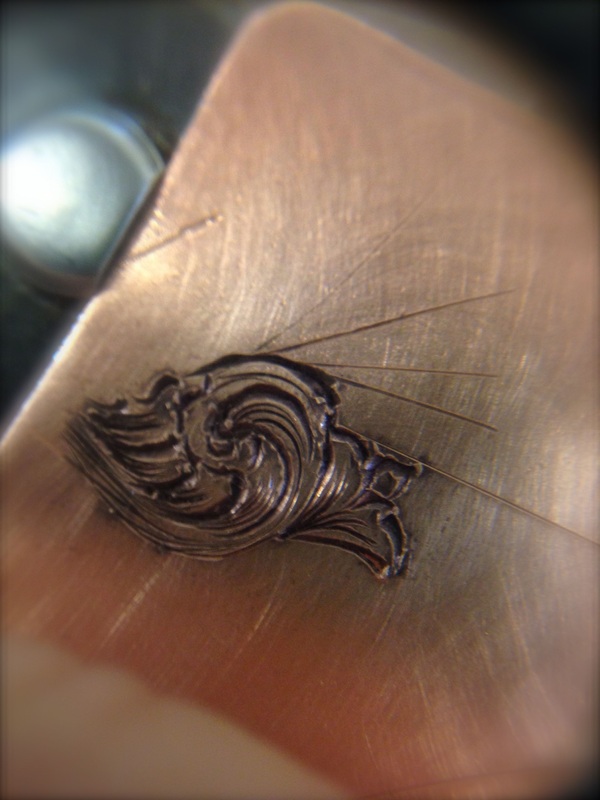
So the week is rolling along and I feel I am getting the hang of things. Even enjoying my self, putting flowers on all my test plates...and then came scrolls. Scrolls are hard. REALLY hard. First is deciphering the "code" of a scroll. Then to actually accomplish a scroll cut without "slipage." Then figuring out how to shade the scroll. It's complicated. It's frustrating, but the result can be beautiful. See >>>> http://jfava.com Lordy. I have a lot of practicing to do.
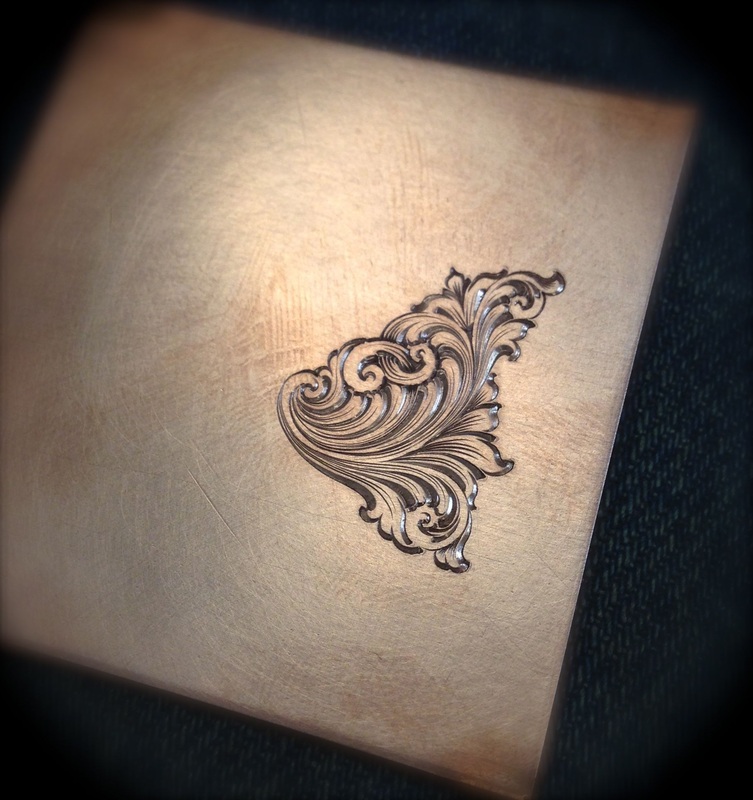
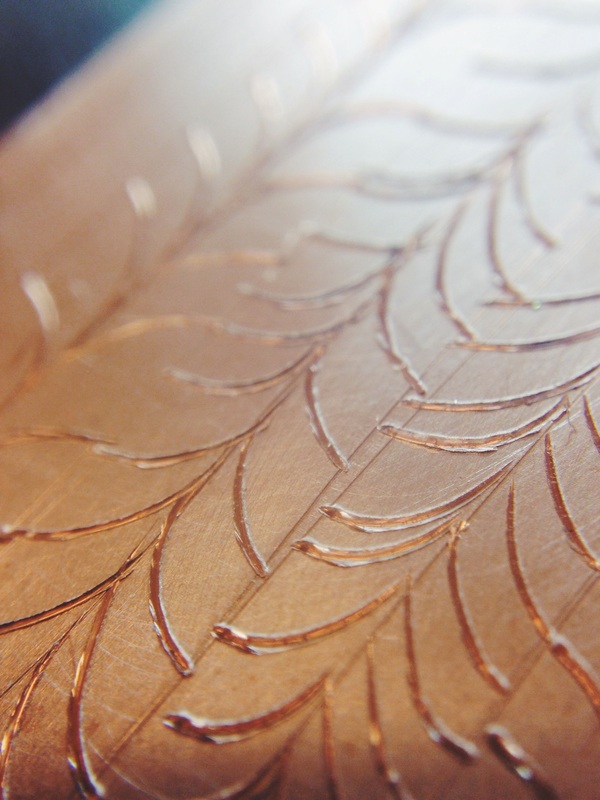
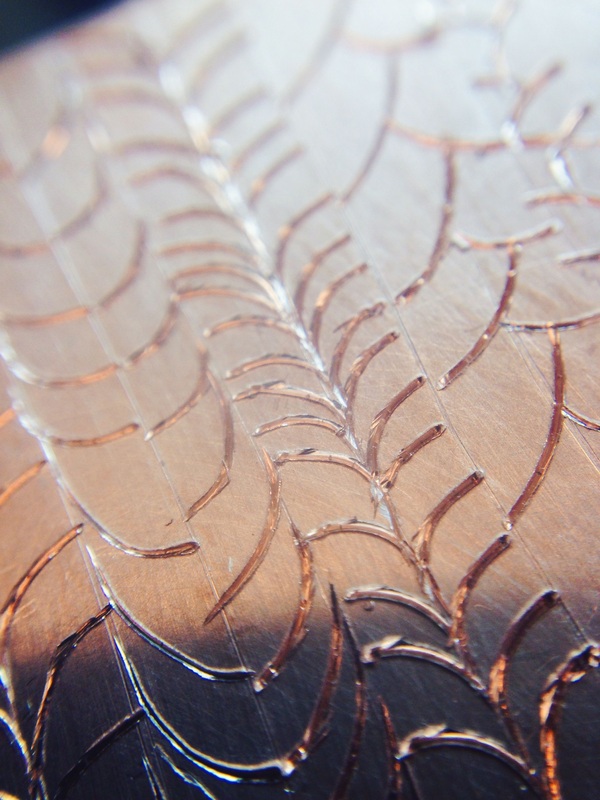
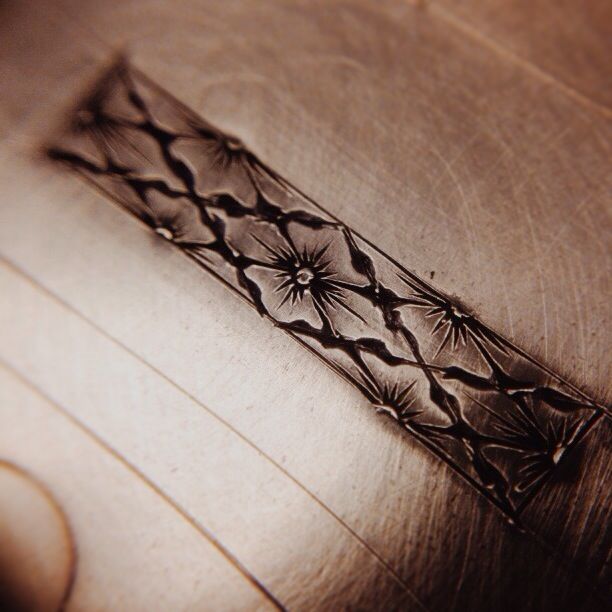
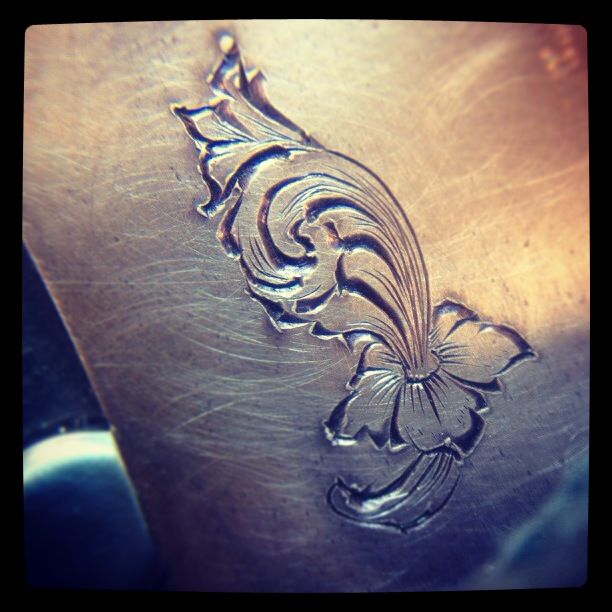
Example of the master engraver, Jason Machiafava, demo plate from class. Awesomeness. Beauty and perfection.
I ended the week by trying to do a leaf pattern on a silver ring. It was quite the challenge as you constantly slip when you are trying to engrave on a curved surface. I will continue to practice as soon as I get my engraving ball and microscope. I want to spring for a Lecia microscope, but not sure it is in the cards. Oh the tools. I am beginning to sort through the neglected tools I already own and see if someone else out there can use them. Our last three weeks are here! I am getting excited to put my skills to work. All of my super patient (and loyal!) clients that have been waiting for projects to get finished (or even started!) are the first priority to testing out the new skills! Thank you for hanging in there dear readers, peers, friends, family and clients through out my adventure.
7 Comments
Much needed fun time at Franklin's Annual Pumpkin Fest!
We've turned the 8 week corner and are quickly approaching the end of the road. It is amazing what we have learned. It's amazing to see the progress of everyone in the class. It is magical. There was a time in my life when I never thought I could pavé set, bead set, hand build a basket setting...Well, I can. I truly appreciate the teaching method that Blaine uses at New Approach School for Jewelers. I never found a book, video or school out there that can teach like Blaine is able to do in this program. You will learn, improve, refine, advance, push, excel in an extremely short amount of time. It's been an amazing experience and I am anxious to put my skills to work.
With a little free time in the clasp/hinge instruction, I finally finished my bead set-hand fabricated basket head earring side project. I had fun doing these and hope to have them for sale in my Etsy shop for the holidays! 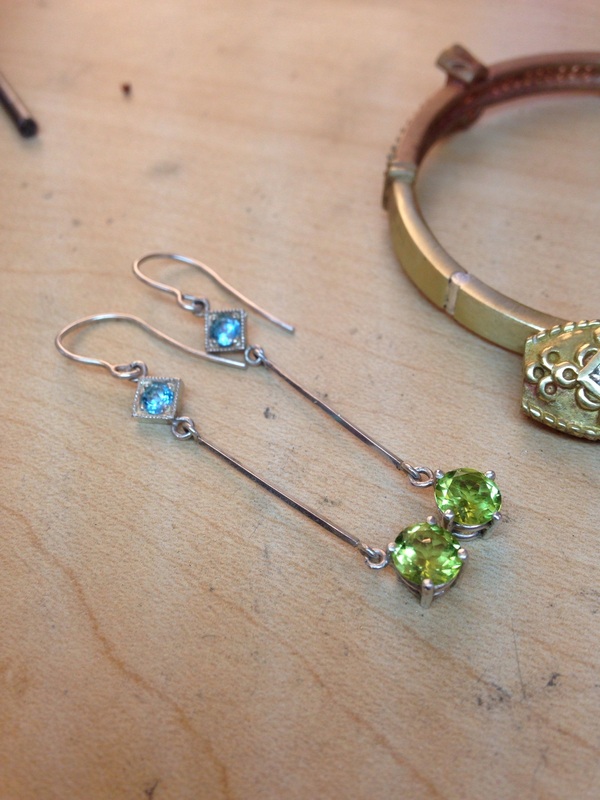
New Earrings!! Blue Topaz bead set at top with Peridot rounds in hand fabricated basket settings.
|
Renee FordMetalsmithing maven and mind behind Renee Ford Metals. I make the plain look interesting with fire, hammers & cool tools. Archives
February 2024
Categories
All
|